C++实现截图截屏的示例代码
更新时间:2021年12月6日 13:21 点击:1083 作者:爱看书的小沐
1、截图工具
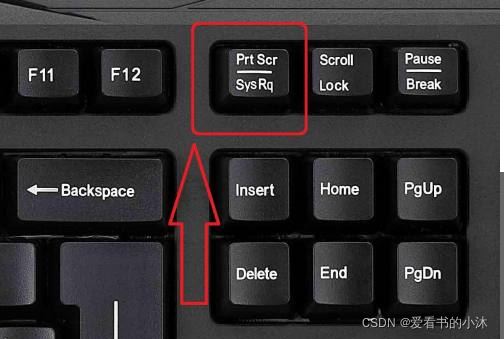
1.1 键盘截图(PrtScn键)
如何使用Microsoft Windows操作系统中的Print Screen(打印屏幕)键
(1)Print Screen键
按下之后,截取整个屏幕的画面到剪切板里。可以复制到其他软件里,比如系统的画图工具,Office Word等。
(2)Alt+Print Screen组合键
按下之后,截取当前活动窗口的画面到剪切板里。
1.2 win10自带截图(Win+Shift+S)

按下该组合键之后,使用鼠标在屏幕上画出想要截取的矩形区域,自动保存到系统剪切板里。
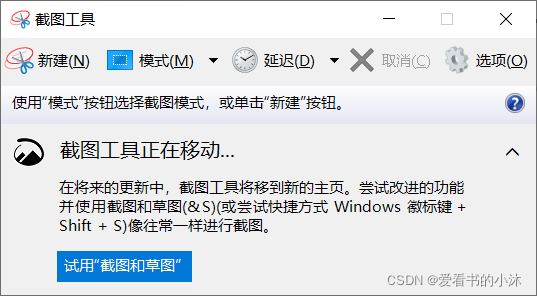
1.3 系统自带的截图小工具
1.4 ffmpeg
ffmpeg -i “输入视频” -fflags nobuffer -t 60 -ss 0 “输出地址”
说明:代表截取输入视频从0秒到60秒的片段,保存到输出地址。
-ss n : 起始时间为第n秒
-t n : 总共截取的片段时长为n秒
运行后会生成截图: out1.jpg out2.jpg out3.jpg …
ffmpeg -i fight.mp4 -r 1 -t 200 -ss 1 -f image2 out%d.jpg
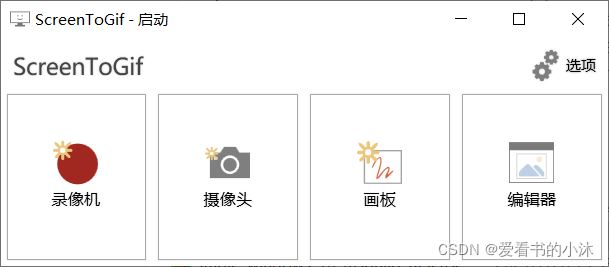
1.5 ScreenToGif
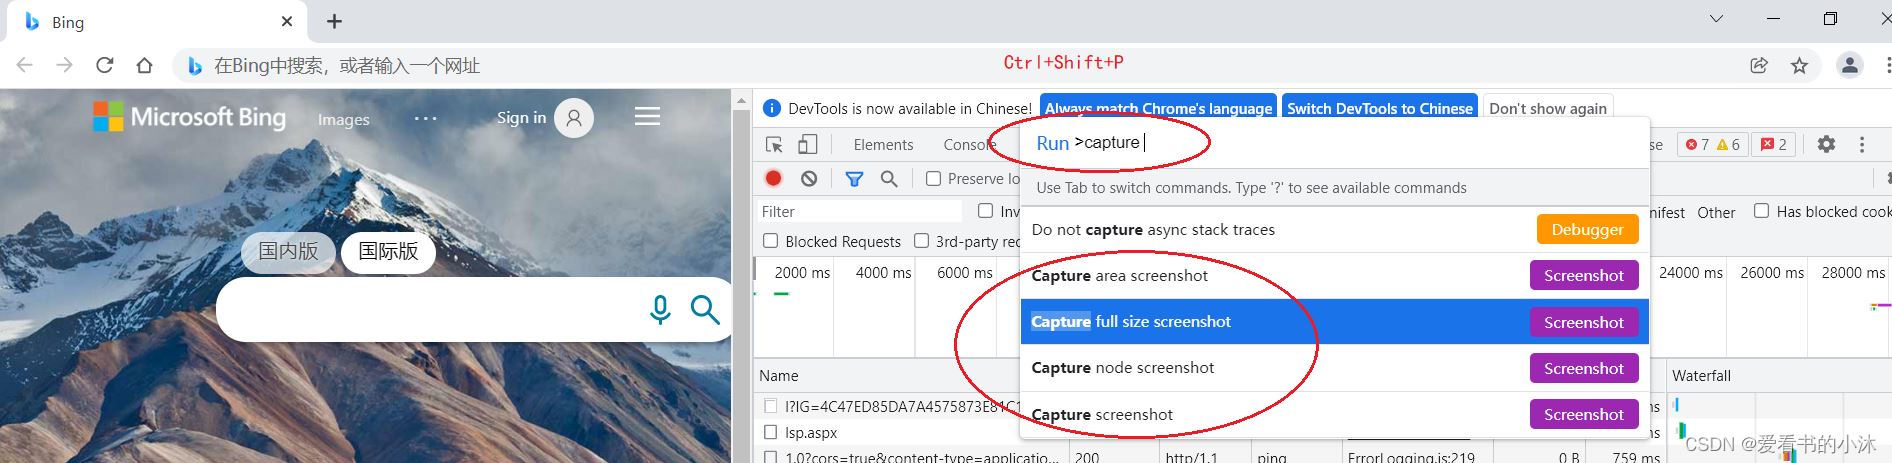
1.6 Chrome
2、C++、GDI
2.1 微软官方例子
https://docs.microsoft.com/en-us/windows/win32/gdi/capturing-an-image
int CaptureAnImage(HWND hWnd)
{
    HDC hdcScreen;
    HDC hdcWindow;
    HDC hdcMemDC = NULL;
    HBITMAP hbmScreen = NULL;
    BITMAP bmpScreen;
    DWORD dwBytesWritten = 0;
    DWORD dwSizeofDIB = 0;
    HANDLE hFile = NULL;
    char* lpbitmap = NULL;
    HANDLE hDIB = NULL;
    DWORD dwBmpSize = 0;

    // Retrieve the handle to a display device context for the client
    // area of the window.
    hdcScreen = GetDC(NULL);
    hdcWindow = GetDC(hWnd);

    // Create a compatible DC, which is used in a BitBlt from the window DC.
    hdcMemDC = CreateCompatibleDC(hdcWindow);

    if (!hdcMemDC)
    {
        MessageBox(hWnd, L"CreateCompatibleDC has failed", L"Failed", MB_OK);
        goto done;
    }

    // Get the client area for size calculation.
    RECT rcClient;
    GetClientRect(hWnd, &rcClient);

    // This is the best stretch mode.
    SetStretchBltMode(hdcWindow, HALFTONE);

    // The source DC is the entire screen, and the destination DC is the current window (HWND).
    if (!StretchBlt(hdcWindow,
        0, 0,
        rcClient.right, rcClient.bottom,
        hdcScreen,
        0, 0,
        GetSystemMetrics(SM_CXSCREEN),
        GetSystemMetrics(SM_CYSCREEN),
        SRCCOPY))
    {
        MessageBox(hWnd, L"StretchBlt has failed", L"Failed", MB_OK);
        goto done;
    }

    // Create a compatible bitmap from the Window DC.
    hbmScreen = CreateCompatibleBitmap(hdcWindow, rcClient.right - rcClient.left, rcClient.bottom - rcClient.top);

    if (!hbmScreen)
    {
        MessageBox(hWnd, L"CreateCompatibleBitmap Failed", L"Failed", MB_OK);
        goto done;
    }

    // Select the compatible bitmap into the compatible memory DC.
    SelectObject(hdcMemDC, hbmScreen);

    // Bit block transfer into our compatible memory DC.
    if (!BitBlt(hdcMemDC,
        0, 0,
        rcClient.right - rcClient.left, rcClient.bottom - rcClient.top,
        hdcWindow,
        0, 0,
        SRCCOPY))
    {
        MessageBox(hWnd, L"BitBlt has failed", L"Failed", MB_OK);
        goto done;
    }

    // Get the BITMAP from the HBITMAP.
    GetObject(hbmScreen, sizeof(BITMAP), &bmpScreen);

    BITMAPFILEHEADER   bmfHeader;
    BITMAPINFOHEADER   bi;

    bi.biSize = sizeof(BITMAPINFOHEADER);
    bi.biWidth = bmpScreen.bmWidth;
    bi.biHeight = bmpScreen.bmHeight;
    bi.biPlanes = 1;
    bi.biBitCount = 32;
    bi.biCompression = BI_RGB;
    bi.biSizeImage = 0;
    bi.biXPelsPerMeter = 0;
    bi.biYPelsPerMeter = 0;
    bi.biClrUsed = 0;
    bi.biClrImportant = 0;

    dwBmpSize = ((bmpScreen.bmWidth * bi.biBitCount + 31) / 32) * 4 * bmpScreen.bmHeight;

    // Starting with 32-bit Windows, GlobalAlloc and LocalAlloc are implemented as wrapper functions that
    // call HeapAlloc using a handle to the process's default heap. Therefore, GlobalAlloc and LocalAlloc
    // have greater overhead than HeapAlloc.
    hDIB = GlobalAlloc(GHND, dwBmpSize);
    lpbitmap = (char*)GlobalLock(hDIB);

    // Gets the "bits" from the bitmap, and copies them into a buffer
    // that's pointed to by lpbitmap.
    GetDIBits(hdcWindow, hbmScreen, 0,
        (UINT)bmpScreen.bmHeight,
        lpbitmap,
        (BITMAPINFO*)&bi, DIB_RGB_COLORS);

    // A file is created, this is where we will save the screen capture.
    hFile = CreateFile(L"captureqwsx.bmp",
        GENERIC_WRITE,
        0,
        NULL,
        CREATE_ALWAYS,
        FILE_ATTRIBUTE_NORMAL, NULL);

    // Add the size of the headers to the size of the bitmap to get the total file size.
    dwSizeofDIB = dwBmpSize + sizeof(BITMAPFILEHEADER) + sizeof(BITMAPINFOHEADER);

    // Offset to where the actual bitmap bits start.
    bmfHeader.bfOffBits = (DWORD)sizeof(BITMAPFILEHEADER) + (DWORD)sizeof(BITMAPINFOHEADER);

    // Size of the file.
    bmfHeader.bfSize = dwSizeofDIB;

    // bfType must always be BM for Bitmaps.
    bmfHeader.bfType = 0x4D42; // BM.

    WriteFile(hFile, (LPSTR)&bmfHeader, sizeof(BITMAPFILEHEADER), &dwBytesWritten, NULL);
    WriteFile(hFile, (LPSTR)&bi, sizeof(BITMAPINFOHEADER), &dwBytesWritten, NULL);
    WriteFile(hFile, (LPSTR)lpbitmap, dwBmpSize, &dwBytesWritten, NULL);

    // Unlock and Free the DIB from the heap.
    GlobalUnlock(hDIB);
    GlobalFree(hDIB);

    // Close the handle for the file that was created.
    CloseHandle(hFile);

    // Clean up.
done:
    DeleteObject(hbmScreen);
    DeleteObject(hdcMemDC);
    ReleaseDC(NULL, hdcScreen);
    ReleaseDC(hWnd, hdcWindow);

    return 0;
}
2.2 C++、GDI、CImage
HDC hdcSrc = GetDC(NULL);
int nBitPerPixel = GetDeviceCaps(hdcSrc, BITSPIXEL);
int nWidth = GetDeviceCaps(hdcSrc, HORZRES);
int nHeight = GetDeviceCaps(hdcSrc, VERTRES);
CImage image;
image.Create(nWidth, nHeight, nBitPerPixel);
BitBlt(image.GetDC(), 0, 0, nWidth, nHeight, hdcSrc, 0, 0, SRCCOPY);
ReleaseDC(NULL, hdcSrc);
image.ReleaseDC();
image.Save(s, Gdiplus::ImageFormatPNG);
3、C++、OpenGL
void CaptureOpenGLWindow(const char* savePath, int w, int h)
{
	GLubyte* pPixelData;
	GLint    PixelDataLength;

	// 分配内存和打开文件
	pPixelData = (GLubyte*)malloc(w*h*3);
	if (pPixelData == 0)
		return;

	glPixelStorei(GL_UNPACK_ALIGNMENT, 4);
	glReadPixels(0, 0, w, h, GL_RGB, GL_UNSIGNED_BYTE, pPixelData);
	stbi_write_png(savePath, w, h, 3, pPixelData, 0);
	free(pPixelData);

	int iw = w, ih = h, n = 3;
	stbi_set_flip_vertically_on_load(true);
	unsigned char *idata = stbi_load(savePath, &iw, &ih, &n, 0);
	stbi_write_png(savePath, w, h, 3, idata, 0);
	stbi_image_free(idata);

}
4、C++、OpenCV
BITMAPINFOHEADER createBitmapHeader(int width, int height)
{
   BITMAPINFOHEADER  bi;

     // create a bitmap
     bi.biSize = sizeof(BITMAPINFOHEADER);
     bi.biWidth = width;
     bi.biHeight = -height;  //this is the line that makes it draw upside down or not
     bi.biPlanes = 1;
     bi.biBitCount = 32;
     bi.biCompression = BI_RGB;
     bi.biSizeImage = 0;
     bi.biXPelsPerMeter = 0;
     bi.biYPelsPerMeter = 0;
     bi.biClrUsed = 0;
     bi.biClrImportant = 0;

     return bi;
}

Mat captureScreenMat(HWND hwnd)
{
     Mat src;

     // get handles to a device context (DC)
     HDC hwindowDC = GetDC(hwnd);
     HDC hwindowCompatibleDC = CreateCompatibleDC(hwindowDC);
     SetStretchBltMode(hwindowCompatibleDC, COLORONCOLOR);

     // define scale, height and width
     int screenx = GetSystemMetrics(SM_XVIRTUALSCREEN);
     int screeny = GetSystemMetrics(SM_YVIRTUALSCREEN);
     int width = GetSystemMetrics(SM_CXVIRTUALSCREEN);
     int height = GetSystemMetrics(SM_CYVIRTUALSCREEN);

     // create mat object
     src.create(height, width, CV_8UC4);

     // create a bitmap
     HBITMAP hbwindow = CreateCompatibleBitmap(hwindowDC, width, height);
     BITMAPINFOHEADER bi = createBitmapHeader(width, height);

     // use the previously created device context with the bitmap
     SelectObject(hwindowCompatibleDC, hbwindow);

     // copy from the window device context to the bitmap device context
     StretchBlt(hwindowCompatibleDC, 0, 0, width, height, hwindowDC, screenx, screeny, width, height, SRCCOPY);  //change SRCCOPY to NOTSRCCOPY for wacky colors !
     GetDIBits(hwindowCompatibleDC, hbwindow, 0, height, src.data, (BITMAPINFO*)&bi, DIB_RGB_COLORS);            //copy from hwindowCompatibleDC to hbwindow

     // avoid memory leak
     DeleteObject(hbwindow);
     DeleteDC(hwindowCompatibleDC);
     ReleaseDC(hwnd, hwindowDC);

     return src;
 }
 int main()
{
      // capture image
      HWND hwnd = GetDesktopWindow();
      Mat src = captureScreenMat(hwnd);

      // save img
      cv::imwrite("Screenshot.png", src);

  	  // clean-ups
      buf.clear();
      return 0;
}
5、C++、QT
QDesktopWidget *desk = QApplication::desktop();
QScreen * screen = QGuiApplication::primaryScreen();
QPixmap p = screen->grabWindow(desk->winId());
QImage image = p.toImage();
到此这篇关于C++实现截图截屏的示例代码的文章就介绍到这了,更多相关C++ 截图截屏内容请搜索猪先飞以前的文章或继续浏览下面的相关文章希望大家以后多多支持猪先飞!
原文出处:https://blog.csdn.net/hhy321/article/details/121548612
上一篇: VC中控制台程序创建窗口的实例方法
相关文章
- vector是表示可以改变大小的数组的序列容器,本文主要介绍了C++STL标准库std::vector的使用详解,文中通过示例代码介绍的非常详细,具有一定的参考价值,感兴趣的小伙伴们可以参考一下...2022-03-06
- 这篇文章主要介绍了C++中取余运算的实现,文中通过示例代码介绍的非常详细,对大家的学习或者工作具有一定的参考学习价值,需要的朋友们下面随着小编来一起学习学习吧...2021-02-23
- 这篇文章主要介绍了C++ string常用截取字符串方法,文中通过示例代码介绍的非常详细,对大家的学习或者工作具有一定的参考学习价值,需要的朋友们下面随着小编来一起学习学习吧...2020-04-25
- 本文通过例子,讲述了C++调用C#的DLL程序的方法,作出了以下总结,下面就让我们一起来学习吧。...2020-06-25
- 本篇文章主要介绍了C++中四种加密算法之AES源代码,小编觉得挺不错的,现在分享给大家,也给大家做个参考。...2020-04-25
- 整数拆分,指把一个整数分解成若干个整数的和。本文重点给大家介绍C++ 整数拆分方法详解,非常不错,感兴趣的朋友一起学习吧...2020-04-25
- 这篇文章主要介绍了C++中Sort函数详细解析,sort函数是algorithm库下的一个函数,sort函数是不稳定的,即大小相同的元素在排序后相对顺序可能发生改变...2022-08-18
- 这篇文章主要介绍了C++万能库头文件在vs中的安装步骤(图文),文中通过示例代码介绍的非常详细,对大家的学习或者工作具有一定的参考学习价值,需要的朋友们下面随着小编来一起学习学习吧...2021-02-23
- 这篇文章主要介绍了C++ bitset用法,文中通过示例代码介绍的非常详细,对大家的学习或者工作具有一定的参考学习价值,需要的朋友们下面随着小编来一起学习学习吧...2020-04-25
- 本篇文章小编并不是为大家讲解string类型的用法,而是讲解我个人比较好奇的问题,就是string 类型占几个字节...2020-04-25
- 这篇文章主要为大家详细介绍了C++ Eigen库计算矩阵特征值及特征向量,具有一定的参考价值,感兴趣的小伙伴们可以参考一下...2020-04-25
- 这篇文章主要介绍了C++ pair的用法实例详解的相关资料,需要的朋友可以参考下...2020-04-25
- 这篇文章主要介绍了VSCode C++多文件编译的简单使用方法,本文给大家介绍的非常详细,对大家的学习或工作具有一定的参考借鉴价值,需要的朋友可以参考下...2021-03-29
- 虽然C++11引入了智能指针的,但是开发人员在与内存的斗争问题上并没有解放,如果我门实用不当仍然有内存泄漏问题,其中智能指针的循环引用缺陷是最大的问题。下面通过实例代码给大家介绍c++中的循环引用,一起看看吧...2020-04-25
- 这篇文章主要给大家介绍了关于C++随机点名生成器的相关资料,文中通过示例代码介绍的非常详细,对大家的学习或者工作具有一定的参考学习价值,需要的朋友们下面随着小编来一起学习学习吧...2020-04-25
- map容器是C++ STL中的重要一员,删除map容器中value为指定元素的问题是我们经常与遇到的一个问题,下面这篇文章主要给大家介绍了关于利用C++如何删除map容器中指定值的元素的相关资料,需要的朋友可以参考借鉴,下面来一起看看吧。...2020-04-25
- 这篇文章主要介绍了C++ 约瑟夫环问题案例详解,本篇文章通过简要的案例,讲解了该项技术的了解与使用,以下就是详细内容,需要的朋友可以参考下...2021-08-15
- 这篇文章主要介绍了C++中cin的用法详细,文中通过示例代码介绍的非常详细,对大家的学习或者工作具有一定的参考学习价值,需要的朋友们下面随着小编来一起学习学习吧...2020-04-25
- 本篇文章是对C++中的常见编译错误进行了详细的分析介绍,需要的朋友参考下...2020-04-25
- 这篇文章主要介绍了c++优先队列(priority_queue)用法详解,文中通过示例代码介绍的非常详细,对大家的学习或者工作具有一定的参考学习价值,需要的朋友们下面随着小编来一起学习学习吧...2020-04-25