Andriod中TextView加载Html标签和加载带图片的标签
一、加载Html代码
String html="<a href=\"http://www.111cn.net \"> 百度</a>;";
textView.setMovementMethod(LinkMovementMethod.getInstance());//允许超链接点击跳转到浏览器
textView.setText(Html.fromHtml(html));
二、加载src标签
1、加载本地图片
String html="<img src=\"file:///system/media/Pre-loaded/Pictures/Picture_01_Greenery.jpg\" />";
textView.setText(Html.fromHtml(html, new Html.ImageGetter() {
@Override
public Drawable getDrawable(String source) {
Drawable drawable = null;
try {
drawable = Drawable.createFromStream(new URL(source).openStream(), null);
drawable.setBounds(0, 0, drawable.getIntrinsicWidth(), drawable.getIntrinsicHeight());
} catch (IOException e) {
e.printStackTrace();
}
return drawable;
}
},null));
注意:file:/别忘了加
Html还有个三参数的fronHtml方法,三个参数分别是:String source(图片资源的路径),ImageGetter imageGetter(实现ImageGetter类的对象),TagHandler tagHandler(暂不知什么用,不过这里设为null就行了)
ImageGetter类是Html类的一个静态接口,有个方法getDrawable,返回值为Drawable,作用是取得图片的Drawable
drawable = Drawable.createFromStream(new URL(source).openStream(), null);
这句代码,有一点要说,不要用网上许多人用的:
drawable= Drawable.createFromPath(source);
可能会报FileNotFound错误。
2、加载网络图片
html代码和之前差不多,把路径换成网络图片的地址就行
比如:
String html="<img src=\"http://img0.bdstatic.com/img/image/shouye/xiaoxiao/%E5%AE%A0%E7%89%A9622.jpg\" />";
但是ImageGetter的getDrawable方法需要变化:
这里使用Piccsso框架加载网络图片,不会的同学可以去百度一下
private class MyImageGetter implements Html.ImageGetter {
private URLDrawable urlDrawable = null;
@Override
public Drawable getDrawable(final String source) {
urlDrawable = new URLDrawable();
Picasso.with(context).load(source).into(new Target() {
@Override
public void onBitmapLoaded(Bitmap bitmap, Picasso.LoadedFrom from) {
urlDrawable.bitmap = bitmap;
urlDrawable.setBounds(0, 0, bitmap.getWidth(), bitmap.getHeight());
textView.setText(textView.getText());//不加这句显示不出来图片,原因不详
}
@Override
public void onBitmapFailed(Drawable errorDrawable) {
}
@Override
public void onPrepareLoad(Drawable placeHolderDrawable) {
}
});
return urlDrawable;
}
}
URLDrawable类:
/**
* Created by Administrator on 2016/6/28 0028.
*/
public class URLDrawable extends BitmapDrawable {
public Bitmap bitmap;
@Override
public void draw(Canvas canvas) {
super.draw(canvas);
if (bitmap != null) {
canvas.drawBitmap(bitmap, 0, 0, getPaint());
}
}
}
调用方法如下:
textView.setText(Html.fromHtml(html, new MyImageGetter(), null));
下面我们一起来看一篇关于Picasso的使用及内存优化的例子,希望这篇教程能够给各位深入理解到Picasso的使用及内存优化方法哦。一、Picasso介绍
picasso是Square公司开源的一个Android第三方图形缓存库,地址http://square.github.io/picasso/,可以实现图片下载和缓存功能。
二、Picasso基本用法
Picasso.with(mContext).load(imageUrl).into(imageView);
代码很简洁。这一行代码解决了一下问题:
1.自动将图像缓存在本地
2.通过图片压缩转换以减少内存消耗
3.自动处理了ImageView的回收,即自动取消不在视野范围内的ImageView视图资源的加载
三、Picasso其他用法
1)在Adapter中使用
@Override
public void getView(int position, View convertView, ViewGroup parent) {
SquaredImageView view = (SquaredImageView) convertView;
if (view == null) {
view = new SquaredImageView(mContext);
}
String url = getItem(position);
Picasso.with(mContext).load(url).into(view);
}
2)图片转换
1
Picasso.with(mContext).load(imageUrl).resize(200,200).centerCrop().into(imageView);
还可以自定义转换:
Transformation transformation = new Transformation() {
@Override
public Bitmap transform(Bitmap source) {
int targetWidth = getWidth();
double aspectRatio = (double) source.getHeight() / (double) source.getWidth();
int targetHeight = (int) (targetWidth * aspectRatio);
Bitmap result = Bitmap.createScaledBitmap(source, targetWidth, targetHeight, false);
if (result != source) {
//如果大小是相同的,相同的位图就会被返回
source.recycle();
}
return result;
}
@Override
public String key() {
return "transformation" + " desiredWidth";
}
};
定义好Transformation后,在Picasso设置transform
Picasso.with(mContext).load(imageUrl).transform(transformation).into(viewHolder.mImageView);
或者通过实现Transformation接口自定义
public class CropSquareTransformation implements Transformation {
@Override
public Bitmap transform(Bitmap source) {
int size = Math.min(source.getWidth(), source.getHeight());
int x = (source.getWidth() - size) / 2;
int y = (source.getHeight() - size) / 2;
Bitmap result = Bitmap.createBitmap(source, x, y, size, size);
if (result != source) {
source.recycle();
}
return result;
}
@Override
public String key() {
return "square()";
}
}
然后将CropSquareTransformation的对象传递给transform方法即可。
3)图片未正常显示时默认的图片,通过placeholder()设置;图片显示错误时显示的默认图片,通过error()设置
Picasso.with(mContext)
.load(url)
.placeholder(R.mipmap.icon_loading)
.error(R.mipmap.icon_loading)
.into(imageView);
4)加载Resources, assets, files, content providers中的资源文件
Picasso.with(mContext).load(R.mipmap.icon).into(imageView);
Picasso.wiht(mContext).load(new File(...)).into(imageView);
四、内存优化
1)查看大图放弃memory cache
Picasso默认会使用设备的15%的内存作为内存图片缓存,且现有的api无法清空内存缓存。我们可以在查看大图时放弃使用内存缓存,图片从网络下载完成后会缓存到磁盘中,加载会从磁盘中加载,这样可以加速内存的回收。
Picasso.with(mContext)
.load(imageUrl)
.memoryPolicy(NO_CACHE, NO_STORE)
.into(imageView);
其中memoryPolicy的NO_CACHE是指图片加载时放弃在内存缓存中查找,NO_STORE是指图片加载完不缓存在内存中。
2)列表页滑动优化
picasso可以对多个加载请求设置相同的tag,即
Object tag = new Object();
Picasso.with(mContext)
.load(url)
.resize(200,200)
.centerCrop()
.tag(tag)
.into(imageView);
例如在RecyclerView滑动时监听,处理不同的表现:
mRecyclerView.addOnScrollListener(new RecyclerView.OnScrollListener(){
@Override
public void onScrollStateChanged(RecyclerView recyclerView, int newState){
if (newState == RecyclerView.SCROLL_STATE_IDLE){
Picasso.with(mContext).resumeTag(tag);
}else{
Picasso.with(mContext).pauseTag(tag);
}
});
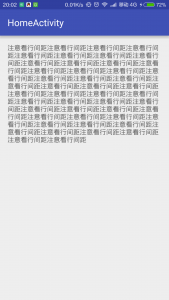
一段文字,如果行间距很小的话看着就会很不舒服,我们在使用word文档的时候行间距是可以自己调整的,那么在Android开发的过程中如果一大段很长的文字如何设置行间距呢,很简单只需要一行代码:
android:lineSpacingExtra="3dp"
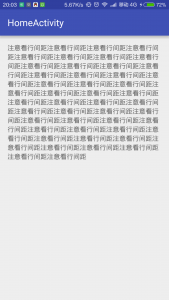
分享三张效果图:
第一张,没有设置行间距的,使用系统默认的效果:
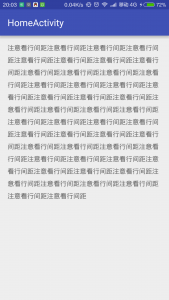
第三张,设置为10dp的效果,更明显:
在使用QQ的过程中我们会发现一个很短的界面也是可以上下拖动的,这就是带有阻尼效果功能实现,要实现这样的功能呢,系统的ScrollView是没法实现的,必须要自定义继承于ScrollView的控件,先来看下效果图。
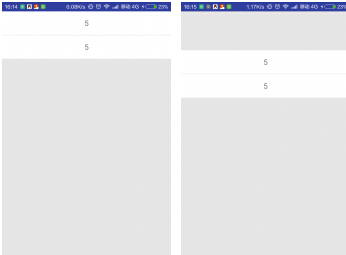
先来看看布局:
<?xml version="1.0" encoding="utf-8"?>
<LinearLayout xmlns:android="http://schemas.android.com/apk/res/android"
android:layout_width="match_parent"
android:layout_height="match_parent"
android:orientation="vertical" >
<frame.zmit.cn.stretchscrollview.StretchScrollView
android:id="@+id/scroll_view"
android:layout_width="match_parent"
android:layout_height="match_parent"
android:fillViewport="true" >
<LinearLayout
android:layout_width="match_parent"
android:layout_height="match_parent"
android:background="#E6E6E6"
android:orientation="vertical" >
<TextView
android:layout_width="match_parent"
android:layout_height="50dp"
android:textSize="16sp"
android:background="#FFFFFF"
android:gravity="center"
android:text="5" />
<View
android:layout_width="match_parent"
android:layout_height="1dp"
android:background="#E6E6E6" />
<TextView
android:layout_width="match_parent"
android:layout_height="50dp"
android:textSize="16sp"
android:background="#FFFFFF"
android:gravity="center"
android:text="5" />
</LinearLayout>
</frame.zmit.cn.stretchscrollview.StretchScrollView>
</LinearLayout>
Activity啥也没有,就不贴了
下面贴上自定义的StretchScrollView
package frame.zmit.cn.stretchscrollview;
import android.content.Context;
import android.os.Handler;
import android.os.Message;
import android.util.AttributeSet;
import android.view.MotionEvent;
import android.view.View;
import android.widget.ScrollView;
/**
* A ScrollView which can scroll to (0,0) when pull down or up.
*
* @author markmjw
* @date 2014-04-30
*/
public class StretchScrollView extends ScrollView {
private static final int MSG_REST_POSITION = 0x01;
/** The max scroll height. */
private static final int MAX_SCROLL_HEIGHT = 600;
/** Damping, the smaller the greater the resistance */
private static final float SCROLL_RATIO = 0.4f;
private View mChildRootView;
private float mTouchY;
private boolean mTouchStop = false;
private int mScrollY = 0;
private int mScrollDy = 0;
private Handler mHandler = new Handler() {
@Override
public void handleMessage(Message msg) {
if (MSG_REST_POSITION == msg.what) {
if (mScrollY != 0 && mTouchStop) {
mScrollY -= mScrollDy;
if ((mScrollDy < 0 && mScrollY > 0) || (mScrollDy > 0 && mScrollY < 0)) {
mScrollY = 0;
}
mChildRootView.scrollTo(0, mScrollY);
// continue scroll after 20ms
sendEmptyMessageDelayed(MSG_REST_POSITION, 20);
}
}
}
};
public StretchScrollView(Context context) {
super(context);
init();
}
public StretchScrollView(Context context, AttributeSet attrs) {
super(context, attrs);
init();
}
public StretchScrollView(Context context, AttributeSet attrs, int defStyle) {
super(context, attrs, defStyle);
init();
}
private void init() {
// set scroll mode
setOverScrollMode(OVER_SCROLL_NEVER);
}
@Override
protected void onFinishInflate() {
if (getChildCount() > 0) {
// when finished inflating from layout xml, get the first child view
mChildRootView = getChildAt(0);
}
}
@Override
public boolean onInterceptTouchEvent(MotionEvent ev) {
if (ev.getAction() == MotionEvent.ACTION_DOWN) {
mTouchY = ev.getY();
}
return super.onInterceptTouchEvent(ev);
}
@Override
public boolean onTouchEvent(MotionEvent ev) {
if (null != mChildRootView) {
doTouchEvent(ev);
}
return super.onTouchEvent(ev);
}
private void doTouchEvent(MotionEvent ev) {
int action = ev.getAction();
switch (action) {
case MotionEvent.ACTION_UP:
mScrollY = mChildRootView.getScrollY();
if (mScrollY != 0) {
mTouchStop = true;
mScrollDy = (int) (mScrollY / 10.0f);
mHandler.sendEmptyMessage(MSG_REST_POSITION);
}
break;
case MotionEvent.ACTION_MOVE:
float nowY = ev.getY();
int deltaY = (int) (mTouchY - nowY);
mTouchY = nowY;
if (isNeedMove()) {
int offset = mChildRootView.getScrollY();
if (offset < MAX_SCROLL_HEIGHT && offset > -MAX_SCROLL_HEIGHT) {
mChildRootView.scrollBy(0, (int) (deltaY * SCROLL_RATIO));
mTouchStop = false;
}
}
break;
default:
break;
}
}
private boolean isNeedMove() {
int viewHeight = mChildRootView.getMeasuredHeight();
int scrollHeight = getHeight();
int offset = viewHeight - scrollHeight;
int scrollY = getScrollY();
return scrollY == 0 || scrollY == offset;
}
}
相关文章
使用PHP+JavaScript将HTML页面转换为图片的实例分享
这篇文章主要介绍了使用PHP+JavaScript将HTML元素转换为图片的实例分享,文后结果的截图只能体现出替换的字体,也不能说将静态页面转为图片可以加快加载,只是这种做法比较interesting XD需要的朋友可以参考下...2016-04-19- 这篇文章主要介绍了C#从数据库读取图片并保存的方法,帮助大家更好的理解和使用c#,感兴趣的朋友可以了解下...2021-01-16
- 这篇文章主要介绍了Python 图片转数组,二进制互转操作,具有很好的参考价值,希望对大家有所帮助。一起跟随小编过来看看吧...2021-03-09
- 今天小编在这里就来给各位Photoshop的这一款软件的使用者们来说说把古装美女图片转为细腻的工笔画效果的制作教程,各位想知道方法的使用者们,那么下面就快来跟着小编一...2016-09-14
- php如何实现抓取网页图片,相较于手动的粘贴复制,使用小程序要方便快捷多了,喜欢编程的人总会喜欢制作一些简单有用的小软件,最近就参考了网上一个php抓取图片代码,封装了一个php远程抓取图片的类,测试了一下,效果还不错分享...2015-10-30
jquery左右滚动焦点图banner图片鼠标经过显示上下页按钮
jquery左右滚动焦点图banner图片鼠标经过显示上下页按钮...2013-10-13- 下面小编就为大家带来一篇利用JS实现点击按钮后图片自动切换的简单方法。小编觉得挺不错的,现在就分享给大家,也给大家做个参考。一起跟随小编过来看看吧...2016-10-25
- 1、先讲讲JQuery的概念,JQuery首先是由一个 America 的叫什么 John Resig的人创建的,后来又很多的JS高手也加入了这个团队。其实 JQuery是一个JavaScript的类库,这个类库集合了很多功能方法,利用类库你可以用简单的一些代...2014-05-31
- Photoshop的这一款软件小编相信很多的人都已经是使用过了吧,那么今天小编在这里就给大家带来了用Photoshop软件制作枪战电影海报的教程,想知道制作步骤的玩家们,那么下面...2016-09-14
- 图片剪裁是常用的方法,那么如何通过4坐标剪裁图片,本文就详细的来介绍一下,感兴趣的小伙伴们可以参考一下...2021-06-04
- 共享一段使用PHP下载CSS文件中的图片的代码 复制代码 代码如下: <?php //note 设置PHP超时时间 set_time_limit(0); //note 取得样式文件内容 $styleFileContent = file_get_contents('images/style.css'); //not...2013-10-04
- 这篇文章主要为大家详细介绍了js实现上传图片及时预览的相关资料,具有一定的参考价值,感兴趣的朋友可以参考一下...2016-05-09
- PHP代码如下:复制代码 代码如下:if (isset($_FILES["Filedata"]) || !is_uploaded_file($_FILES["Filedata"]["tmp_name"]) || $_FILES["Filedata"]["error"] != 0) { $upload_file = $_FILES['Filedata']; $fil...2013-10-04
C#中图片旋转和翻转(RotateFlipType)用法分析
这篇文章主要介绍了C#中图片旋转和翻转(RotateFlipType)用法,实例分析了C#图片旋转及翻转Image.RotateFlip方法属性的常用设置技巧,需要的朋友可以参考下...2020-06-25- 这篇文章主要给大家介绍了关于微信小程序如何获取图片宽度与高度的相关资料,文中通过示例代码介绍的非常详细,对大家的学习或者工作具有一定的参考学习价值,需要的朋友们下面随着小编来一起学习学习吧...2021-03-10
- ps软件是现在很多人比较喜欢的,有着非常不错的使用效果,这次文章就给大家介绍下ps怎么制作图片阴影效果,还不知道制作方法的赶紧来看看。 ps图片阴影效果怎么做方法/...2017-07-06
- 这篇文章主要介绍了OpenCV如何去除图片中的阴影的实现,文中通过示例代码介绍的非常详细,对大家的学习或者工作具有一定的参考学习价值,需要的朋友们下面随着小编来一起学习学习吧...2021-03-29
- 本文主要介绍用C#实现图片转换成字节流,字节流转换成图片,并根据图片路径返回图片的字节流,有需要的朋友可以参考下...2020-06-25
- 这篇文章主要介绍了JavaScript 如何禁止用户保存图片,帮助大家完成需求,更好的理解和使用JavaScript,感兴趣的朋友可以了解下...2020-11-19
- 我们在php中上传文件就必须使用#_FILE变量了,这个自动全局变量 $_FILES 从 PHP 4.1.0 版本开始被支持。在这之前,从 4.0.0 版本开始,PHP 支持 $HTTP_POST_FILES 数组。这...2016-11-25