vue自定义可选时间的日历组件
本文实例为大家分享了vue自定义可选时间日历组件的具体代码,供大家参考,具体内容如下
日历功能:
1、过去时间不可选择
2、可自定义不可选时间
3、本月默认展示当天,其他月展示第一天,若为不可选时间,往后顺延
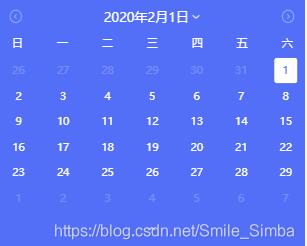
效果图:
-------下面开始表演-----------
**首先,画出日历页面布局,参照win10系统日历布局*6行7列,为何如此,请自行理解…*本人也是“偷窥”来的
beginDay是当前月第一天的周几,prevMdays是上个月总天数,nowMdays是当月总天数,这样就实现了日历的展示效果,标签中绑入一些可能会用到的数据 data-dates等
<div class="dateContent-body-day" v-for="item in 42" :key="item">
            <div
              v-if="item - beginDay > 0 && item - beginDay <= nowMdays"
              :class="{
                'active-day': `${year}/${month}/${item - beginDay}` == curDate
              }"
              @click="dayHandler"
              :data-year="year"
              :data-month="month"
              :data-day="item - beginDay"
              :data-dates="year + '/' + month + '/' + (item - beginDay)"
            >
              {{ item - beginDay }}
            </div>
            <div class="other-day" v-else-if="item - beginDay <= 0">
              {{ item - beginDay + prevMdays }}
    </div>
  <div class="other-day" v-else>{{ item - beginDay - nowMdays }}</div>
</div>
—接下来…
所用到的数据:

*active-day是高亮的那一天即选中日期,curDate控制选中哪一天,这里默认当天,开放一个props数据timeArry,允许传入一些自定义日期作为不可选,点击的日期中绑定的dates存在于数组中则返回,可选择的情况下通过$emit将选择的结果通过chooseDate事件暴露出去。
//点击切换日
 dayHandler(e) {
      console.log(e);
      var daNum = e.target.dataset;
      if (this.cantTime.indexOf(daNum.dates) > -1) {
        this.$toast("非开放日期,不可选取");
        return;
      }
      if (
        `${daNum.year}/${daNum.month}/${daNum.day}` >=
        `${new Date().getFullYear()}/${new Date().getMonth() +
          1}/${new Date().getDate()}`
      ) {
        this.date = e.target.dataset.day;
        this.$emit(
          "chooseDate",
          this.year + "/" + this.month + "/" + this.date
        );
      } else {
        this.$toast("过去时间不可选取");
      }
    },
    //切换下月
``nextMonth() {
      if (this.month == 12) {
        this.month = 1;
        this.year++;
      } else {
        this.month++;
      }
},
对切换月、日都要进行观测,重点在于观测月份变化,也不知道watch有没有被滥用
```javascript
watch: {
    date(val, oldval) {
      if (val) {
        this.curDate = `${this.year}/${this.month}/${this.date}`;
      }
    },
    month(val, oldval) {
      if (val) {
        var ndate;
        for (var i = 1; i <= 31; i++) {
          console.log(`${this.year}/${this.month}/${i}`);
          if (this.cantTime.indexOf(`${this.year}/${this.month}/${i}`) < 0) {
            console.log("不存在数值,停止,日期停留在" + i);
            ndate = i;
            break;
          }
        }
        console.log(ndate, `${this.year}/${this.month}/${ndate}`);
        //用切换到的月和本日相比较,未来月默认选中1号,当月选中当天
        if (
          `${this.year}/${this.month}/1` >
          `${new Date().getFullYear()}/${new Date().getMonth() +
            1}/${new Date().getDate()}`
        ) {
          this.curDate = `${this.year}/${this.month}/${ndate}`;
          this.date = ndate;
        } else {
          for (var i = new Date().getDate(); i <= 31; i++) {
            console.log(2`${this.year}/${this.month}/${i}`);
            if (this.cantTime.indexOf(`${this.year}/${this.month}/${i}`) < 0) {
              this.curDate = `${new Date().getFullYear()}/${new Date().getMonth() +
            1}/${i}`;
          this.date = i;
              break;
            }
          }
        }
        this.$emit(
          "chooseDate",
          this.year + "/" + this.month + "/" + this.date
        );
      }
    }
  },
父组件中调用
<calendar :timeArry="timeArray" @chooseDate="chooseHandler"></calendar>
import { calendar ,alertBox} from '@/components/index.js';
export default {
    components:{calendar,alertBox
    },
这样的日历就完成了。
以上就是本文的全部内容,希望对大家的学习有所帮助,也希望大家多多支持猪先飞。
相关文章
- 这篇文章主要介绍了vue中activated的用法,帮助大家更好的理解和使用vue框架,感兴趣的朋友可以了解下...2021-01-03
基于vue-simple-uploader封装文件分片上传、秒传及断点续传的全局上传插件功能
这篇文章主要介绍了基于vue-simple-uploader封装文件分片上传、秒传及断点续传的全局上传插件,本文给大家介绍的非常详细,对大家的学习或工作具有一定的参考借鉴价值,需要的朋友可以参考下...2021-02-23Antd-vue Table组件添加Click事件,实现点击某行数据教程
这篇文章主要介绍了Antd-vue Table组件添加Click事件,实现点击某行数据教程,具有很好的参考价值,希望对大家有所帮助。一起跟随小编过来看看吧...2020-11-17- 这篇文章主要介绍了Vue基于localStorage存储信息代码实例,文中通过示例代码介绍的非常详细,对大家的学习或者工作具有一定的参考学习价值,需要的朋友可以参考下...2020-11-16
- 这篇文章主要介绍了vue 实现动态路由的方法,文中示例代码非常详细,帮助大家更好的理解和学习,感兴趣的朋友可以了解下...2020-07-06
- 这篇文章主要介绍了vue 监听 Treeselect 选择项的改变操作,具有很好的参考价值,希望对大家有所帮助。一起跟随小编过来看看吧...2020-09-01
- 这篇文章主要介绍了Vue组件跨层级获取组件操作,具有很好的参考价值,希望对大家有所帮助。一起跟随小编过来看看吧...2020-07-28
- 这篇文章主要介绍了vue 获取到数据但却渲染不到页面上的解决方法,文中通过示例代码介绍的非常详细,对大家的学习或者工作具有一定的参考学习价值,需要的朋友们下面随着小编来一起学习学习吧...2020-11-19
antdesign-vue结合sortablejs实现两个table相互拖拽排序功能
这篇文章主要介绍了antdesign-vue结合sortablejs实现两个table相互拖拽排序功能,本文通过实例图文相结合给大家介绍的非常详细,对大家的学习或工作具有一定的参考借鉴价值,需要的朋友可以参考下...2021-01-09vuejs element table 表格添加行,修改,单独删除行,批量删除行操作
这篇文章主要介绍了vuejs element table 表格添加行,修改,单独删除行,批量删除行操作,具有很好的参考价值,希望对大家有所帮助。一起跟随小编过来看看吧...2020-07-18- 这篇文章主要给大家介绍了关于Vue中slot-scope的深入理解,这个教程非常适合初学者,文中通过示例代码介绍的非常详细,对大家的学习或者工作具有一定的参考学习价值,需要的朋友们下面随着小编来一起学习学习吧...2021-04-17
- 最常见的多环境配置,就是开发环境配置,和生产环境配置,本文主要介绍了vue项目多环境配置的实现,感兴趣的可以了解一下...2021-07-20
- 这篇文章主要介绍了vue treeselect获取当前选中项的label实例,具有很好的参考价值,希望对大家有所帮助。一起跟随小编过来看看吧...2020-09-01
vue项目页面嵌入代码块vue-prism-editor的实现
这篇文章主要介绍了vue项目页面嵌入代码块vue-prism-editor的实现,本文给大家介绍的非常详细,对大家的学习或工作具有一定的参考借鉴价值,需要的朋友可以参考下...2020-10-30- 这篇文章主要介绍了Vue 3.0 中 jsx 语法使用,帮助大家更好的理解和使用vue框架,感兴趣的朋友可以了解下...2020-11-13
vue Treeselect下拉树只能选择第N级元素实现代码
这篇文章主要介绍了vue Treeselect下拉树只能选择第N级元素实现代码,具有很好的参考价值,希望对大家有所帮助。一起跟随小编过来看看吧...2020-09-01解决vue的router组件component在import时不能使用变量问题
这篇文章主要介绍了解决vue的router组件component在import时不能使用变量问题,具有很好的参考价值,希望对大家有所帮助。一起跟随小编过来看看吧...2020-07-27Ant design vue table 单击行选中 勾选checkbox教程
这篇文章主要介绍了Ant design vue table 单击行选中 勾选checkbox教程,具有很好的参考价值,希望对大家有所帮助。一起跟随小编过来看看吧...2020-10-25- 这篇文章主要为大家详细介绍了vue实现同时设置多个倒计时,文中示例代码介绍的非常详细,具有一定的参考价值,感兴趣的小伙伴们可以参考一下...2021-05-20
- 这篇文章主要介绍了WebStorm无法正确识别Vue3组合式API的解决方案,帮助大家更好的理解和学习使用vue框架,感兴趣的朋友可以了解下...2021-02-18