彻底搞懂Java多线程(五)
单例模式与多线程
单例模式就是全局唯一但是所有程序都可以使用的对象
写单例模式步骤:
1.将构造函数设置为私有的
2.创建一个静态的类变量
3.提供获取单例的方法
立即加载/饿汉模式
/**
 * user:ypc;
 * date:2021-06-13;
 * time: 21:02;
 */
//饿汉方式实现单例模式
public class Singleton {
    //1.将构造函数设置为私有的,不然外部可以创建
    private Singleton(){
    }
    //2.创建静态的类变量(让第三步的方法进行返回)
    private static Singleton singleton = new Singleton();
    //给外部接口提供的获取单例的方法
    public static Singleton getInstance(){
        return singleton;
    }
}
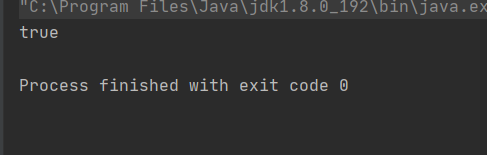
测试饿汉的单例模式
    //测试饿汉方式实现的单例模式,创建两个线程,看是不是得到了一个实列对象,如果为true就说明饿汉的单例模式没有问题
    static Singleton singleton1 = null;
    static Singleton singleton2 = null;
    public static void main(String[] args) throws InterruptedException {
        Thread thread1 = new Thread(() -> {
            singleton1 = Singleton.getInstance();
        });
        Thread thread2 = new Thread(() -> {
            singleton2 = Singleton.getInstance();
        });
        thread1.start();
        thread2.start();
        thread1.join();
        thread2.join();
        System.out.println(singleton1 == singleton2);
    }
延时加载/懒汉模式
不会随着程序的启动而启动,而是等到有人调用它的时候,它才会初始化
/**
 * user:ypc;
 * date:2021-06-13;
 * time: 21:22;
 */
//懒汉方式实现单例模式
public class Singleton2 {
    static class Singleton {
        //1.设置私有的构造函数
        private Singleton() {
        }
        //2.提供一个私有的静态变量
        private static Singleton singleton = null;
        //3.提供给外部调用,返回一个单例对象给外部
        public static Singleton getInstance() {
            if (singleton == null) {
                singleton = new Singleton();
            }
            return singleton;
        }
    }
}
那么这样写有什么问题呢?我们来看看多线程情况下的懒汉方式实现单例模式:
/**
 * user:ypc;
 * date:2021-06-13;
 * time: 21:22;
 */
//懒汉方式实现单例模式
public class Singleton2 {
    static class Singleton {
        //1.设置私有的构造函数
        private Singleton() {
        }
        //2.提供一个私有的静态变量
        private static Singleton singleton = null;
        //3.提供给外部调用,返回一个单例对象给外部
        public static Singleton getInstance() throws InterruptedException {
            if (singleton == null) {
                Thread.sleep(100);
                singleton = new Singleton();
            }
            return singleton;
        }
    }
    static Singleton singleton1 = null;
    static Singleton singleton2 = null;
    public static void main(String[] args) throws InterruptedException {
        Thread thread1 = new Thread(() -> {
            try {
                singleton1 = Singleton.getInstance();
            } catch (InterruptedException e) {
                e.printStackTrace();
            }
        });
        Thread thread2 = new Thread(() -> {
            try {
                singleton2 = Singleton.getInstance();
            } catch (InterruptedException e) {
                e.printStackTrace();
            }
        });
        thread1.start();
        thread2.start();
        thread1.join();
        thread2.join();
        System.out.println(singleton1 == singleton2);
    }
}
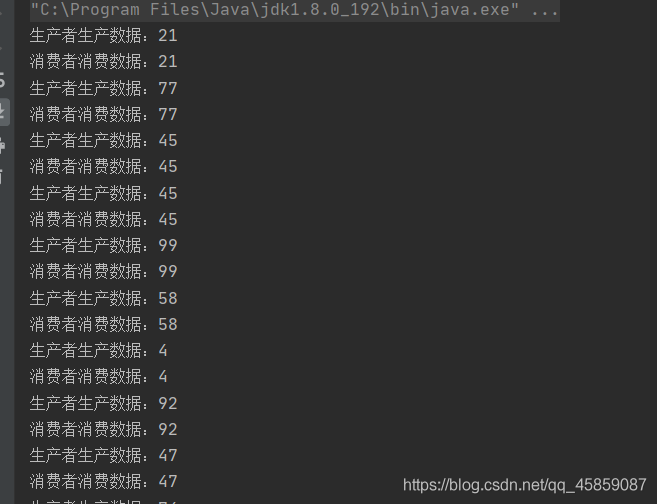
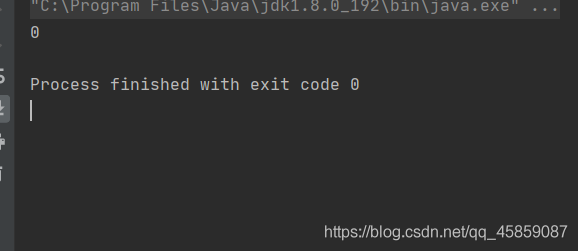
结果:
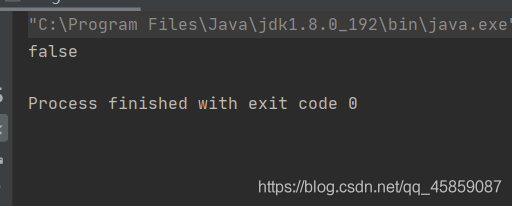
所以发生了线程不安全的问题
那么要如何更改呢?
加锁:👇
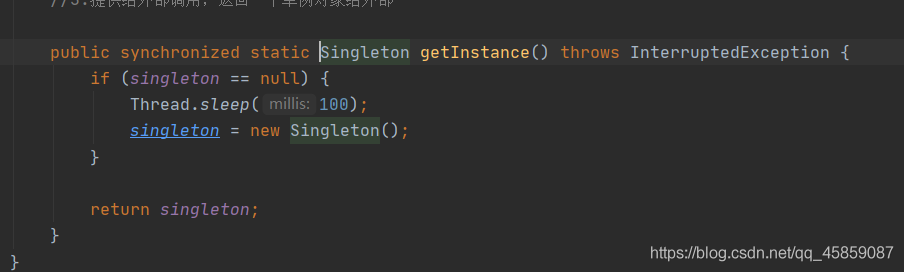
结果就是true了:
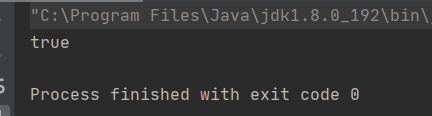
给方法加锁可以实现线程安全,但是所锁的粒度太大。
使用双重校验锁优化后:
    static class Singleton {
        //1.设置私有的构造函数
        private Singleton() {
        }
        //2.提供一个私有的静态变量
        private static Singleton singleton = null;
        //3.提供给外部调用,返回一个单例对象给外部
        public static Singleton getInstance() {
            if (singleton == null) {
                synchronized (Singleton.class) {
                    if (singleton == null) {
                        singleton = new Singleton();
                    }
                }
            }
            return singleton;
        }
    }

那么这样写就没有问题了吗?
不是的:有可能还会发生指令重排的问题
当有线程在进行第一次初始化的时候,就有可能发生问题👇
先来看初始化的过程
1.先分配内存空间
2.初始化
3.将singleton指向内存
有可能指令重排序之后:
线程1执行的顺序变成了 1 --> 3 --> 2
在线程1执行完1、3之后时间片使用完了
线程2再来执行,线程2得到了未初始化的singleton,也就是的到了一个空的对象
也就发生了线程不安全的问题
那么要如何解决指令重排序的问题呢?那就是使用volatile关键字👇:
/**
 * user:ypc;
 * date:2021-06-13;
 * time: 21:22;
 */
//懒汉方式实现单例模式
public class Singleton2 {
    static class Singleton {
        //1.设置私有的构造函数
        private Singleton() {
        }
        //2.提供一个私有的静态变量
        private static volatile Singleton singleton = null;
        //3.提供给外部调用,返回一个单例对象给外部
        public static Singleton getInstance() {
            if (singleton == null) {
                synchronized (Singleton.class) {
                    if (singleton == null) {
                        singleton = new Singleton();
                    }
                }
            }
            return singleton;
        }
    }
这样就没有问题了
饿汉/懒汉对比
饿汉方式: 优点:实现简单,不存在线程安全的问题,因为饿汉的方式是随着程序的启动而初始化的,因为类加载是线程安全的,所以它是线程安全的。缺点:随着程序的启动而启动,有可能在整个程序的运行周期都没有用到,这样就带来了不必要的开销。
阻塞队列的实现
import java.util.Random;
/**
 * user:ypc;
 * date:2021-06-14;
 * time: 8:57;
 */
public class MyBlockingQueue {
    private int[] values;
    private int first;
    private int last;
    private int size;
    MyBlockingQueue(int maxSize) {
        this.values = new int[maxSize];
        this.first = 0;
        this.last = 0;
        this.size = 0;
    }
    public void offer(int val) throws InterruptedException {
        synchronized (this) {
            if (this.size == values.length) {
                this.wait();
            }
            this.values[last++] = val;
            size++;
            //变为循环队列
            if (this.last == values.length) {
                this.last = 0;
            }
            //唤醒消费者
            this.notify();
        }
    }
    public int poll() throws InterruptedException {
        int result = 0;
        synchronized (this) {
            if (size == 0) {
                this.wait();
            }
            result = this.values[first++];
            this.size--;
            if (first == this.values.length) {
                this.first = 0;
            }
            //唤醒生产者开生产数据
            this.notify();
        }
        return result;
    }
    public static void main(String[] args) {
        MyBlockingQueue myBlockingQueue = new MyBlockingQueue(100);
        //生产者
        Thread thread1 = new Thread(() -> {
            while (true) {
                try {
                    int num = new Random().nextInt(100);
                    myBlockingQueue.offer(num);
                    System.out.println("生产者生产数据:" + num);
                    Thread.sleep(100);
                } catch (InterruptedException e) {
                    e.printStackTrace();
                }
            }
        });

        //消费者
        Thread thread2 = new Thread(new Runnable() {
            @Override
            public void run() {
                try {
                    while (true) {
                        int res = myBlockingQueue.poll();
                        System.out.println("消费者消费数据:" + res);
                    }
                } catch (InterruptedException e) {
                    e.printStackTrace();
                }
            }
        });
        thread1.start();
        thread2.start();
    }
}
可以看到生产者每生产一个数据都会被取走:
常见的锁策略
乐观锁
它认为程序在一般的情况下不会发生问题,所以他在使用的时候不会加锁,只有在数据修改的时候才会判断有没有锁竞争,如果没有就会直接修改数据,如果有就会返回失败信息给用户自行处理。
CAS
乐观锁的经典实现 Compare and Swap
CAS 实现的三个重要的属性:
(V,A,B)
V:内存中的值
A:预期的旧值
B:新值
V == A? V -> B : 修改失败
修改失之后:
自旋对比和替换
CAS 的底层实现:
CAS在Java中是通过unsafe来实现的,unsafe时本地类和本地方法,它是c/c++实现的原生方法,通过调用操作系统Atomic::cmpxchg原子指令来实现的
CAS在java中的应用
i++、i–问题
可以使用加锁、ThreadLocal 解决问题
也可以使用atomic.AtomicInteger来解决问题,底层也使用了乐观锁。
import java.util.concurrent.atomic.AtomicInteger;
/**
 * user:ypc;
 * date:2021-06-14;
 * time: 10:12;
 */
public class ThreadDemo1 {
    private static AtomicInteger count  = new AtomicInteger(0);
    private static final int MaxSize = 100000;
    public static void main(String[] args) throws InterruptedException {
        Thread thread1 = new Thread(new Runnable() {
            @Override
            public void run() {
                for (int i = 0; i < MaxSize; i++) {
                    count.getAndIncrement();//i++
                }
            }
        });
        thread1.start();
        Thread thread2 = new Thread(()->{
            for (int i = 0; i < MaxSize; i++) {
             count.getAndDecrement();//i--
            }
        });
        thread2.start();
        thread1.join();
        thread2.join();
        System.out.println(count);
    }
}
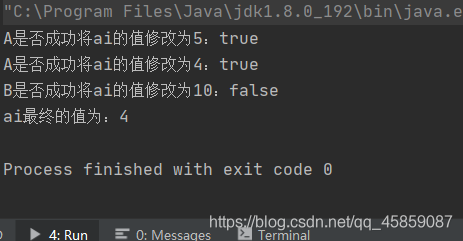
CAS 的ABA问题
当有多个线程对一个原子类进行操作的时候,某个线程在短时间内将原子类的值A修改为B,又马上将其修改为A,此时其他线程不感知,还是会修改成功。
来看:
import java.util.concurrent.atomic.AtomicInteger;
/**
 * user:ypc;
 * date:2021-06-14;
 * time: 10:43;
 */
public class ThreadDemo2 {
    //线程操作资源,原子类ai的初始值为4
    static AtomicInteger ai = new AtomicInteger(4);
    public static void main(String[] args) {
        new Thread(() -> {
            //利用CAS将ai的值改成5
            boolean b = ai.compareAndSet(4, 5);
            System.out.println(Thread.currentThread().getName()+"是否成功将ai的值修改为5:"+b);
            //休眠一秒
            try {Thread.sleep(1000);} catch (InterruptedException e) {e.printStackTrace();}
            //利用CAS将ai的值改回4
            b = ai.compareAndSet(5,4);
            System.out.println(Thread.currentThread().getName()+"是否成功将ai的值修改为4:"+b);
        },"A").start();
        new Thread(() -> {
            //模拟此线程执行较慢的情况
            try {Thread.sleep(5000);} catch (InterruptedException e) {e.printStackTrace();}
            //利用CAS将ai的值从4改为10
            boolean b = ai.compareAndSet(4, 10);
            System.out.println(Thread.currentThread().getName()+"是否成功将ai的值修改为10:"+b);
        },"B").start();
        //等待其他线程完成,为什么是2,因为一个是main线程,一个是后台的GC线程
        while (Thread.activeCount() > 2) {
            Thread.yield();
        }
        System.out.println("ai最终的值为:"+ai.get());
    }
}
上面例子模拟的是A、B两个线程操作一个资源ai,A的执行速度比B的快,在B执行前,A就已经将ai的值改为5之后马上又把ai的值改回为4,但是B不感知,所以最后B就修改成功了。
那么会造成会有什么问题呢?
假设A现在有100元,要给B转账100元,点击了两次转账按钮,第一次B只会得到100元,A现在剩余0元。第二次A是0元,预期的旧值是100,不相等,就不会执行转账操作。
如果点击第二次按钮之前,A又得到了100元,B不能感知的到,此时A得到了转账100元,预期的旧值就是100,又会转给B100元。
那么如何解决这个问题呢?👇
ABA 问题的解决
我们可以给操作加上版本号,每次修改的时候判断版本号和预期的旧值,如果不一样就不会执行操作了。
即是预期的旧值和V值相等,但是版本号不一样,也不会执行操作。
在Java中的实现:
import java.util.concurrent.atomic.AtomicStampedReference;
/**
 * user:ypc;
 * date:2021-06-14;
 * time: 11:05;
 */
public class ThreadDemo3 {
    static AtomicStampedReference<Integer> ai = new AtomicStampedReference<>(4,0);
    public static void main(String[] args) {
        new Thread(() -> {
            //四个参数分别是预估内存值,更新值,预估版本号,初始版本号
            //只有当预估内存值==实际内存值相等并且预估版本号==实际版本号,才会进行修改
            boolean b = ai.compareAndSet(4, 5,0,1);
            System.out.println(Thread.currentThread().getName()+"是否成功将ai的值修改为5:"+b);
            try {Thread.sleep(1000);} catch (InterruptedException e) {e.printStackTrace();}
            b = ai.compareAndSet(5,4,1,2);
            System.out.println(Thread.currentThread().getName()+"是否成功将ai的值修改为4:"+b);
        },"A").start();
        new Thread(() -> {
            try {Thread.sleep(5000);} catch (InterruptedException e) {e.printStackTrace();}
            boolean b = ai.compareAndSet(4, 10,0,1);
            System.out.println(Thread.currentThread().getName()+"是否成功将ai的值修改为10:"+b);
        },"B").start();
        while (Thread.activeCount() > 2) {
            Thread.yield();
        }
        System.out.println("ai最终的值为:"+ai.getReference());
    }
}
注意:里面的旧值对比的是引用。
如果范围在-128 - 127 里,会使用缓存的值,如果超过了这个范围,就会重新来new对象
可以将Integer 的高速缓存的值的边界调整
悲观锁
悲观锁认为只要执行多线程的任务,就会发生线程不安全的问题,所以正在进入方法之后会直接加锁。
直接使用synchronzied关键字给方法加锁就可以了
独占锁、共享锁、自旋锁、可重入锁
独占锁:指的是这一把锁只能被一个线程所拥有
比如:synchronzied、Lock
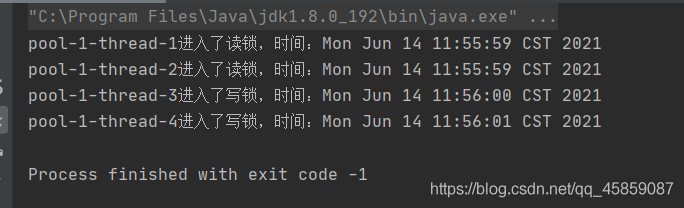
共享锁: 指的是一把锁可以被多个线程同时拥有
ReadWriterLock读写锁就是共享锁
读锁就是共享的,将锁的粒度更加的细化
import java.util.Date;
import java.util.concurrent.LinkedBlockingDeque;
import java.util.concurrent.ThreadPoolExecutor;
import java.util.concurrent.TimeUnit;
import java.util.concurrent.locks.ReentrantReadWriteLock;
/**
 * user:ypc;
 * date:2021-06-14;
 * time: 11:42;
 */
public class ThreadDemo4 {
    //创建读写锁
    public static void main(String[] args) {
        ReentrantReadWriteLock readWriteLock = new ReentrantReadWriteLock();
        //读锁
        ReentrantReadWriteLock.ReadLock readLock = readWriteLock.readLock();
        //写锁
        ReentrantReadWriteLock.WriteLock writeLock = readWriteLock.writeLock();
        ThreadPoolExecutor threadPoolExecutor = new ThreadPoolExecutor(10, 10, 1000,
                TimeUnit.MILLISECONDS, new LinkedBlockingDeque<>(100), new ThreadPoolExecutor.DiscardPolicy());

        //任务一:读锁演示
        threadPoolExecutor.execute(new Runnable() {
            @Override
            public void run() {
                readLock.lock();
                try {
                    System.out.println(Thread.currentThread().getName() + "进入了读锁,时间:" + new Date());
                    Thread.sleep(1000);
                } catch (InterruptedException e) {
                    e.printStackTrace();
                } finally {
                    readLock.unlock();
                }
            }
        });
        //任务二:读锁演示
        threadPoolExecutor.execute(new Runnable() {
            @Override
            public void run() {
                readLock.lock();
                try {
                    System.out.println(Thread.currentThread().getName() + "进入了读锁,时间:" + new Date());
                    Thread.sleep(1000);
                } catch (InterruptedException e) {
                    e.printStackTrace();
                } finally {
                    readLock.unlock();
                }
            }
        });
        //任务三:写锁

        threadPoolExecutor.execute(new Runnable() {
            @Override
            public void run() {
                writeLock.lock();
                try {
                    System.out.println(Thread.currentThread().getName() + "进入了写锁,时间:" + new Date());
                    Thread.sleep(1000);
                } catch (InterruptedException e) {
                    e.printStackTrace();
                } finally {
                    writeLock.unlock();
                }
            }
        });
        //任务四:写锁

        threadPoolExecutor.execute(new Runnable() {
            @Override
            public void run() {
                writeLock.lock();
                try {
                    System.out.println(Thread.currentThread().getName() + "进入了写锁,时间:" + new Date());
                    Thread.sleep(1000);
                } catch (InterruptedException e) {
                    e.printStackTrace();
                } finally {
                    writeLock.unlock();
                }
            }
        });

    }
}
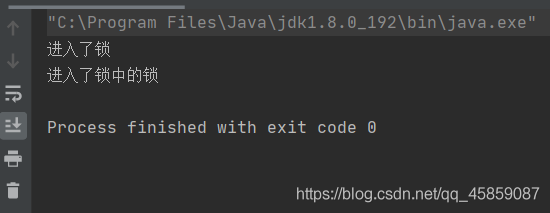
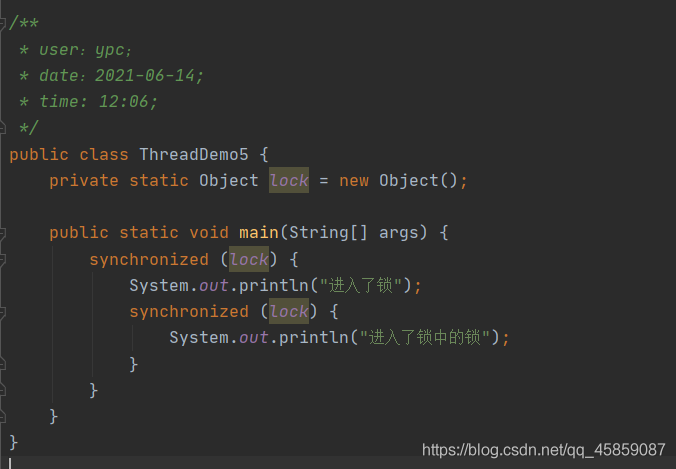
可重入锁:
当一个线程拥有了锁之后,可以重复的进入,就叫可重入锁。
synchronzied就是典型的可重入锁的代表
读锁的时间在一秒内,所以两个线程读到的锁是一把锁,即读锁是共享锁
而写锁的时间刚好是一秒,所以写锁是独占锁。
自旋锁:相当于死循环,一直尝试获取锁
详解synchronized锁的优化问题
synchroized加锁的整个过程,都是依赖于Monitor(监视器锁)实现的,监视器锁在虚拟机中又是根据操作系统的Metux Lock(互斥量)来实现的,这就导致在加锁的过程中需要频繁的在操作系统的内核态和和JVM级别的用户态进行切换,并且涉及到线程上下文的切换,是比较消耗性能的。所以后来有一位大佬Doug Lea基于java实现了一个AQS的框架,提供了Lock锁,性能远远高于synchroized。这就导致Oracle公司很没有面子,因此他们在JDK1.6对synchroized做了优化,引入了偏向锁和轻量级锁。存在一个从无锁-》偏向锁–》轻量级锁–》重量级锁的升级过程,优化后性能就可以和Lock锁的方式持平了。
对象头
HotSpot虚拟机中,对象在内存中分为三块区域:对象头、实例数据和对齐填充。
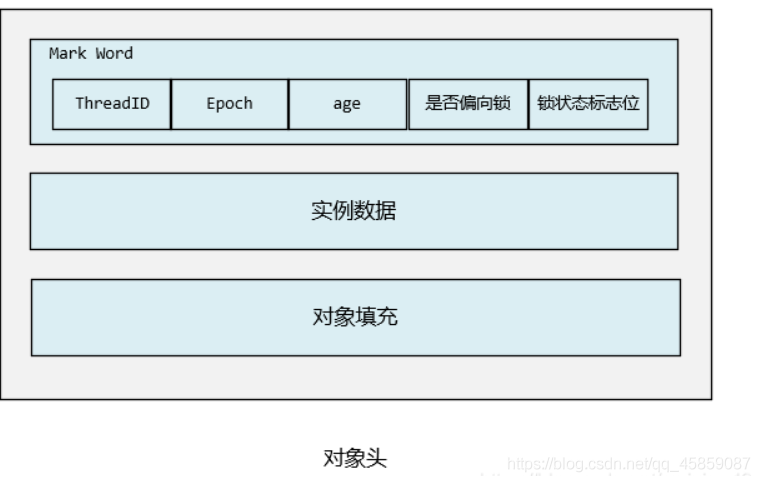
对象头包括两部分:Mark Word 和 类型指针。类型指针是指向该对象所属类对象的指针,我们不关注。mark word用于存储对象的HashCode、GC分代年龄、锁状态等信息。在32位系统上mark word长度为32bit,64位系统上长度为64bit。他不是一个固定的数据结构,是和对象的状态紧密相关,有一个对应关系的,具体如下表所示:
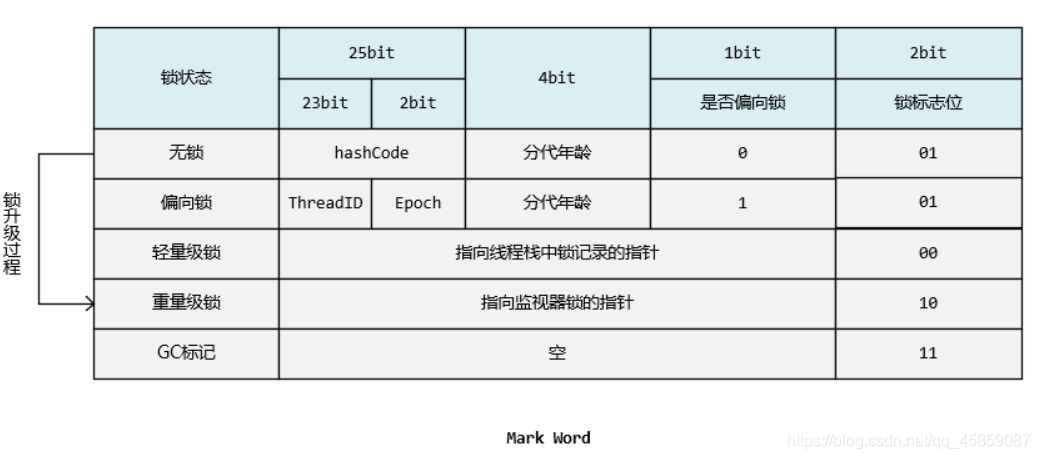
当某一线程第一次获得锁的时候,虚拟机会把对象头中的锁标志位设置为“01”,把偏向模式设置为“1”,表示进入偏向锁模式。同时使用CAS操作将获取到这个锁的线程的ID记录在对象的Mark Word中。如果CAS操作成功,持有偏向锁的线程每次进入这个锁的相关的同步块的时候。虚拟机都可以不在进行任何的同步操作。
当其他线程进入同步块时,发现已经有偏向的线程了,偏向模式马上结束。根据锁对象目前是否处于被锁定的状态决定是否撤销偏向,也就是将偏向模式设置为“0”,撤销后标志位恢复到“01”,也就是未锁定的状态或者轻量级锁定,标志位为“00”的状态,后续的同步操作就按照下面的轻量级锁那样去执行
1、在线程进入同步块的时候,如果同步对象状态为无锁状态(锁标志为 01),虚拟机首先将在当前线程的栈帧中建立一个名为锁记录的空间,用来存储锁对象目前的 Mark Word 的拷贝。拷贝成功后,虚拟机将使用 CAS 操作尝试将对象的 Mark Word 更新为指向 Lock Record 的指针,并将 Lock Record 里的 owner 指针指向锁对象的 Mark Word。如果更新成功,则执行 2,否则执行 3。
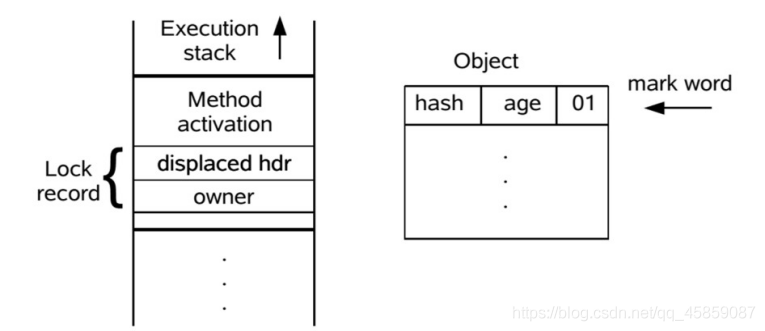
2、如果这个更新动作成功了,那么这个线程就拥有了该对象的锁,并且锁对象的 Mark Word 中的锁标志位设置为 “00”,即表示此对象处于轻量级锁定状态,这时候虚拟机线程栈与堆中锁对象的对象头的状态如图所示。
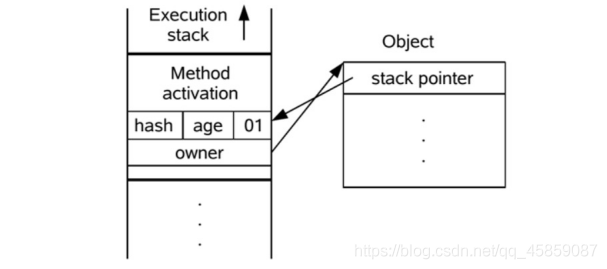
3、如果这个更新操作失败了,虚拟机首先会检查锁对象的 Mark Word 是否指向当前线程的栈帧,如果是就说明当前线程已经拥有了这个对象的锁,那就可以直接进入同步块继续执行。否则说明多个线程竞争锁,轻量级锁就要膨胀为重要量级锁,锁标志的状态值变为 “10”,Mark Word 中存储的就是指向重量级锁的指针,后面等待锁的线程也要进入阻塞状态。而当前线程便尝试使用自旋来获取锁。自旋失败后膨胀为重量级锁,被阻塞。
Semaphore
Semaphore的作用:
在java中,使用了synchronized关键字和Lock锁实现了资源的并发访问控制,在同一时间只允许唯一了线程进入临界区访问资源(读锁除外),这样子控制的主要目的是为了解决多个线程并发同一资源造成的数据不一致的问题。也就是做限流的作用
Semaphore实现原理:
Semaphore是用来保护一个或者多个共享资源的访问,Semaphore内部维护了一个计数器,其值为可以访问的共享资源的个数。一个线程要访问共享资源,先获得信号量,如果信号量的计数器值大于1,意味着有共享资源可以访问,则使其计数器值减去1,再访问共享资源。
如果计数器值为0,线程进入休眠。当某个线程使用完共享资源后,释放信号量,并将信号量内部的计数器加1,之前进入休眠的线程将被唤醒并再次试图获得信号量。
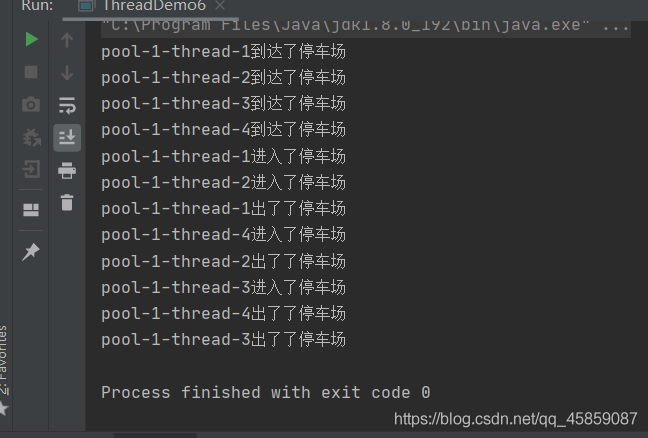
就好比一个厕所管理员,站在门口,只有厕所有空位,就开门允许与空侧数量等量的人进入厕所。多个人进入厕所后,相当于N个人来分配使用N个空位。为避免多个人来同时竞争同一个侧卫,在内部仍然使用锁来控制资源的同步访问。
Semaphore的使用:
Semaphore使用时需要先构建一个参数来指定共享资源的数量,Semaphore构造完成后即是获取Semaphore、共享资源使用完毕后释放Semaphore。
使用Semaphore 来模拟有四辆车同时到达了停车场的门口,但是停车位只有两个,也就是只能停两辆车,这就可以使用信号量来实现。👇:
import java.util.concurrent.LinkedBlockingDeque;
import java.util.concurrent.Semaphore;
import java.util.concurrent.ThreadPoolExecutor;
import java.util.concurrent.TimeUnit;
/**
 * user:ypc;
 * date:2021-06-14;
 * time: 14:00;
 */
public class ThreadDemo6 {
    public static void main(String[] args) {
        Semaphore semaphore = new Semaphore(2);
        ThreadPoolExecutor threadPoolExecutor = new ThreadPoolExecutor(10, 10, 200,
                TimeUnit.MILLISECONDS, new LinkedBlockingDeque<>(100), new ThreadPoolExecutor.DiscardPolicy());

        threadPoolExecutor.execute(new Runnable() {
            @Override
            public void run() {
                System.out.println(Thread.currentThread().getName() + "到达了停车场");
                try {
                    Thread.sleep(1000);
                    semaphore.acquire();
                    System.out.println(Thread.currentThread().getName() + "进入了停车场");
                } catch (InterruptedException e) {
                    e.printStackTrace();
                }

                try {
                    Thread.sleep(1000);

                } catch (InterruptedException e) {
                    e.printStackTrace();
                }
                System.out.println(Thread.currentThread().getName() + "出了了停车场");
                semaphore.release();
            }
        });
        threadPoolExecutor.execute(new Runnable() {
            @Override
            public void run() {
                System.out.println(Thread.currentThread().getName() + "到达了停车场");
                try {
                    Thread.sleep(1000);
                    semaphore.acquire();
                    System.out.println(Thread.currentThread().getName() + "进入了停车场");
                } catch (InterruptedException e) {
                    e.printStackTrace();
                }
                try {
                    Thread.sleep(2000);

                } catch (InterruptedException e) {
                    e.printStackTrace();
                }
                System.out.println(Thread.currentThread().getName() + "出了了停车场");
                semaphore.release();

            }
        });
        threadPoolExecutor.execute(new Runnable() {
            @Override
            public void run() {
                System.out.println(Thread.currentThread().getName() + "到达了停车场");
                try {
                    Thread.sleep(1000);
                    semaphore.acquire();
                    System.out.println(Thread.currentThread().getName() + "进入了停车场");
                } catch (InterruptedException e) {
                    e.printStackTrace();
                }

                try {
                    Thread.sleep(500);

                } catch (InterruptedException e) {
                    e.printStackTrace();
                }
                System.out.println(Thread.currentThread().getName() + "出了了停车场");
                semaphore.release();
            }
        });
        threadPoolExecutor.execute(new Runnable() {
            @Override
            public void run() {
                System.out.println(Thread.currentThread().getName() + "到达了停车场");
                try {
                    Thread.sleep(1000);
                    semaphore.acquire();
                    System.out.println(Thread.currentThread().getName() + "进入了停车场");
                } catch (InterruptedException e) {
                    e.printStackTrace();
                }

                try {
                    Thread.sleep(1500);

                } catch (InterruptedException e) {
                    e.printStackTrace();
                }
                System.out.println(Thread.currentThread().getName() + "出了了停车场");
                semaphore.release();
            }
        });
        threadPoolExecutor.shutdown();
    }
}
CountDownLatch\CyclicBarrier
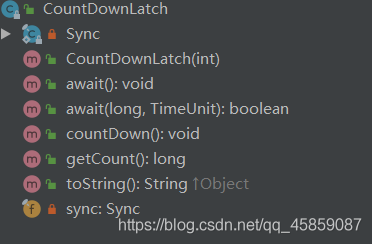
CountDownLatch
一个可以用来协调多个线程之间的同步,或者说起到线程之间的通信作用的工具类。
它能够使一个线程在等待另外一些线程完成各自工作之后,再继续执行。使用一个计数器进行实现。计数器初始值为线程的数量。当每一个线程完成自己任务后,计数器的值就会减一。当计数器的值为0时,表示所有的线程都已经完成了任务,然后在CountDownLatch上等待的线程就可以恢复执行任务。
CountDownLatch的用法
某一线程在开始运行前等待n个线程执行完毕。
将CountDownLatch的计数器初始化为n:new CountDownLatch(n) ,每当一个任务线程执行完毕,就将计数器减1,
countdownlatch.countDown(),当计数器的值变为0时,在CountDownLatch上 await() 的线程就会被唤醒。一个典型应用场景就是启动一个服务时,主线程需要等待多个组件加载完毕,之后再继续执行。
实现多个线程开始执行任务的最大并行性。注意是并行性,不是并发,强调的是多个线程在某一时刻同时开始执行。做法是初始化一个共享的CountDownLatch(1),将其计数器初始化为1,多个线程在开始执行任务前首先 coundownlatch.await(),当主线程调用 countDown() 时,计数器变为0,多个线程同时被唤醒。
CountDownLatch的不足
CountDownLatch是一次性的,计数器的值只能在构造方法中初始化一次,之后没有任何机制再次对其设置值,当CountDownLatch使用完毕后,它不能再次被使用。
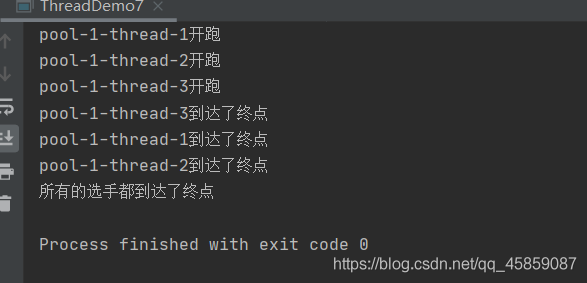
模拟赛跑:当三个运动员都到达终点的时候宣布比赛结束
import java.util.Random;
import java.util.concurrent.*;
/**
 * user:ypc;
 * date:2021-06-14;
 * time: 14:27;
 */
public class ThreadDemo7 {
    public static void main(String[] args) throws InterruptedException {
        CountDownLatch countDownLatch = new CountDownLatch(3);
        ThreadPoolExecutor threadPoolExecutor = new ThreadPoolExecutor(10, 10, 200,
                TimeUnit.MILLISECONDS, new LinkedBlockingDeque<>(100));

        threadPoolExecutor.execute(new Runnable() {
            @Override
            public void run() {
                System.out.println(Thread.currentThread().getName() + "开跑");
                int num = new Random().nextInt(4);
                num += 1;
                try {
                    Thread.sleep(1000*num);
                } catch (InterruptedException e) {
                    e.printStackTrace();
                }
                System.out.println(Thread.currentThread().getName() + "到达了终点");
                countDownLatch.countDown();
            }
        });
        countDownLatch.await();
        System.out.println("所有的选手都到达了终点");
        threadPoolExecutor.shutdown();
    }
}
CyclicBarrier
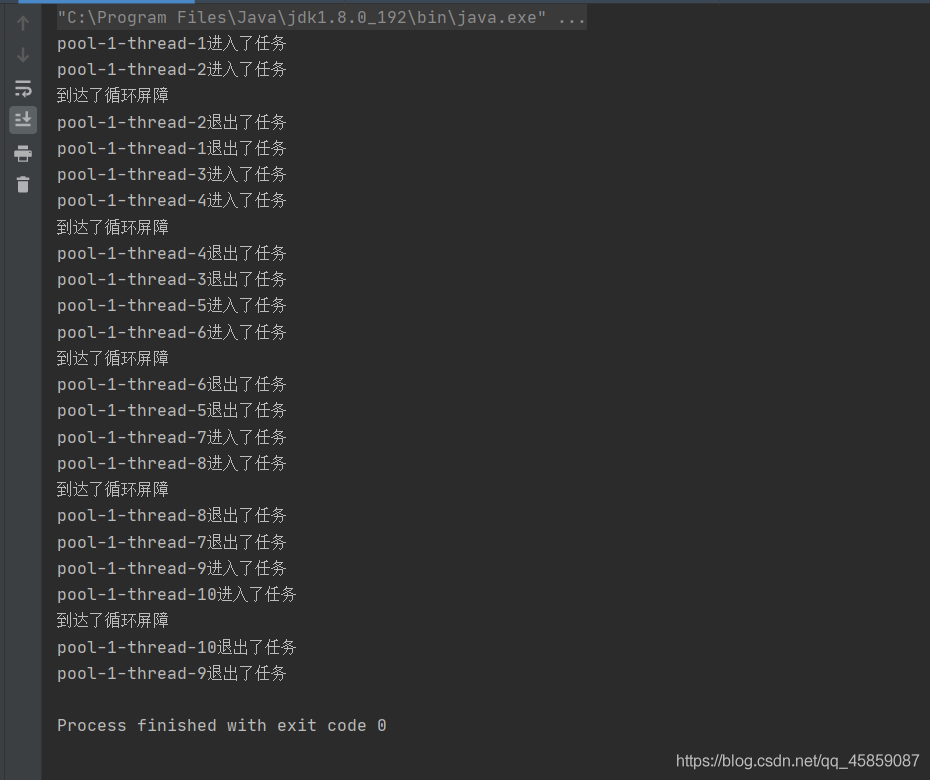
CyclicBarrier 的字面意思是可循环(Cyclic)使用的屏障(Barrier)。它要做的事情是,让一组线程到达一个屏障(也可以叫同步点)时被阻塞,直到最后一个线程到达屏障时,屏障才会开门,所有被屏障拦截的线程才会继续干活。线程进入屏障通过CyclicBarrier的await()方法。
CyclicBarrier默认的构造方法是CyclicBarrier(int parties),其参数表示屏障拦截的线程数量,每个线程调用await方法告诉CyclicBarrier我已经到达了屏障,然后当前线程被阻塞。
import java.util.concurrent.*;
/**
 * user:ypc;
 * date:2021-06-14;
 * time: 15:03;
 */
public class ThreadDemo8 {
    public static void main(String[] args) {
        CyclicBarrier cyclicBarrier = new CyclicBarrier(2, new Runnable() {
            @Override
            public void run() {
                System.out.println("到达了循环屏障");
            }
        });
        ThreadPoolExecutor threadPoolExecutor = new ThreadPoolExecutor(10, 10, 200,
                TimeUnit.MILLISECONDS, new LinkedBlockingDeque<>(100));
        for (int i = 0; i < 10; i++) {
            int finalI = i;
            threadPoolExecutor.execute(new Runnable() {
                @Override
                public void run() {
                    try {
                        Thread.sleep(finalI * 1000);
                    } catch (InterruptedException e) {
                        e.printStackTrace();
                    }
                    System.out.println(Thread.currentThread().getName() + "进入了任务");
                    try {
                        cyclicBarrier.await();
                    } catch (InterruptedException e) {
                        e.printStackTrace();
                    } catch (BrokenBarrierException e) {
                        e.printStackTrace();
                    }
                    System.out.println(Thread.currentThread().getName() + "退出了任务");
                }
            });
        }

        threadPoolExecutor.shutdown();
    }
}
CyclicBarrier原理
每当线程执行await,内部变量count减1,如果count!= 0,说明有线程还未到屏障处,则在锁条件变量trip上等待。
当count == 0时,说明所有线程都已经到屏障处,执行条件变量的signalAll方法唤醒等待的线程。
其中 nextGeneration方法可以实现屏障的循环使用:
重新生成Generation对象
恢复count值
CyclicBarrier可以循环的使用。
hashmap/ConcurrentHashMap
hashmap在JDK1.7中头插死循环问题
来看👇JDK1.7 hashMap transfer的源码
void transfer(Entry[] newTable, boolean rehash) {
        int newCapacity = newTable.length;
        for (Entry<K,V> e : table) {
            while(null != e) {
                Entry<K,V> next = e.next;
                if (rehash) {
                    e.hash = null == e.key ? 0 : hash(e.key);
                }
                int i = indexFor(e.hash, newCapacity);
                e.next = newTable[i];
                newTable[i] = e;
                e = next;
            }
        }
    }
来看多线程情况下的问题:
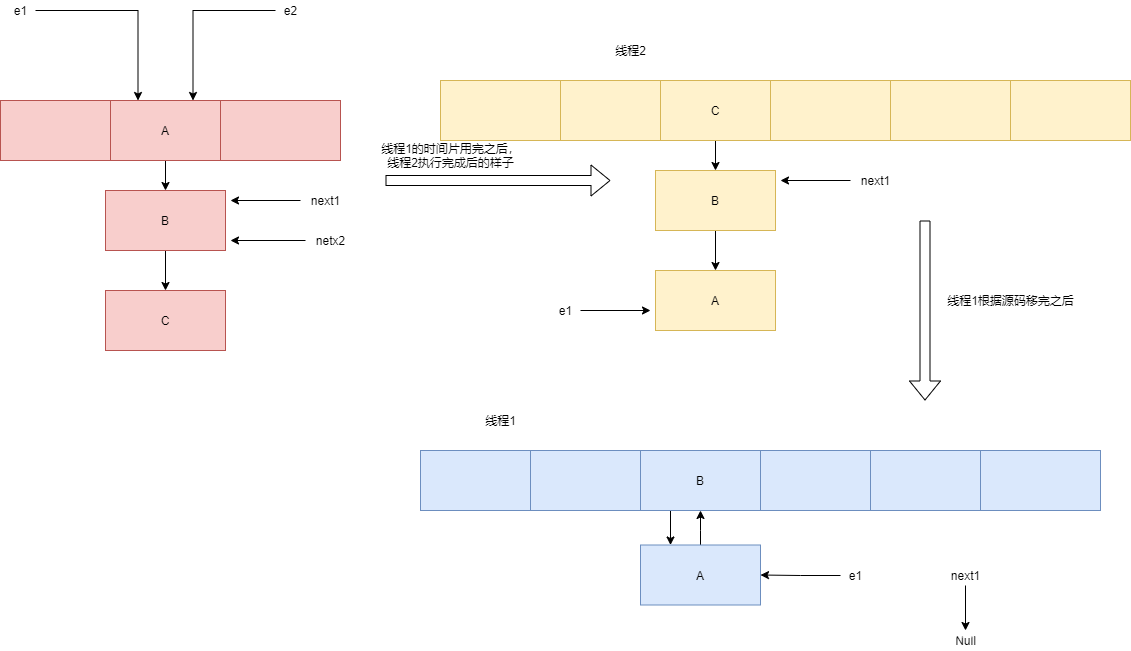
这样就会造成死循环。
hashmap在JDK1.8中值覆盖问题
在JDK1.8的时候使用的是尾插法来看👇:
final V putVal(int hash, K key, V value, boolean onlyIfAbsent,
                   boolean evict) {
        Node<K,V>[] tab; Node<K,V> p; int n, i;
        if ((tab = table) == null || (n = tab.length) == 0)
            n = (tab = resize()).length;
        if ((p = tab[i = (n - 1) & hash]) == null) // 如果没有hash碰撞则直接插入元素
            tab[i] = newNode(hash, key, value, null);
        else {
            Node<K,V> e; K k;
            if (p.hash == hash &&
                ((k = p.key) == key || (key != null && key.equals(k))))
                e = p;
            else if (p instanceof TreeNode)
                e = ((TreeNode<K,V>)p).putTreeVal(this, tab, hash, key, value);
            else {
                for (int binCount = 0; ; ++binCount) {
                    if ((e = p.next) == null) {
                        p.next = newNode(hash, key, value, null);
                        if (binCount >= TREEIFY_THRESHOLD - 1) // -1 for 1st
                            treeifyBin(tab, hash);
                        break;
                    }
                    if (e.hash == hash &&
                        ((k = e.key) == key || (key != null && key.equals(k))))
                        break;
                    p = e;
                }
            }
            if (e != null) { // existing mapping for key
                V oldValue = e.value;
                if (!onlyIfAbsent || oldValue == null)
                    e.value = value;
                afterNodeAccess(e);
                return oldValue;
            }
        }
        ++modCount;
        if (++size > threshold)
            resize();
        afterNodeInsertion(evict);
        return null;
    }
在多线程的情况下:
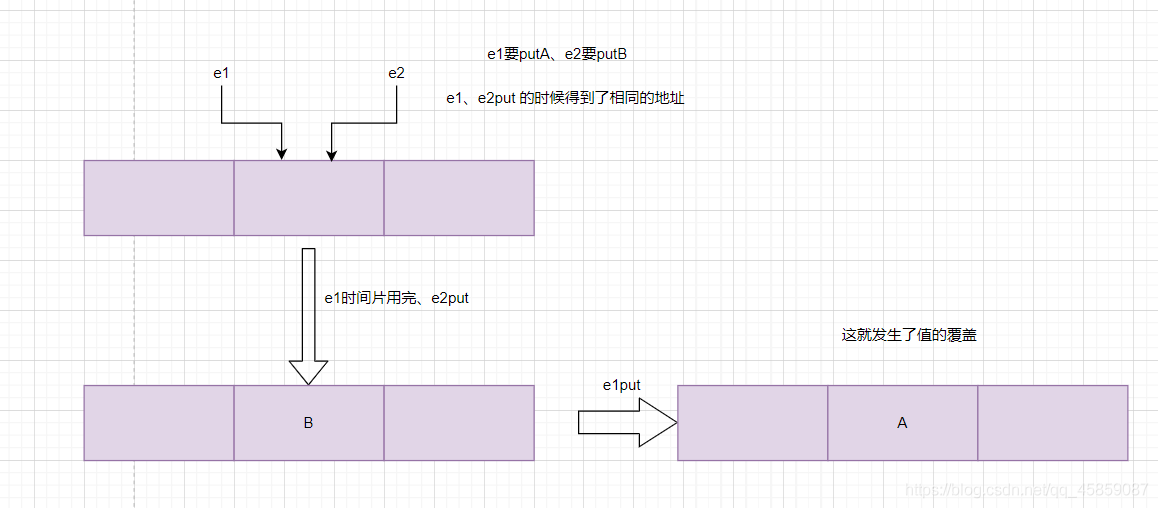
其中第六行代码是判断是否出现hash碰撞,假设两个线程1、2都在进行put操作,并且hash函数计算出的插入下标是相同的,当线程1执行完第六行代码后由于时间片耗尽导致被挂起,而线程2得到时间片后在该下标处插入了元素,完成了正常的插入,然后线程A获得时间片,由于之前已经进行了hash碰撞的判断,所有此时不会再进行判断,而是直接进行插入,这就导致了线程2插入的数据被线程1覆盖了,从而线程不安全。
除此之前,还有就是代码的第38行处有个++size,我们这样想,还是线程1、2,这两个线程同时进行put操作时,假设当前HashMap的zise大小为10,当线程1执行到第38行代码时,从主内存中获得size的值为10后准备进行+1操作,但是由于时间片耗尽只好让出CPU,线程2快乐的拿到CPU还是从主内存中拿到size的值10进行+1操作,完成了put操作并将size=11写回主内存,然后线程1再次拿到CPU并继续执行(此时size的值仍为10),当执行完put操作后,还是将size=11写回内存,此时,线程1、2都执行了一次put操作,但是size的值只增加了1,所有说还是由于数据覆盖又导致了线程不安全。
总结
这个系列的文章到这里就结束了,希望可以帮到你,请您多多关注猪先飞的更多精彩内容!
相关文章
- 这篇文章主要介绍了如何利用java语言实现经典《复杂迷宫》游戏,文中采用了swing技术进行了界面化处理,感兴趣的小伙伴可以动手试一试...2022-02-01
java 运行报错has been compiled by a more recent version of the Java Runtime
java 运行报错has been compiled by a more recent version of the Java Runtime (class file version 54.0)...2021-04-01- 这篇文章主要介绍了在java中获取List集合中最大的日期时间操作,具有很好的参考价值,希望对大家有所帮助。一起跟随小编过来看看吧...2020-08-15
- 这篇文章主要介绍了教你怎么用Java获取国家法定节假日,文中有非常详细的代码示例,对正在学习java的小伙伴们有非常好的帮助,需要的朋友可以参考下...2021-04-23
- 这篇文章主要介绍了Java如何发起http请求的实现,文中通过示例代码介绍的非常详细,对大家的学习或者工作具有一定的参考学习价值,需要的朋友们下面随着小编来一起学习学习吧...2021-03-31
- 说起C#和Java这两门语言(语法,数据类型 等),个人以为,大概有90%以上的相似,甚至可以认为几乎一样。但是在工作中,我也发现了一些细微的差别...2020-06-25
- 这篇文章主要介绍了解决Java处理HTTP请求超时的问题,具有很好的参考价值,希望对大家有所帮助。一起跟随小编过来看看吧...2021-03-29
- 这篇文章主要介绍了java 判断两个时间段是否重叠的案例,具有很好的参考价值,希望对大家有所帮助。一起跟随小编过来看看吧...2020-08-15
- 这篇文章主要介绍了超简洁java实现双色球若干注随机号码生成(实例代码),本文通过实例代码给大家介绍的非常详细,对大家的学习或工作具有一定的参考借鉴价值,需要的朋友可以参考下...2021-04-02
- 这篇文章主要介绍了Java生成随机姓名、性别和年龄的实现示例,文中通过示例代码介绍的非常详细,对大家的学习或者工作具有一定的参考学习价值,需要的朋友们下面随着小编来一起学习学习吧...2020-10-01
java 画pdf用itext调整表格宽度、自定义各个列宽的方法
这篇文章主要介绍了java 画pdf用itext调整表格宽度、自定义各个列宽的方法,具有很好的参考价值,希望对大家有所帮助。一起跟随小编过来看看吧...2021-01-31- 这篇文章主要介绍了java正则表达式判断前端参数修改表中另一个字段的值,需要的朋友可以参考下...2021-05-07
Java使用ScriptEngine动态执行代码(附Java几种动态执行代码比较)
这篇文章主要介绍了Java使用ScriptEngine动态执行代码,并且分享Java几种动态执行代码比较,需要的朋友可以参考下...2021-04-15- 这篇文章主要介绍了Java开发实现人机猜拳游戏,文中示例代码介绍的非常详细,具有一定的参考价值,感兴趣的小伙伴们可以参考一下...2020-08-03
- 这篇文章主要介绍了Java List集合返回值去掉中括号('[ ]')的操作,具有很好的参考价值,希望对大家有所帮助。一起跟随小编过来看看吧...2020-08-29
Java中lombok的@Builder注解的解析与简单使用详解
这篇文章主要介绍了Java中lombok的@Builder注解的解析与简单使用,本文给大家介绍的非常详细,对大家的学习或工作具有一定的参考借鉴价值,需要的朋友可以参考下...2021-01-06- 下面小编就为大家带来一篇java中String类型变量的赋值问题介绍。小编觉得挺不错的。现在分享给大家,给大家一个参考。...2016-03-28
Java 8 Stream 的终极技巧——Collectors 功能与操作方法详解
这篇文章主要介绍了Java 8 Stream Collectors 功能与操作方法,结合实例形式详细分析了Java 8 Stream Collectors 功能、操作方法及相关注意事项,需要的朋友可以参考下...2020-05-20- 这篇文章主要介绍了Java线程池中的各个参数如何合理设置操作,具有很好的参考价值,希望对大家有所帮助。如有错误或未考虑完全的地方,望不吝赐教...2021-06-19
- 在Java中,我们可以利用多线程来最大化地压榨CPU多核计算的能力,下面这篇文章主要给大家介绍了关于java中多线程与线程池基本使用的相关资料,需要的朋友可以参考下...2021-09-13