WinForm中如何预览Office文件
本文为大家分享了WinForm预览Office文档的方法,供大家参考,具体内容如下
使用WinForm, WPF, Office组件
原理:使用Office COM组件将Word,Excel转换为XPS文档, 将WPF的DocumentViewer控件寄宿到WinForm中, 实现预览.
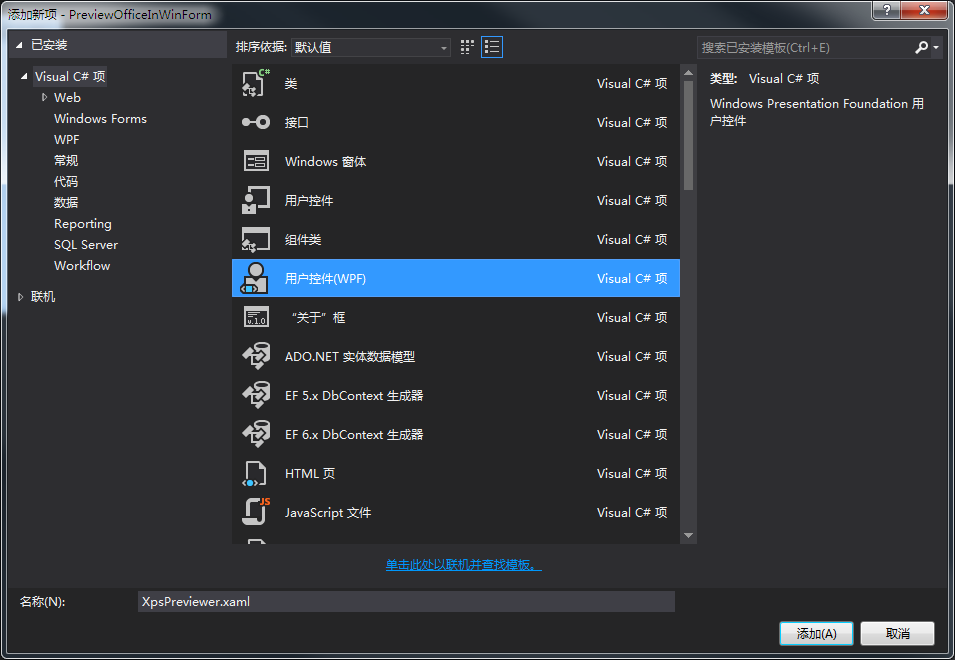
1. 新建WinForm项目
2. 新建WPF用户控件, 注意是WPF控件
3. 编辑WPF用户控件
<UserControl ...
       ...>
  <Grid>
    <DocumentViewer x:Name="documentViewer"/>
  </Grid>
</UserControl>
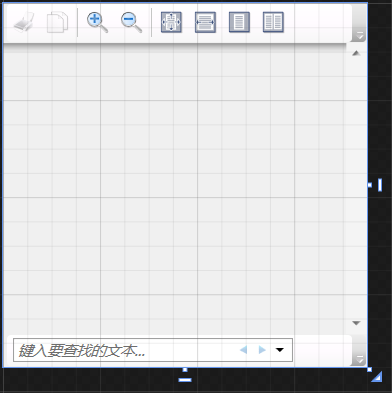
VS设计预览显示效果如下:
如果不需要自带的工具栏, 可以添加以下资源隐藏工具栏:
<!--隐藏DocumentViewer边框-->
<UserControl.Resources>
  <Style x:Key="{x:Type DocumentViewer}" TargetType="{x:Type DocumentViewer}">
    <Setter Property="Foreground" Value="{DynamicResource {x:Static SystemColors.WindowTextBrushKey}}" />
    <Setter Property="Background" Value="{DynamicResource {x:Static SystemColors.ControlBrushKey}}" />
    <Setter Property="FocusVisualStyle" Value="{x:Null}" />
    <Setter Property="Template">
      <Setter.Value>
        <ControlTemplate TargetType="{x:Type DocumentViewer}">
          <Border BorderThickness="{TemplateBinding BorderThickness}" BorderBrush="{TemplateBinding BorderBrush}" Focusable="False">
            <Grid KeyboardNavigation.TabNavigation="Local">
              <Grid.Background>
                <SolidColorBrush Color="{DynamicResource ControlLightColor}" />
              </Grid.Background>
              <Grid.RowDefinitions>
                <RowDefinition Height="Auto" />
                <RowDefinition Height="*" />
                <RowDefinition Height="Auto" />
              </Grid.RowDefinitions>
              <ScrollViewer Grid.Row="1" CanContentScroll="true" HorizontalScrollBarVisibility="Auto" x:Name="PART_ContentHost" IsTabStop="true">
                <ScrollViewer.Background>
                  <LinearGradientBrush EndPoint="0.5,1" StartPoint="0.5,0">
                    <GradientStop Color="{DynamicResource ControlLightColor}" Offset="0" />
                    <GradientStop Color="{DynamicResource ControlMediumColor}" Offset="1" />
                  </LinearGradientBrush>
                </ScrollViewer.Background>
              </ScrollViewer>
            </Grid>
          </Border>
        </ControlTemplate>
      </Setter.Value>
    </Setter>
  </Style>
</UserControl.Resources>
4. 新建WinForm用户控件
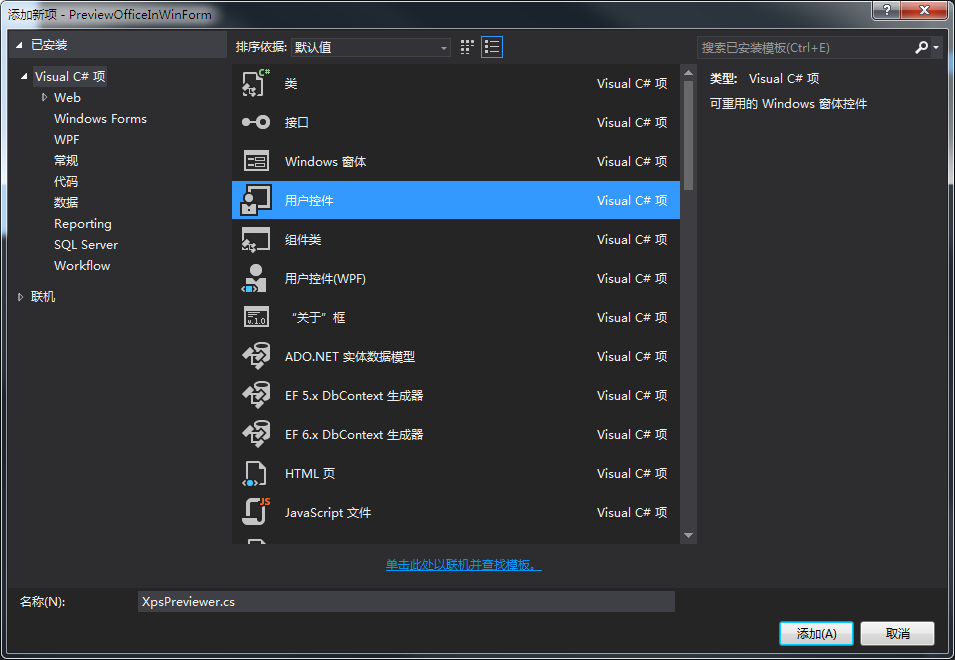
在WinForm上添加ElementHost

将WPF用户控件添加到ElementHost上,设计器代码XpsPreviewer.Designer.cs如下
  //ElementHost
  private System.Windows.Forms.Integration.ElementHost elementHost1;
  //XpsPreviewer变量
  private WPF.XpsPreviewer xpsPreviewer1;

  private void InitializeComponent()
  {
    this.elementHost1 = new System.Windows.Forms.Integration.ElementHost();
    this.xpsPreviewer1 = new WPF.XpsPreviewer();

    //初始化
    //其他属性初始化...
    this.elementHost1.Child = this.xpsPreviewer1;
    //其他属性初始化...
  }
在XpsPreviewer.cs后台代码中定义方法:
  /// <summary>
  /// 加载XPS文件
  /// </summary>
  /// <param name="fileName">XPS文件名</param>
  internal void LoadXps(string fileName)
  {
    var xpsDocument = new XpsDocument(fileName, FileAccess.Read);
    this.xpsPreviewer1.documentViewer.Document = xpsDocument.GetFixedDocumentSequence();
    xpsDocument.Close();
  }
5. 将Excel(Word类似)转换为XPS文件
通过Nuget包管理控制台安装COM组件:
PM> Install-Package Microsoft.Office.Interop.Excel
转换为XPS:
  /// <summary>
  /// 将Excel文件转换为XPS文件
  /// </summary>
  /// <param name="execelFileName">Excel文件名</param>
  /// <param name="xpsFileName">转换的xps文件名</param>
  public void ConvertExcelToXps(string excelFileName, string xpsFileName)
  {
    if (string.IsNullOrWhiteSpace(excelFileName))
      throw new ArgumentNullException(excelFileName);
    if (string.IsNullOrWhiteSpace(xpsFileName))
      throw new ArgumentNullException(xpsFileName);

    var fileInfo = new FileInfo(xpsFileName);
    if (!fileInfo.Directory.Exists)
      fileInfo.Directory.Create();

    //删除已存在的文件
    if (File.Exists(xpsFileName))
      File.Delete(xpsFileName);

    Excel.Application app = new Excel.Application();
    app.DisplayAlerts = false;
    Excel.Workbooks wbs;
    Excel.Workbook wb;

    wbs = app.Workbooks;
    wb = wbs.Add(excelFileName);
    dynamic Nothing = System.Reflection.Missing.Value;
    wb.ExportAsFixedFormat(Excel.XlFixedFormatType.xlTypeXPS, xpsFileName, Nothing, Nothing, Nothing, Nothing, Nothing, Nothing, Nothing);
    wb.Close(true);
    wbs.Close();
    app.Quit();
    KillExcelProcess(app);
  }
扩展: 每次调用Excel打开文件,均会产生一个进程, 在网络上收集的释放Excel进程方式均不起作用. 因此选择直接结束进程, 根据Excel句柄结束进程, 而不是根据进程名称杀死全部正在运行的Excel.
  [DllImport("User32.dll")]
  private static extern int GetWindowThreadProcessId(IntPtr hWnd, out int ProcessId);

  /// <summary>
  /// 结束Excel进程
  /// </summary>
  /// <param name="obj"></param>
  private void KillExcelProcess(Excel.Application app)
  {
    if (app == null)
      return;
    try
    {
      IntPtr intptr = new IntPtr(app.Hwnd);
      int id;
      GetWindowThreadProcessId(intptr, out id);
      var p = Process.GetProcessById(id);
      p.Kill();
    }
    catch { }
  }
现在已经可以正常的预览Excel文件了. 由于Excel另存为XPS文件会耗费一定的时间, 因此建议在后台线程中提前异步生成, 在预览时可直接调取XPS文件.
以上就是本文的全部内容,希望对大家的学习有所帮助,也希望大家多多支持猪先飞。
相关文章
- 本篇文章是对C#中WinForm控件之Dock顺序调整进行了详细的分析介绍,需要的朋友参考下...2020-06-25
- 这篇文章主要介绍了C# Winform中实现主窗口打开登录窗口关闭的方法,这在需要用户名密码的软件项目中是必用的一个技巧,要的朋友可以参考下...2020-06-25
- 下面小编就为大家带来一篇C# winform打开Excel文档的方法总结(必看篇)。小编觉得挺不错的,现在就分享给大家,也给大家做个参考。一起跟随小编过来看看吧...2020-06-25
- 这篇文章主要给大家介绍C# winform快捷键设置技巧,涉及到C winform快捷键相关知识,对C winform知识感兴趣的朋友可以参考下本篇文章...2020-06-25
c#中Winform实现多线程异步更新UI(进度及状态信息)
本篇文章主要介绍了c#中Winform实现多线程异步更新UI(进度及状态信息) ,小编觉得挺不错的,现在分享给大家,也给大家做个参考。一起跟随小编过来看看吧...2020-06-25- 这篇文章主要给大家介绍了关于c# winform异步不卡界面的实现方法,文中通过示例代码介绍的非常详细,对大家学习或者使用c#具有一定的参考学习价值,需要的朋友们下面来一起学习学习吧...2020-06-25
C# WinForm程序处理后台繁忙导致前台控件假死现象解决方法
这篇文章主要介绍了C# WinForm程序处理后台繁忙导致前台控件假死现象解决方法,本文通过Application.DoEvents()解决这个问题,并讲解了Application.DoEvents()的作用,需要的朋友可以参考下...2020-06-25- 这篇文章主要介绍了C#中winform使用相对路径读取文件的方法,实例分析了C#使用相对路径读取文件的技巧与实际应用,需要的朋友可以参考下...2020-06-25
winform中的ListBox和ComboBox绑定数据用法实例
这篇文章主要介绍了winform中的ListBox和ComboBox绑定数据用法,实例分析了将集合数据绑定到ListBox和ComboBox控件的技巧,具有一定参考借鉴价值,需要的朋友可以参考下...2020-06-25- 这篇文章主要介绍了C#在Winform开发中使用Grid++报表,文中通过示例代码介绍的非常详细,对大家的学习或者工作具有一定的参考学习价值,需要的朋友们下面随着小编来一起学习学习吧...2020-06-25
- 这篇文章主要为大家详细介绍了C# WinForm程序设计简单计算器,具有一定的参考价值,感兴趣的小伙伴们可以参考一下...2020-06-25
C# WinForm控件对透明图片重叠时出现图片不透明的简单解决方法
这篇文章主要介绍了C# WinForm控件对透明图片重叠时出现图片不透明的简单解决方法,结合实例形式分析了WinForm图片重叠后造成图片不透明的原因与相应的解决方法,需要的朋友可以参考下...2020-06-25- 在工作中遇到这样一个问题,在系统使用过程中,输入法会变灰导致无法使用输入法输入文字,就好像输入法被禁用了没有启用似的。对此,在这里做个备录...2020-06-25
- 这篇文章主要介绍了C#实现Winform中打开网页页面的方法,涉及WinForm中WebBrowser的相关使用技巧,具有一定参考借鉴价值,需要的朋友可以参考下...2020-06-25
C#实现winform中RichTextBox在指定光标位置插入图片的方法
这篇文章主要介绍了C#实现winform中RichTextBox在指定光标位置插入图片的方法,涉及RichTextBox控件及剪切板的相关操作技巧,非常简单实用,需要的朋友可以参考下...2020-06-25C# Winform 调用系统接口操作 INI 配置文件的代码
封装了一小段代码, 调用系统接口, 操作配置文件. 一般用于 .ini 文件, 或者其它键值对格式的配置文件...2020-06-25- 这篇文章主要介绍了WinForm调用百度地图接口用法,结合具体实例形式简单分析了WinForm WebBrower控件与前端百度接口交互的相关操作技巧,需要的朋友可以参考下...2020-06-25
- 在.NET应用中,导出Excel是很常见的需求,导出Excel报表大致有以下三种方式:Office PIA,文件流和NPOI开源库,本文只介绍前两种方式...2020-06-25
- 这篇文章主要介绍了C# WinForm中禁止改变窗口大小的方法,需要把FormBorderStyle和MaximizeBox的值固定即可,需要的朋友可以参考下...2020-06-25
- 这篇文章主要介绍了C# inForm编程获取文件物理路径的方法,获取的物理路径是软件即软件安装所在目录,需要的朋友可以参考下...2020-06-25