android自定义环形统计图动画
更新时间:2020年7月16日 21:10 点击:1433
本文实例为大家分享了android自定义环形统计图动画的具体代码,供大家参考,具体内容如下
一、测试截图
二、实现原理
package com.freedomanlib;
import java.util.Timer;
import java.util.TimerTask;
import android.annotation.SuppressLint;
import android.content.Context;
import android.graphics.Canvas;
import android.graphics.Color;
import android.graphics.Paint;
import android.graphics.RectF;
import android.graphics.Typeface;
import android.util.AttributeSet;
import android.util.Log;
import android.view.MotionEvent;
import android.view.View;
/**
* @name 自定义车辆数据统计比重环
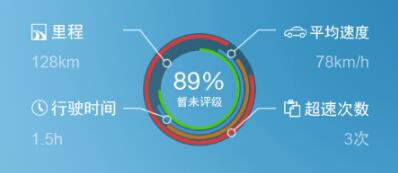
* 1、比重环由底环(灰色)、里程环(红色)、平均速度环(黄色)、行驶时间环(蓝色)、超速次数环(绿色)、环中间评级、指示器组成
* ,其中四个数据统计环和底环是同心圆、圆心处有评分文本,圆环外是四个统计指示器。<br>
* 2、四个统计环是四个弧线,弧度由外界提供数据,并动态显示在界面上。<br>
* 3、评分等级分为三种:未评分、正在评分、评分完成,当用户点击中间区域时开启评分,评分结束自动停止。<br>
* 4、外侧对应的四个指示器上结构上包括:指示器位置的小圆圈、折线连接线、指示文本、文本数据显示具体的数值。<br>
*
* @author Freedoman
* @date 2014-10-27
*/
public class CirStatisticGraph extends View {
private static final String TAG = "CirStatisticGraph";
/**
* @name CenterPoint
* @Descripation 中心点<br>
*/
class CenterPoint {
float x;
float y;
}
/**
* 边界宽高、中心坐标、外环和内环半径
*/
private float boundsWidth;
private float boundsHeigh;
private CenterPoint centerPoint = new CenterPoint();
private float radius;
private float paintWidth;
private float genPaintWidth;
/**
* 几种不同的画笔
*/
private Paint defaultPaint;
private Paint genPaint;
private Paint progressTextPaint;
private Paint flagPaint;
/**
* 进度
*/
private int curProgress;
private int targetProgress = 88;
private boolean complete;
private int mileage = 128;
private int averageSpeed = 78;
private float goTime = 1.5f;
private int overSpeedCount = 3;
/**
* 构造
*
* @param context
*/
public CirStatisticGraph(Context context) {
this(context, null);
}
public CirStatisticGraph(Context context, AttributeSet attrs) {
super(context, attrs, 0);
}
public CirStatisticGraph(Context context, AttributeSet attrs, int defStyle) {
super(context, attrs, defStyle);
this.initialize();
}
/**
* 初始化
*/
private void initialize() {
// 底环画笔
defaultPaint = new Paint();
defaultPaint.setColor(Color.argb(0xEE, 0x8E, 0x8E, 0x8E));
defaultPaint.setStyle(Paint.Style.STROKE);
defaultPaint.setStrokeWidth(paintWidth);
defaultPaint.setAntiAlias(true);
// 比重环画笔
genPaint = new Paint();
genPaint.setStyle(Paint.Style.STROKE);
genPaint.setStrokeWidth(genPaintWidth);
genPaint.setAntiAlias(true);
// 中心进度文本和评级画笔
progressTextPaint = new Paint();
progressTextPaint.setColor(Color.WHITE);
progressTextPaint.setStyle(Paint.Style.STROKE);
progressTextPaint.setStrokeWidth(0);
progressTextPaint.setTypeface(Typeface.DEFAULT_BOLD);
// 指示器画笔
flagPaint = new Paint();
flagPaint.setColor(Color.WHITE);
flagPaint.setStyle(Paint.Style.STROKE);
flagPaint.setStrokeWidth(3);
flagPaint.setAntiAlias(true);
}
@Override
protected void onMeasure(int widthMeasureSpec, int heightMeasureSpec) {
super.onMeasure(widthMeasureSpec, heightMeasureSpec);
// 绘制区域的宽高
boundsWidth = getWidth();
boundsHeigh = getHeight();
centerPoint.x = boundsWidth / 2;
centerPoint.y = boundsHeigh / 2;
radius = boundsHeigh * 1 / 3;
paintWidth = 50;
genPaintWidth = paintWidth / 7;
initialize();
}
/**
* 启动进度动画
*/
public void start() {
curProgress = 0;
if (targetProgress == 0) {
targetProgress = 88;
}
final Timer timer = new Timer();
TimerTask timerTask = new TimerTask() {
@Override
public void run() {
curProgress++;
if (curProgress == targetProgress) {
timer.cancel();
}
postInvalidate();
}
};
timer.schedule(timerTask, 0, 20);
}
@SuppressLint("DrawAllocation")
@Override
public void onDraw(Canvas canvas) {
super.onDraw(canvas);
// 底环(灰色)
canvas.drawCircle(centerPoint.x, centerPoint.y, radius, defaultPaint);
// 很重要的一个半径(最外层环即里程环的半径)
float sroundRadius = radius + paintWidth / 2 - genPaintWidth / 2;
// 里程比重环(红色)
genPaint.setColor(Color.argb(0xEE, 0xFF, 0x35, 0x9A));
RectF oval1 = new RectF(centerPoint.x - sroundRadius, centerPoint.y
- sroundRadius, centerPoint.x + sroundRadius, centerPoint.y
+ sroundRadius);
canvas.drawArc(oval1, -90, 300, false, genPaint);
// 里程比重环的指示器位置(勾股定理计算坐标)
float temp = sroundRadius;
float relativePoint = (float) Math.sqrt(temp * temp / 2);
canvas.drawCircle(centerPoint.x - relativePoint, centerPoint.y
- relativePoint, radius / 12, flagPaint);
// 连线
float[] pts1 = new float[8];
pts1[0] = centerPoint.x - relativePoint - radius / 24;
pts1[1] = centerPoint.y - relativePoint - radius / 24;
pts1[2] = centerPoint.x - relativePoint - 80;
pts1[3] = centerPoint.y - relativePoint - 40;
pts1[4] = pts1[2];
pts1[5] = pts1[3];
pts1[6] = pts1[4] - 50;
pts1[7] = pts1[5];
canvas.drawLines(pts1, flagPaint);
// 文本
progressTextPaint.setTextSize(30);
String txt = "里程";
float wt = progressTextPaint.measureText(txt);
canvas.drawText(txt, pts1[6] - wt - 10, pts1[7] + 15, progressTextPaint);
if (complete) {
canvas.drawText(mileage + "km", pts1[6] - wt - 10, pts1[7] + 50,
progressTextPaint);
}
// 平均速度环(黄色)
genPaint.setColor(Color.argb(0xEE, 0xF7, 0x50, 0x00));
RectF oval2 = new RectF(centerPoint.x - sroundRadius + 2
* genPaintWidth, centerPoint.y - sroundRadius + 2
* genPaintWidth, centerPoint.x + sroundRadius - 2
* genPaintWidth, centerPoint.y + sroundRadius - 2
* genPaintWidth);
canvas.drawArc(oval2, 0, 280, false, genPaint);
// 平均速度环的指示器位置
temp = sroundRadius - 2 * genPaintWidth;
relativePoint = (float) Math.sqrt(temp * temp / 2);
canvas.drawCircle(centerPoint.x + relativePoint, centerPoint.y
- relativePoint, radius / 12, flagPaint);
// 连接线
pts1 = new float[8];
pts1[0] = centerPoint.x + relativePoint + radius / 24;
pts1[1] = centerPoint.y - relativePoint - radius / 24;
pts1[2] = centerPoint.x + relativePoint + 80;
pts1[3] = centerPoint.y - relativePoint - 40;
pts1[4] = pts1[2];
pts1[5] = pts1[3];
pts1[6] = pts1[4] + 50;
pts1[7] = pts1[5];
canvas.drawLines(pts1, flagPaint);
// 文本
txt = "平均速度";
wt = progressTextPaint.measureText(txt);
canvas.drawText(txt, pts1[6] + 10, pts1[7] + 15, progressTextPaint);
if (complete) {
canvas.drawText(averageSpeed + "km/h", pts1[6] + 10, pts1[7] + 50,
progressTextPaint);
}
// 行驶时间环(蓝色)和指示
genPaint.setColor(Color.argb(0xEE, 0x00, 0x72, 0xE3));
RectF oval3 = new RectF(centerPoint.x - sroundRadius + 4
* genPaintWidth, centerPoint.y - sroundRadius + 4
* genPaintWidth, centerPoint.x + sroundRadius - 4
* genPaintWidth, centerPoint.y + sroundRadius - 4
* genPaintWidth);
canvas.drawArc(oval3, 90, 270, false, genPaint);
// 行驶时间环指示器的位置
temp = sroundRadius - 4 * genPaintWidth;
relativePoint = (float) Math.sqrt(temp * temp / 2);
canvas.drawCircle(centerPoint.x - relativePoint, centerPoint.y
+ relativePoint, radius / 12, flagPaint);
// 连接线和文本
pts1 = new float[8];
pts1[0] = centerPoint.x - relativePoint - radius / 24;
pts1[1] = centerPoint.y + relativePoint + radius / 24;
pts1[2] = centerPoint.x - relativePoint - 80;
pts1[3] = centerPoint.y + relativePoint + 40;
pts1[4] = pts1[2];
pts1[5] = pts1[3];
pts1[6] = pts1[4] - 50;
pts1[7] = pts1[5];
canvas.drawLines(pts1, flagPaint);
txt = "行驶时间";
wt = progressTextPaint.measureText(txt);
canvas.drawText(txt, pts1[6] - wt - 10, pts1[7] + 15, progressTextPaint);
if (complete) {
canvas.drawText(goTime + "h", pts1[6] - wt - 10, pts1[7] - 20,
progressTextPaint);
}
// 超速次数环(绿色)
genPaint.setColor(Color.argb(0xEE, 0x00, 0xEC, 0x00));
RectF oval4 = new RectF(centerPoint.x - sroundRadius + 6
* genPaintWidth, centerPoint.y - sroundRadius + 6
* genPaintWidth, centerPoint.x + sroundRadius - 6
* genPaintWidth, centerPoint.y + sroundRadius - 6
* genPaintWidth);
canvas.drawArc(oval4, 0, 290, false, genPaint);
// 超速次数环指示器的位置
temp = sroundRadius - 6 * genPaintWidth;
relativePoint = (float) Math.sqrt(temp * temp / 2);
canvas.drawCircle(centerPoint.x + relativePoint, centerPoint.y
+ relativePoint, radius / 12, flagPaint);
// 连接线
pts1 = new float[8];
pts1[0] = centerPoint.x + relativePoint + radius / 24;
pts1[1] = centerPoint.y + relativePoint + radius / 24;
pts1[2] = centerPoint.x + relativePoint + 80;
pts1[3] = centerPoint.y + relativePoint + 40;
pts1[4] = pts1[2];
pts1[5] = pts1[3];
pts1[6] = pts1[4] + 50;
pts1[7] = pts1[5];
canvas.drawLines(pts1, flagPaint);
// 文本
txt = "超速次数";
wt = progressTextPaint.measureText(txt);
canvas.drawText(txt, pts1[6] + 10, pts1[7] + 15, progressTextPaint);
if (complete) {
canvas.drawText(overSpeedCount + "次", pts1[6] + 10, pts1[7] - 20,
progressTextPaint);
}
// 环中心进度文本(动态迭加的)
int curPercent = curProgress;
progressTextPaint.setTextSize(60);
float ww = progressTextPaint.measureText(curPercent + "%");
canvas.drawText(curPercent + "%", centerPoint.x - ww / 2,
centerPoint.y, progressTextPaint);
// 评级提示
progressTextPaint.setTextSize(25);
float w = 0;
String text = "";
if (curPercent == 0) {
// 暂未评级
text = "暂未评级";
w = progressTextPaint.measureText(text);
complete = false;
} else if (curPercent < targetProgress) {
// 评级中...
text = "评级中...";
w = progressTextPaint.measureText(text);
} else if (curPercent == targetProgress) {
// 评级完成
text = "评级完成";
w = progressTextPaint.measureText(text);
complete = true;
postInvalidate();
}
canvas.drawText(text, centerPoint.x - w / 2, centerPoint.y + 40,
progressTextPaint);
}
/**
* 点击评分区域,进行评分
*
* @param event
* @return
*/
@Override
public boolean onTouchEvent(MotionEvent event) {
float x = event.getX();
float y = event.getY();
if (x > centerPoint.x - radius && x < centerPoint.x + radius
&& y > centerPoint.y - radius && y < centerPoint.y + radius) {
Log.i(TAG, ">>>");
start();
}
return super.onTouchEvent(event);
}
}
以上就是本文的全部内容,希望对大家的学习有所帮助,也希望大家多多支持猪先飞。
上一篇: Android实现强制下线功能的示例代码
下一篇: android自定义等级评分圆形进度条
相关文章
- 下面我们来看一篇关于Android子控件超出父控件的范围显示出来方法,希望这篇文章能够帮助到各位朋友,有碰到此问题的朋友可以进来看看哦。 <RelativeLayout xmlns:an...2016-10-02
Android开发中findViewById()函数用法与简化
findViewById方法在android开发中是获取页面控件的值了,有没有发现我们一个页面控件多了会反复研究写findViewById呢,下面我们一起来看它的简化方法。 Android中Fin...2016-09-20- 如果我们的项目需要做来电及短信的功能,那么我们就得在Android模拟器开发这些功能,本来就来告诉我们如何在Android模拟器上模拟来电及来短信的功能。 在Android模拟...2016-09-20
- 夜神android模拟器如何设置代理呢?对于这个问题其实操作起来是非常的简单,下面小编来为各位详细介绍夜神android模拟器设置代理的方法,希望例子能够帮助到各位。 app...2016-09-20
- 为了增强android应用的用户体验,我们可以在一些Button按钮上自定义动态的设置一些样式,比如交互时改变字体、颜色、背景图等。 今天来看一个通过重写Button来动态实...2016-09-20
- 如果我们要在Android应用APP中加载html5页面,我们可以使用WebView,本文我们分享两个WebView加载html5页面实例应用。 实例一:WebView加载html5实现炫酷引导页面大多...2016-09-20
- 深入理解Android中View和ViewGroup从组成架构上看,似乎ViewGroup在View之上,View需要继承ViewGroup,但实际上不是这样的。View是基类,ViewGroup是它的子类。本教程我们深...2016-09-20
- 下面我们来看一篇关于Android自定义WebView网络视频播放控件开发例子,这个文章写得非常的不错下面给各位共享一下吧。 因为业务需要,以下代码均以Youtube网站在线视...2016-10-02
- java开发的Android应用,性能一直是一个大问题,,或许是Java语言本身比较消耗内存。本文我们来谈谈Android 性能优化之MemoryFile文件读写。 Android匿名共享内存对外A...2016-09-20
- TextView默认是横着显示了,今天我们一起来看看Android设置TextView竖着显示如何来实现吧,今天我们就一起来看看操作细节,具体的如下所示。 在开发Android程序的时候,...2016-10-02
android.os.BinderProxy cannot be cast to com解决办法
本文章来给大家介绍关于android.os.BinderProxy cannot be cast to com解决办法,希望此文章对各位有帮助呀。 Android在绑定服务的时候出现java.lang.ClassCastExc...2016-09-20- 这篇文章主要介绍了Android 实现钉钉自动打卡功能的步骤,帮助大家更好的理解和学习使用Android,感兴趣的朋友可以了解下...2021-03-15
- 下面我们来看一篇关于Android 开发之布局细节对比:RTL模式 ,希望这篇文章对各位同学会带来帮助,具体的细节如下介绍。 前言 讲真,好久没写博客了,2016都过了一半了,赶紧...2016-10-02
- 首先如果要在程序中使用sdcard进行存储,我们必须要在AndroidManifset.xml文件进行下面的权限设置: 在AndroidManifest.xml中加入访问SDCard的权限如下: <!--...2016-09-20
- 下面来给各位简单的介绍一下关于Android开发之PhoneGap打包及错误解决办法,希望碰到此类问题的同学可进入参考一下哦。 在我安装、配置好PhoneGap项目的所有依赖...2016-09-20
用Intel HAXM给Android模拟器Emulator加速
Android 模拟器 Emulator 速度真心不给力,, 现在我们来介绍使用 Intel HAXM 技术为 Android 模拟器加速,使模拟器运行度与真机比肩。 周末试玩了一下在Eclipse中使...2016-09-20- 在安卓开发时我碰到一个问题就是需要实现全屏,但又需要我们来判断出用户是使用了全屏或非全屏了,下面我分别找了两段代码,大家可参考。 先来看一个android屏幕全屏实...2016-09-20
Android开发中布局中的onClick简单完成多控件时的监听的利与弊
本文章来为各位介绍一篇关于Android开发中布局中的onClick简单完成多控件时的监听的利与弊的例子,希望这个例子能够帮助到各位朋友. 首先在一个控件加上这么一句:and...2016-09-20Ubuntu 系统下安装Android开发环境 Android Studio 1.0 步骤
Android Studio 是一个Android开发环境,基于IntelliJ IDEA. 类似 Eclipse ADT,Android Studio 提供了集成的 Android 开发工具用于开发和调试,可以在Linux,Mac OS X,Window...2016-09-20- 这篇文章主要为大家详细介绍了Android实现简单用户注册案例,文中示例代码介绍的非常详细,具有一定的参考价值,感兴趣的小伙伴们可以参考一下...2020-05-26