安卓开发之ListView(HorizontalListView)横向动态加载数据例子
这个自定义的控件可以实现横向的动态数据加载,话不多说,下面上代码。(使用方法和普通listview一致)
1、在布局里用HorizontalScrollView包含一个ListView;
2、利用GridView,把它的行数设为1行;
HorizontalListView.java:
package cn.zmit.xianneng.widget;
import java.util.LinkedList;
import java.util.Queue;
import android.content.Context;
import android.database.DataSetObserver;
import android.graphics.Rect;
import android.util.AttributeSet;
import android.view.GestureDetector;
import android.view.GestureDetector.OnGestureListener;
import android.view.MotionEvent;
import android.view.View;
import android.widget.AdapterView;
import android.widget.ListAdapter;
import android.widget.Scroller;
public class HorizontalListView extends AdapterView<ListAdapter> {
public boolean mAlwaysOverrideTouch = true;
protected ListAdapter mAdapter;
private int mLeftViewIndex = -1;
private int mRightViewIndex = 0;
protected int mCurrentX;
protected int mNextX;
private int mMaxX = Integer.MAX_VALUE;
private int mDisplayOffset = 0;
protected Scroller mScroller;
private GestureDetector mGesture;
private Queue<View> mRemovedViewQueue = new LinkedList<View>();
private OnItemSelectedListener mOnItemSelected;
private OnItemClickListener mOnItemClicked;
private OnItemLongClickListener mOnItemLongClicked;
private boolean mDataChanged = false;
public HorizontalListView(Context context, AttributeSet attrs) {
super(context, attrs);
initView();
}
private synchronized void initView() {
mLeftViewIndex = -1;
mRightViewIndex = 0;
mDisplayOffset = 0;
mCurrentX = 0;
mNextX = 0;
mMaxX = Integer.MAX_VALUE;
mScroller = new Scroller(getContext());
mGesture = new GestureDetector(getContext(), mOnGesture);
}
@Override
public void setOnItemSelectedListener(AdapterView.OnItemSelectedListener listener) {
mOnItemSelected = listener;
}
@Override
public void setOnItemClickListener(AdapterView.OnItemClickListener listener){
mOnItemClicked = listener;
}
@Override
public void setOnItemLongClickListener(AdapterView.OnItemLongClickListener listener) {
mOnItemLongClicked = listener;
}
private DataSetObserver mDataObserver = new DataSetObserver() {
@Override
public void onChanged() {
synchronized(HorizontalListView.this){
mDataChanged = true;
}
invalidate();
requestLayout();
}
@Override
public void onInvalidated() {
reset();
invalidate();
requestLayout();
}
};
@Override
public ListAdapter getAdapter() {
return mAdapter;
}
@Override
public View getSelectedView() {
//TODO: implement
return null;
}
@Override
public void setAdapter(ListAdapter adapter) {
if(mAdapter != null) {
mAdapter.unregisterDataSetObserver(mDataObserver);
}
mAdapter = adapter;
mAdapter.registerDataSetObserver(mDataObserver);
reset();
}
private synchronized void reset(){
initView();
removeAllViewsInLayout();
requestLayout();
}
@Override
public void setSelection(int position) {
//TODO: implement
}
private void addAndMeasureChild(final View child, int viewPos) {
LayoutParams params = child.getLayoutParams();
if(params == null) {
params = new LayoutParams(LayoutParams.FILL_PARENT, LayoutParams.FILL_PARENT);
}
addViewInLayout(child, viewPos, params, true);
child.measure(MeasureSpec.makeMeasureSpec(getWidth(), MeasureSpec.AT_MOST),
MeasureSpec.makeMeasureSpec(getHeight(), MeasureSpec.AT_MOST));
}
@Override
protected synchronized void onLayout(boolean changed, int left, int top, int right, int bottom) {
super.onLayout(changed, left, top, right, bottom);
if(mAdapter == null){
return;
}
if(mDataChanged){
int oldCurrentX = mCurrentX;
initView();
removeAllViewsInLayout();
mNextX = oldCurrentX;
mDataChanged = false;
}
if(mScroller.computeScrollOffset()){
int scrollx = mScroller.getCurrX();
mNextX = scrollx;
}
if(mNextX <= 0){
mNextX = 0;
mScroller.forceFinished(true);
}
if(mNextX >= mMaxX) {
mNextX = mMaxX;
mScroller.forceFinished(true);
}
int dx = mCurrentX – mNextX;
removeNonVisibleItems(dx);
fillList(dx);
positionItems(dx);
mCurrentX = mNextX;
if(!mScroller.isFinished()){
post(new Runnable(){
@Override
public void run() {
requestLayout();
}
});
}
}
private void fillList(final int dx) {
int edge = 0;
View child = getChildAt(getChildCount()-1);
if(child != null) {
edge = child.getRight();
}
fillListRight(edge, dx);
edge = 0;
child = getChildAt(0);
if(child != null) {
edge = child.getLeft();
}
fillListLeft(edge, dx);
}
private void fillListRight(int rightEdge, final int dx) {
while(rightEdge + dx < getWidth() && mRightViewIndex < mAdapter.getCount()) {
View child = mAdapter.getView(mRightViewIndex, mRemovedViewQueue.poll(), this);
addAndMeasureChild(child, -1);
rightEdge += child.getMeasuredWidth();
if(mRightViewIndex == mAdapter.getCount()-1) {
mMaxX = mCurrentX + rightEdge – getWidth();
}
if (mMaxX < 0) {
mMaxX = 0;
}
mRightViewIndex++;
}
}
private void fillListLeft(int leftEdge, final int dx) {
while(leftEdge + dx > 0 && mLeftViewIndex >= 0) {
View child = mAdapter.getView(mLeftViewIndex, mRemovedViewQueue.poll(), this);
addAndMeasureChild(child, 0);
leftEdge -= child.getMeasuredWidth();
mLeftViewIndex–;
mDisplayOffset -= child.getMeasuredWidth();
}
}
private void removeNonVisibleItems(final int dx) {
View child = getChildAt(0);
while(child != null && child.getRight() + dx <= 0) {
mDisplayOffset += child.getMeasuredWidth();
mRemovedViewQueue.offer(child);
removeViewInLayout(child);
mLeftViewIndex++;
child = getChildAt(0);
}
child = getChildAt(getChildCount()-1);
while(child != null && child.getLeft() + dx >= getWidth()) {
mRemovedViewQueue.offer(child);
removeViewInLayout(child);
mRightViewIndex–;
child = getChildAt(getChildCount()-1);
}
}
private void positionItems(final int dx) {
if(getChildCount() > 0){
mDisplayOffset += dx;
int left = mDisplayOffset;
for(int i=0;i<getChildCount();i++){
View child = getChildAt(i);
int childWidth = child.getMeasuredWidth();
child.layout(left, 0, left + childWidth, child.getMeasuredHeight());
left += childWidth + child.getPaddingRight();
}
}
}
public synchronized void scrollTo(int x) {
mScroller.startScroll(mNextX, 0, x – mNextX, 0);
requestLayout();
}
@Override
public boolean dispatchTouchEvent(MotionEvent ev) {
boolean handled = super.dispatchTouchEvent(ev);
handled |= mGesture.onTouchEvent(ev);
return handled;
}
protected boolean onFling(MotionEvent e1, MotionEvent e2, float velocityX,
float velocityY) {
synchronized(HorizontalListView.this){
mScroller.fling(mNextX, 0, (int)-velocityX, 0, 0, mMaxX, 0, 0);
}
requestLayout();
return true;
}
protected boolean onDown(MotionEvent e) {
mScroller.forceFinished(true);
return true;
}
private OnGestureListener mOnGesture = new GestureDetector.SimpleOnGestureListener() {
@Override
public boolean onDown(MotionEvent e) {
return HorizontalListView.this.onDown(e);
}
@Override
public boolean onFling(MotionEvent e1, MotionEvent e2, float velocityX,
float velocityY) {
return HorizontalListView.this.onFling(e1, e2, velocityX, velocityY);
}
@Override
public boolean onScroll(MotionEvent e1, MotionEvent e2,
float distanceX, float distanceY) {
synchronized(HorizontalListView.this){
mNextX += (int)distanceX;
}
requestLayout();
return true;
}
@Override
public boolean onSingleTapConfirmed(MotionEvent e) {
for(int i=0;i<getChildCount();i++){
View child = getChildAt(i);
if (isEventWithinView(e, child)) {
if(mOnItemClicked != null){
mOnItemClicked.onItemClick(HorizontalListView.this, child, mLeftViewIndex + 1 + i, mAdapter.getItemId( mLeftViewIndex + 1 + i ));
}
if(mOnItemSelected != null){
mOnItemSelected.onItemSelected(HorizontalListView.this, child, mLeftViewIndex + 1 + i, mAdapter.getItemId( mLeftViewIndex + 1 + i ));
}
break;
}
}
return true;
}
@Override
public void onLongPress(MotionEvent e) {
int childCount = getChildCount();
for (int i = 0; i < childCount; i++) {
View child = getChildAt(i);
if (isEventWithinView(e, child)) {
if (mOnItemLongClicked != null) {
mOnItemLongClicked.onItemLongClick(HorizontalListView.this, child, mLeftViewIndex + 1 + i, mAdapter.getItemId(mLeftViewIndex + 1 + i));
}
break;
}
}
}
private boolean isEventWithinView(MotionEvent e, View child) {
Rect viewRect = new Rect();
int[] childPosition = new int[2];
child.getLocationOnScreen(childPosition);
int left = childPosition[0];
int right = left + child.getWidth();
int top = childPosition[1];
int bottom = top + child.getHeight();
viewRect.set(left, top, right, bottom);
return viewRect.contains((int) e.getRawX(), (int) e.getRawY());
}
};
}
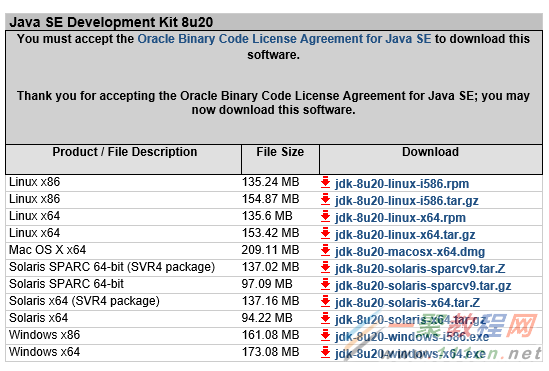
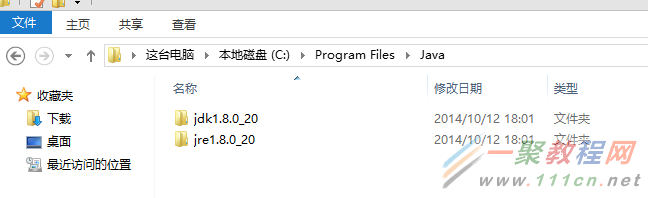
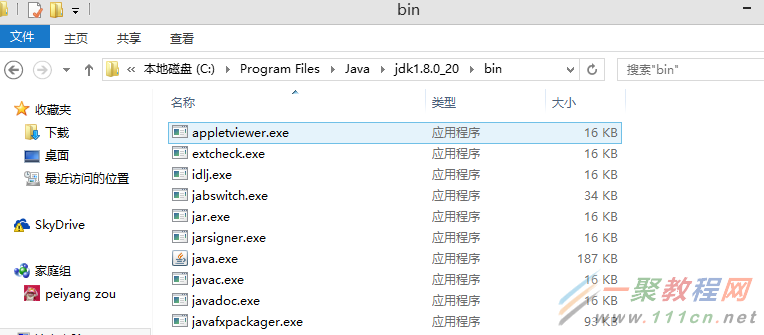
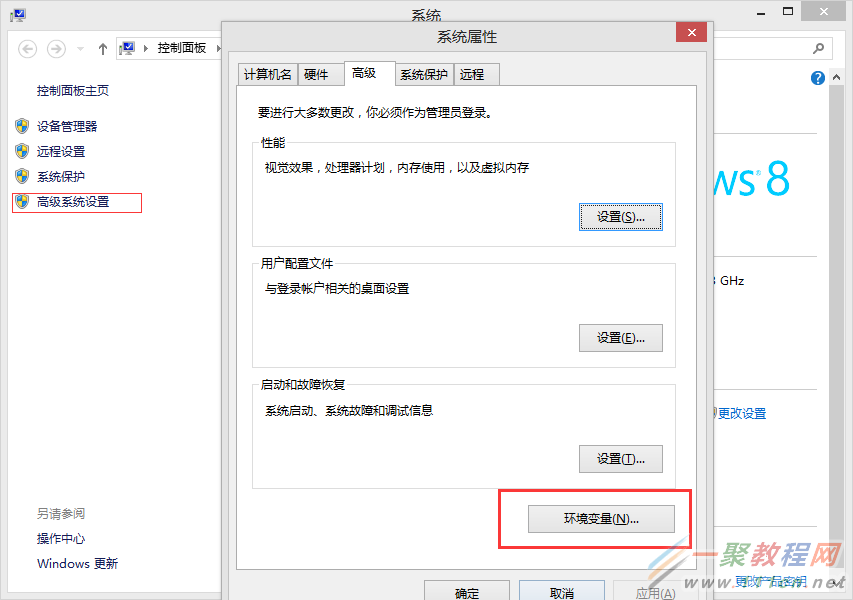
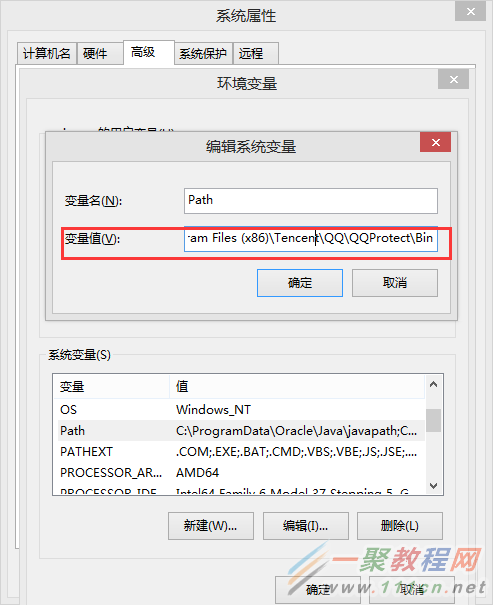
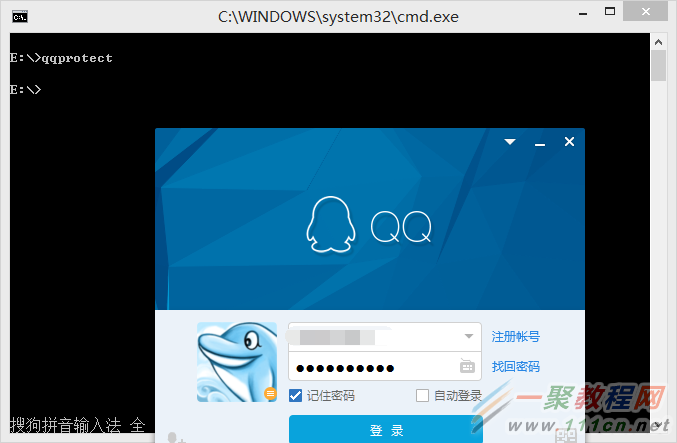
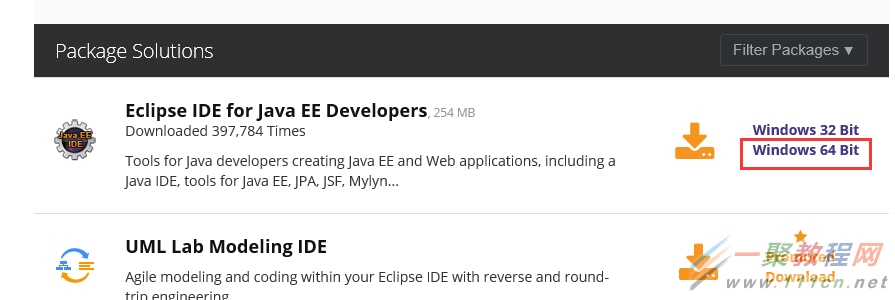
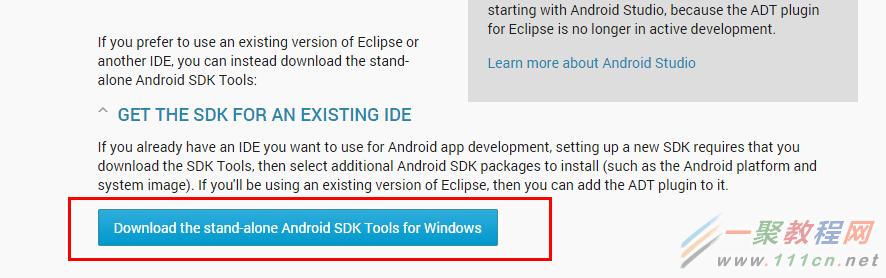
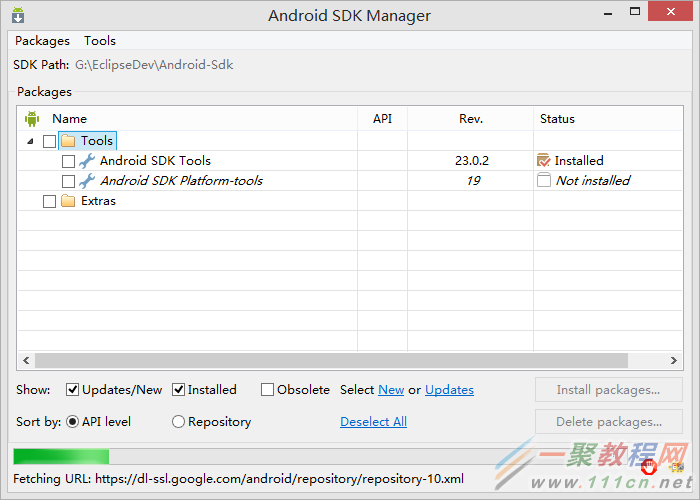
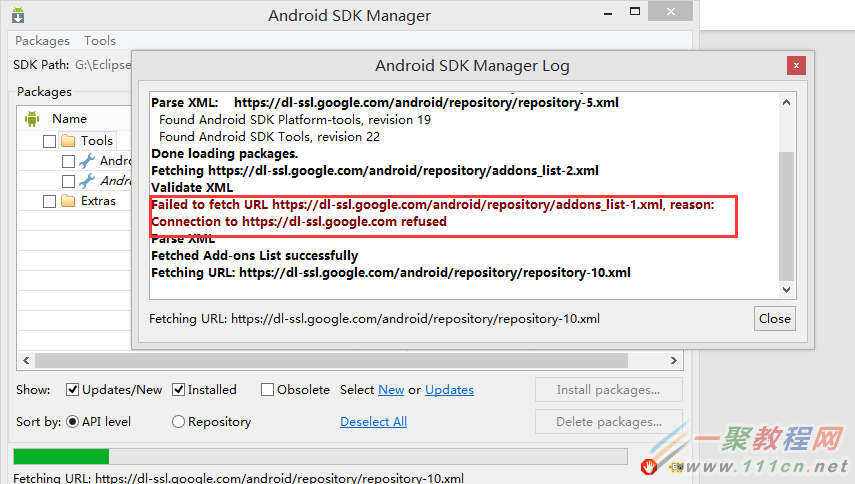
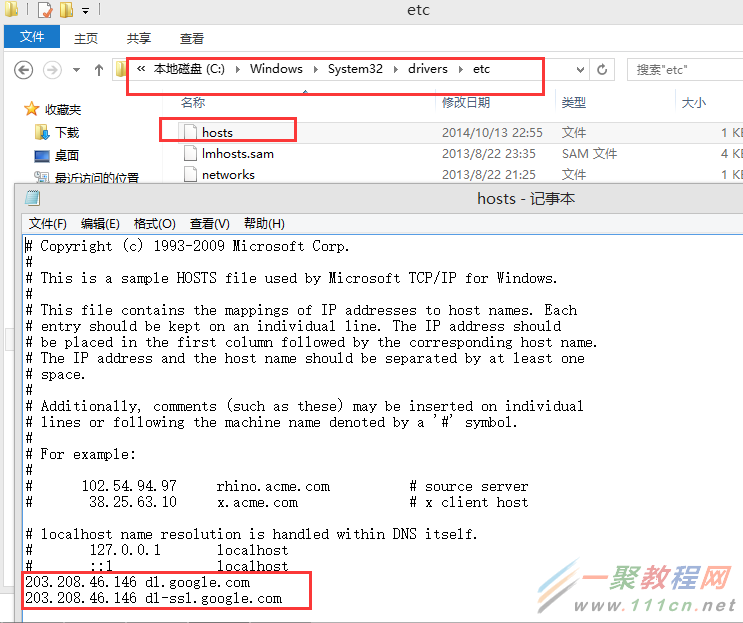
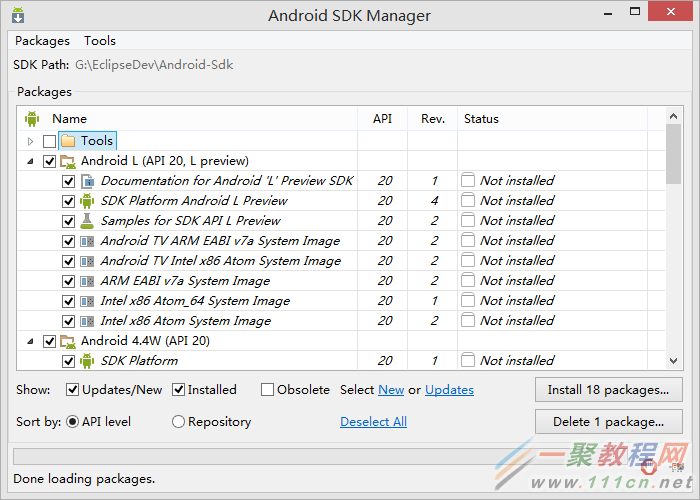
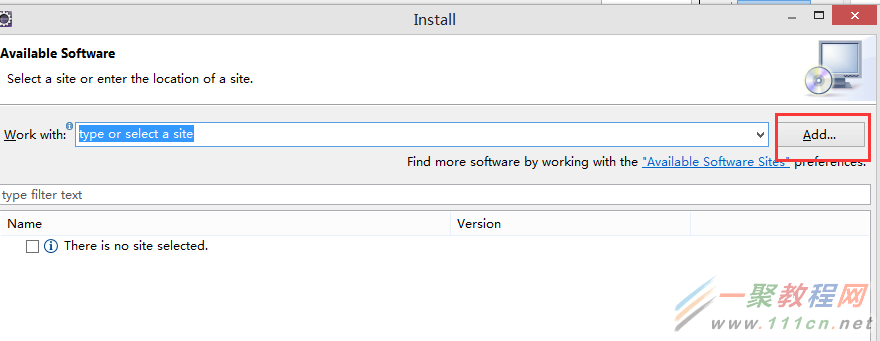
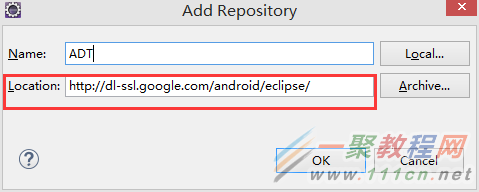
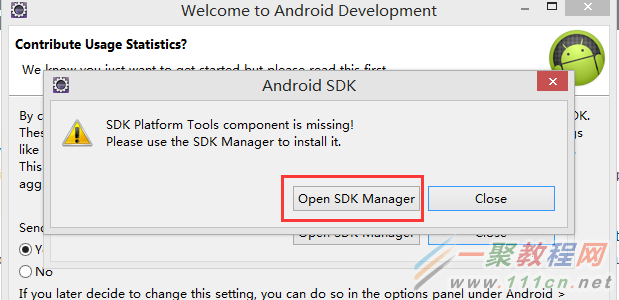
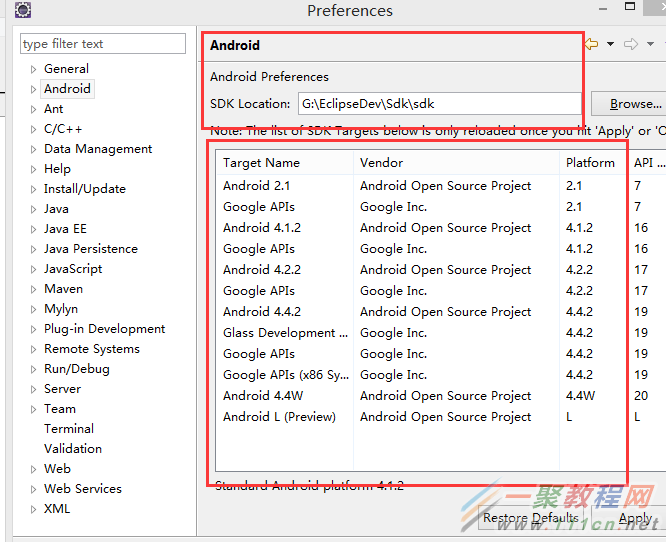
Eclipse编辑器是许多开发者会用到的一个编辑器了,我信下面来为各位介绍一篇关于Eclipse编辑器的安装操作步骤,具体如下所示。第一步:安装JDK


有时候我们在使用tableView 的时候不仅仅需要它能够上下滑动,而且还要做到左右滑动的效果.下面就介绍一种比较简单的实现方法.
zmitTableView = [[UITableView alloc] initWithFrame:CGRectMake(0 , 0, kScreenWidth, kScreenHeight)];
zmitTableView = [UIColor whiteColor];
secondTableView = [[UITableView alloc] initWithFrame:CGRectMake(0,100, kScreenWidth, kScreenHeight)];
secondTableViewTableView.backgroundColor = [UIColor whiteColor];
secondTableView.scrollEnabled = NO;
secondTableView.userInteractionEnabled = YES;
[zmitTableView addSubview:secondTableView];
[self.view addSubview: zmitTableView];
首先创建两个tableview ,然后给secondTableView加上拖动手势
UIPanGestureRecognizer *panGestureRecognize = [[UIPanGestureRecognizer alloc] initWithTarget:self action:@selector(handlePan:)];
-(void)handlePan:(UIPanGestureRecognizer *)sender
{
CGPoint translatin = [sender translationInView:secondTableView];
sender.view.center = CGPointMake(sender.view.center.x + translatin.x, sender.view.center.y);
[sender setTranslation:CGPointZero inView:self.YidaScrollView.scrollViewTableView];
}
这样的话就实现了第二个tableView的左右滑动效果,并且不影响第一个tableView的上下滑动.
本文章来为各位介绍一篇关于Android标准、固定和沉浸式状态栏的实现例子,希望这个例子能够帮助到各位更深入的理解Android标准、固定和沉浸式状态栏的用法。


沉浸很简单,两句代码搞定:
在Activity中的setContentView(R.layout.activity_main);之前加上:
if (Build.VERSION.SDK_INT >= Build.VERSION_CODES.KITKAT) {
// 透明状态栏
getWindow().addFlags(WindowManager.LayoutParams.FLAG_TRANSLUCENT_STATUS);
// 透明导航栏
getWindow().addFlags(WindowManager.LayoutParams.FLAG_TRANSLUCENT_NAVIGATION);
}
再说固定颜色的设置,需要一个依赖的java文件,先贴出来等会要用。还有一个要注意的地方,这种方式需要在当前activity的布局文件中的最外层加上android:fitsSystemWindows=”true”这个属性。
import android.annotation.SuppressLint;
import android.annotation.TargetApi;
import android.app.Activity;
import android.content.Context;
import android.content.res.Configuration;
import android.content.res.Resources;
import android.content.res.TypedArray;
import android.graphics.drawable.Drawable;
import android.os.Build;
import android.util.DisplayMetrics;
import android.util.TypedValue;
import android.view.Gravity;
import android.view.View;
import android.view.ViewConfiguration;
import android.view.ViewGroup;
import android.view.Window;
import android.view.WindowManager;
import android.widget.FrameLayout.LayoutParams;
import java.lang.reflect.Method;
@SuppressWarnings({ "unchecked", "rawtypes" })
public class SystemStatusManager
{
static
{
if (Build.VERSION.SDK_INT >= Build.VERSION_CODES.KITKAT) {
try {
Class c = Class.forName("android.os.SystemProperties");
Method m = c.getDeclaredMethod("get", String.class);
m.setAccessible(true);
sNavBarOverride = (String) m.invoke(null, "qemu.hw.mainkeys");
} catch (Throwable e) {
sNavBarOverride = null;
}
}
}
/**
* The default system bar tint color value.
*/
public static final int DEFAULT_TINT_COLOR = 0x99000000;
private static String sNavBarOverride;
private final SystemBarConfig mConfig;
private boolean mStatusBarAvailable;
private boolean mNavBarAvailable;
private boolean mStatusBarTintEnabled;
private boolean mNavBarTintEnabled;
private View mStatusBarTintView;
private View mNavBarTintView;
/**
* Constructor. Call this in the host activity onCreate method after its
* content view has been set. You should always create new instances when
* the host activity is recreated.
*
* @param activity The host activity.
*/
@TargetApi(19)
public SystemStatusManager(Activity activity) {
Window win = activity.getWindow();
ViewGroup decorViewGroup = (ViewGroup) win.getDecorView();
if (Build.VERSION.SDK_INT >= Build.VERSION_CODES.KITKAT) {
// check theme attrs
int[] attrs = {android.R.attr.windowTranslucentStatus,
android.R.attr.windowTranslucentNavigation};
TypedArray a = activity.obtainStyledAttributes(attrs);
try {
mStatusBarAvailable = a.getBoolean(0, false);
mNavBarAvailable = a.getBoolean(1, false);
} finally {
a.recycle();
}
// check window flags
WindowManager.LayoutParams winParams = win.getAttributes();
int bits = WindowManager.LayoutParams.FLAG_TRANSLUCENT_STATUS;
if ((winParams.flags & bits) != 0) {
mStatusBarAvailable = true;
}
bits = WindowManager.LayoutParams.FLAG_TRANSLUCENT_NAVIGATION;
if ((winParams.flags & bits) != 0) {
mNavBarAvailable = true;
}
}
mConfig = new SystemBarConfig(activity, mStatusBarAvailable, mNavBarAvailable);
// device might not have virtual navigation keys
if (!mConfig.hasNavigtionBar()) {
mNavBarAvailable = false;
}
if (mStatusBarAvailable) {
setupStatusBarView(activity, decorViewGroup);
}
if (mNavBarAvailable) {
setupNavBarView(activity, decorViewGroup);
}
}
/**
* Enable tinting of the system status bar.
*
* If the platform is running Jelly Bean or earlier, or translucent system
* UI modes have not been enabled in either the theme or via window flags,
* then this method does nothing.
*
* @param enabled True to enable tinting, false to disable it (default).
*/
public void setStatusBarTintEnabled(boolean enabled) {
mStatusBarTintEnabled = enabled;
if (mStatusBarAvailable) {
mStatusBarTintView.setVisibility(enabled ? View.VISIBLE : View.GONE);
}
}
/**
* Enable tinting of the system navigation bar.
*
* If the platform does not have soft navigation keys, is running Jelly Bean
* or earlier, or translucent system UI modes have not been enabled in either
* the theme or via window flags, then this method does nothing.
*
* @param enabled True to enable tinting, false to disable it (default).
*/
public void setNavigationBarTintEnabled(boolean enabled) {
mNavBarTintEnabled = enabled;
if (mNavBarAvailable) {
mNavBarTintView.setVisibility(enabled ? View.VISIBLE : View.GONE);
}
}
/**
* Apply the specified color tint to all system UI bars.
*
* @param color The color of the background tint.
*/
public void setTintColor(int color) {
setStatusBarTintColor(color);
setNavigationBarTintColor(color);
}
/**
* Apply the specified drawable or color resource to all system UI bars.
*
* @param res The identifier of the resource.
*/
public void setTintResource(int res) {
setStatusBarTintResource(res);
setNavigationBarTintResource(res);
}
/**
* Apply the specified drawable to all system UI bars.
*
* @param drawable The drawable to use as the background, or null to remove it.
*/
public void setTintDrawable(Drawable drawable) {
setStatusBarTintDrawable(drawable);
setNavigationBarTintDrawable(drawable);
}
/**
* Apply the specified alpha to all system UI bars.
*
* @param alpha The alpha to use
*/
public void setTintAlpha(float alpha) {
setStatusBarAlpha(alpha);
setNavigationBarAlpha(alpha);
}
/**
* Apply the specified color tint to the system status bar.
*
* @param color The color of the background tint.
*/
public void setStatusBarTintColor(int color) {
if (mStatusBarAvailable) {
mStatusBarTintView.setBackgroundColor(color);
}
}
/**
* Apply the specified drawable or color resource to the system status bar.
*
* @param res The identifier of the resource.
*/
public void setStatusBarTintResource(int res) {
if (mStatusBarAvailable) {
mStatusBarTintView.setBackgroundResource(res);
}
}
/**
* Apply the specified drawable to the system status bar.
*
* @param drawable The drawable to use as the background, or null to remove it.
*/
@SuppressWarnings("deprecation")
public void setStatusBarTintDrawable(Drawable drawable) {
if (mStatusBarAvailable) {
mStatusBarTintView.setBackgroundDrawable(drawable);
}
}
/**
* Apply the specified alpha to the system status bar.
*
* @param alpha The alpha to use
*/
@TargetApi(11)
public void setStatusBarAlpha(float alpha) {
if (mStatusBarAvailable && Build.VERSION.SDK_INT >= Build.VERSION_CODES.HONEYCOMB) {
mStatusBarTintView.setAlpha(alpha);
}
}
/**
* Apply the specified color tint to the system navigation bar.
*
* @param color The color of the background tint.
*/
public void setNavigationBarTintColor(int color) {
if (mNavBarAvailable) {
mNavBarTintView.setBackgroundColor(color);
}
}
/**
* Apply the specified drawable or color resource to the system navigation bar.
*
* @param res The identifier of the resource.
*/
public void setNavigationBarTintResource(int res) {
if (mNavBarAvailable) {
mNavBarTintView.setBackgroundResource(res);
}
}
/**
* Apply the specified drawable to the system navigation bar.
*
* @param drawable The drawable to use as the background, or null to remove it.
*/
@SuppressWarnings("deprecation")
public void setNavigationBarTintDrawable(Drawable drawable) {
if (mNavBarAvailable) {
mNavBarTintView.setBackgroundDrawable(drawable);
}
}
/**
* Apply the specified alpha to the system navigation bar.
*
* @param alpha The alpha to use
*/
@TargetApi(11)
public void setNavigationBarAlpha(float alpha) {
if (mNavBarAvailable && Build.VERSION.SDK_INT >= Build.VERSION_CODES.HONEYCOMB) {
mNavBarTintView.setAlpha(alpha);
}
}
/**
* Get the system bar configuration.
*
* @return The system bar configuration for the current device configuration.
*/
public SystemBarConfig getConfig() {
return mConfig;
}
/**
* Is tinting enabled for the system status bar?
*
* @return True if enabled, False otherwise.
*/
public boolean isStatusBarTintEnabled() {
return mStatusBarTintEnabled;
}
/**
* Is tinting enabled for the system navigation bar?
*
* @return True if enabled, False otherwise.
*/
public boolean isNavBarTintEnabled() {
return mNavBarTintEnabled;
}
private void setupStatusBarView(Context context, ViewGroup decorViewGroup) {
mStatusBarTintView = new View(context);
LayoutParams params = new LayoutParams(LayoutParams.MATCH_PARENT, mConfig.getStatusBarHeight());
params.gravity = Gravity.TOP;
if (mNavBarAvailable && !mConfig.isNavigationAtBottom()) {
params.rightMargin = mConfig.getNavigationBarWidth();
}
mStatusBarTintView.setLayoutParams(params);
mStatusBarTintView.setBackgroundColor(DEFAULT_TINT_COLOR);
mStatusBarTintView.setVisibility(View.GONE);
decorViewGroup.addView(mStatusBarTintView);
}
private void setupNavBarView(Context context, ViewGroup decorViewGroup) {
mNavBarTintView = new View(context);
LayoutParams params;
if (mConfig.isNavigationAtBottom()) {
params = new LayoutParams(LayoutParams.MATCH_PARENT, mConfig.getNavigationBarHeight());
params.gravity = Gravity.BOTTOM;
} else {
params = new LayoutParams(mConfig.getNavigationBarWidth(), LayoutParams.MATCH_PARENT);
params.gravity = Gravity.RIGHT;
}
mNavBarTintView.setLayoutParams(params);
mNavBarTintView.setBackgroundColor(DEFAULT_TINT_COLOR);
mNavBarTintView.setVisibility(View.GONE);
decorViewGroup.addView(mNavBarTintView);
}
/**
* Class which describes system bar sizing and other characteristics for the current
* device configuration.
*
*/
public static class SystemBarConfig {
private static final String STATUS_BAR_HEIGHT_RES_NAME = "status_bar_height";
private static final String NAV_BAR_HEIGHT_RES_NAME = "navigation_bar_height";
private static final String NAV_BAR_HEIGHT_LANDSCAPE_RES_NAME = "navigation_bar_height_landscape";
private static final String NAV_BAR_WIDTH_RES_NAME = "navigation_bar_width";
private static final String SHOW_NAV_BAR_RES_NAME = "config_showNavigationBar";
private final boolean mTranslucentStatusBar;
private final boolean mTranslucentNavBar;
private final int mStatusBarHeight;
private final int mActionBarHeight;
private final boolean mHasNavigationBar;
private final int mNavigationBarHeight;
private final int mNavigationBarWidth;
private final boolean mInPortrait;
private final float mSmallestWidthDp;
private SystemBarConfig(Activity activity, boolean translucentStatusBar, boolean traslucentNavBar) {
Resources res = activity.getResources();
mInPortrait = (res.getConfiguration().orientation == Configuration.ORIENTATION_PORTRAIT);
mSmallestWidthDp = getSmallestWidthDp(activity);
mStatusBarHeight = getInternalDimensionSize(res, STATUS_BAR_HEIGHT_RES_NAME);
mActionBarHeight = getActionBarHeight(activity);
mNavigationBarHeight = getNavigationBarHeight(activity);
mNavigationBarWidth = getNavigationBarWidth(activity);
mHasNavigationBar = (mNavigationBarHeight > 0);
mTranslucentStatusBar = translucentStatusBar;
mTranslucentNavBar = traslucentNavBar;
}
@TargetApi(14)
private int getActionBarHeight(Context context) {
int result = 0;
if (Build.VERSION.SDK_INT >= Build.VERSION_CODES.ICE_CREAM_SANDWICH) {
TypedValue tv = new TypedValue();
context.getTheme().resolveAttribute(android.R.attr.actionBarSize, tv, true);
result = TypedValue.complexToDimensionPixelSize(tv.data, context.getResources().getDisplayMetrics());
}
return result;
}
@TargetApi(14)
private int getNavigationBarHeight(Context context) {
Resources res = context.getResources();
int result = 0;
if (Build.VERSION.SDK_INT >= Build.VERSION_CODES.ICE_CREAM_SANDWICH) {
if (hasNavBar(context)) {
String key;
if (mInPortrait) {
key = NAV_BAR_HEIGHT_RES_NAME;
} else {
key = NAV_BAR_HEIGHT_LANDSCAPE_RES_NAME;
}
return getInternalDimensionSize(res, key);
}
}
return result;
}
@TargetApi(14)
private int getNavigationBarWidth(Context context) {
Resources res = context.getResources();
int result = 0;
if (Build.VERSION.SDK_INT >= Build.VERSION_CODES.ICE_CREAM_SANDWICH) {
if (hasNavBar(context)) {
return getInternalDimensionSize(res, NAV_BAR_WIDTH_RES_NAME);
}
}
return result;
}
@TargetApi(14)
private boolean hasNavBar(Context context) {
Resources res = context.getResources();
int resourceId = res.getIdentifier(SHOW_NAV_BAR_RES_NAME, "bool", "android");
if (resourceId != 0) {
boolean hasNav = res.getBoolean(resourceId);
// check override flag (see static block)
if ("1".equals(sNavBarOverride)) {
hasNav = false;
} else if ("0".equals(sNavBarOverride)) {
hasNav = true;
}
return hasNav;
} else { // fallback
return !ViewConfiguration.get(context).hasPermanentMenuKey();
}
}
private int getInternalDimensionSize(Resources res, String key) {
int result = 0;
int resourceId = res.getIdentifier(key, "dimen", "android");
if (resourceId > 0) {
result = res.getDimensionPixelSize(resourceId);
}
return result;
}
@SuppressLint("NewApi")
private float getSmallestWidthDp(Activity activity) {
DisplayMetrics metrics = new DisplayMetrics();
if (Build.VERSION.SDK_INT >= Build.VERSION_CODES.JELLY_BEAN) {
activity.getWindowManager().getDefaultDisplay().getRealMetrics(metrics);
} else {
activity.getWindowManager().getDefaultDisplay().getMetrics(metrics);
}
float widthDp = metrics.widthPixels / metrics.density;
float heightDp = metrics.heightPixels / metrics.density;
return Math.min(widthDp, heightDp);
}
/**
* Should a navigation bar appear at the bottom of the screen in the current
* device configuration? A navigation bar may appear on the right side of
* the screen in certain configurations.
*
* @return True if navigation should appear at the bottom of the screen, False otherwise.
*/
public boolean isNavigationAtBottom() {
return (mSmallestWidthDp >= 600 || mInPortrait);
}
/**
* Get the height of the system status bar.
*
* @return The height of the status bar (in pixels).
*/
public int getStatusBarHeight() {
return mStatusBarHeight;
}
/**
* Get the height of the action bar.
*
* @return The height of the action bar (in pixels).
*/
public int getActionBarHeight() {
return mActionBarHeight;
}
/**
* Does this device have a system navigation bar?
*
* @return True if this device uses soft key navigation, False otherwise.
*/
public boolean hasNavigtionBar() {
return mHasNavigationBar;
}
/**
* Get the height of the system navigation bar.
*
* @return The height of the navigation bar (in pixels). If the device does not have
* soft navigation keys, this will always return 0.
*/
public int getNavigationBarHeight() {
return mNavigationBarHeight;
}
/**
* Get the width of the system navigation bar when it is placed vertically on the screen.
*
* @return The width of the navigation bar (in pixels). If the device does not have
* soft navigation keys, this will always return 0.
*/
public int getNavigationBarWidth() {
return mNavigationBarWidth;
}
/**
* Get the layout inset for any system UI that appears at the top of the screen.
*
* @param withActionBar True to include the height of the action bar, False otherwise.
* @return The layout inset (in pixels).
*/
public int getPixelInsetTop(boolean withActionBar) {
return (mTranslucentStatusBar ? mStatusBarHeight : 0) + (withActionBar ? mActionBarHeight : 0);
}
/**
* Get the layout inset for any system UI that appears at the bottom of the screen.
*
* @return The layout inset (in pixels).
*/
public int getPixelInsetBottom() {
if (mTranslucentNavBar && isNavigationAtBottom()) {
return mNavigationBarHeight;
} else {
return 0;
}
}
/**
* Get the layout inset for any system UI that appears at the right of the screen.
*
* @return The layout inset (in pixels).
*/
public int getPixelInsetRight() {
if (mTranslucentNavBar && !isNavigationAtBottom()) {
return mNavigationBarWidth;
} else {
return 0;
}
}
}
}
好了,然后我把主activity贴出来吧。
public class MainActivity extends Activity {
@Override
protected void onCreate(Bundle savedInstanceState) {
super.onCreate(savedInstanceState);
setTranslucentStatus();
setContentView(R.layout.activity_main);
}
private void setTranslucentStatus() {
if (Build.VERSION.SDK_INT >= Build.VERSION_CODES.KITKAT) {
// 透明状态栏
getWindow().addFlags(WindowManager.LayoutParams.FLAG_TRANSLUCENT_STATUS);
// 透明导航栏
getWindow().addFlags(WindowManager.LayoutParams.FLAG_TRANSLUCENT_NAVIGATION);
SystemStatusManager tintManager = new SystemStatusManager(this);
tintManager.setStatusBarTintEnabled(true);
tintManager.setStatusBarTintResource(R.color.red);//你要设置的颜色
getWindow().getDecorView().setFitsSystemWindows(true);
}
}
}
好了,这就实现了上面效果图的第二张,固定的状态栏颜色。


1、获取ListView的LayoutParams:
LayoutParams params= listView.getLayoutParams();
2、为RelativeLayout设置手势监听:
mRlBus.setOnTouchListener(new View.OnTouchListener() {//mRlBus为红框处外层布局
float y=0;//在此处定义一个y,接收Y坐标
@Override
public boolean onTouch(View v, MotionEvent event) {
case MotionEvent.ACTION_DOWN:
y=event.getY();//当手指按在RelativeLayout的某个地方时触发,获取当前纵坐标.
break;
case MotionEvent.ACTION_MOVE:
float x= event.getY()-y;//在此定义一个x,意思为滑动的每一刻,当前时刻的纵坐标减去最初刚按下手指的纵坐标
if(x>0||params.height<=250){//如果手指是向下滑(x=0)或者ListView的高度小于250,
params.height= (int) (params.height-x); //则执行降低或者升高ListView的操作
if(params.height>250){//这个步骤的意思为:假设用户很快速的往上滑,可能造成高度大于250
params.height=250;//如果过高,那么固定为250
}
}
if(params.height<0){//这个步骤的意思为:假设用户很快速的往下滑,可能造成高度小于0,造成ListView选取滑动之前的高度为当前高度
params.height=0;
}
listView.setLayoutParams(params);
break;
case MotionEvent.ACTION_UP:
break;
}
}
});
相关文章
用js的document.write输出的广告无阻塞加载的方法
一、广告代码分析很多第三方的广告系统都是使用document.write来加载广告,如下面的一个javascript的广告链接。复制代码 代码如下:<script type="text/javascript" src="http://gg.5173.com/adpolestar/5173/;ap=2EBE5...2014-06-07- 当页面打开时我们需要执行一些操作,这个时候如果我们选择使用jquery的话,需要重写他的3中方法,自我感觉没什么区 别,看个人喜好了,第二种感觉比较简单明了: 第一种: 复制代码 代码如下: <script type="text/javas...2014-06-07
- 这篇文章主要介绍了解决IDEA插件市场Plugins无法加载的问题,本文通过图文并茂的形式给大家介绍的非常详细,对大家的学习或工作具有一定的参考借鉴价值,需要的朋友可以参考下...2020-10-21
- 如果我们要在Android应用APP中加载html5页面,我们可以使用WebView,本文我们分享两个WebView加载html5页面实例应用。 实例一:WebView加载html5实现炫酷引导页面大多...2016-09-20
- 距离 Vue 3.0 正式版发布已经有一段时间了,关于vue3组件库相关的问题还是挺多人感兴趣的,这篇文章主要给大家介绍了关于vue3如何按需加载第三方组件库的相关资料,需要的朋友可以参考下...2021-06-02
- AngularJS 通过路由支持多视图应用, 可以根据路由动态加载所需的视图, 在 AngularJS 的文档中有详细的介绍, 网上也有不少教程, 就不用介绍了!随着视图的不断增加,js文件会越来越多,而 AngularJS 默认需要把全部的js都一次性...2015-10-21
解决vue动态路由异步加载import组件,加载不到module的问题
这篇文章主要介绍了解决vue动态路由异步加载import组件,加载不到module的问题,具有很好的参考价值,希望对大家有所帮助。一起跟随小编过来看看吧...2020-07-27- 这篇文章主要介绍了Angular性能优化之第三方组件和懒加载技术,对性能优化感兴趣的同学,可以参考下...2021-05-11
- 本文介绍了如何延迟javascript代码的加载,加快网页的访问速度。 当一个网站有很多js代码要加载,js代码放置的位置在一定程度上将会影像网页的加载速度,为了让我们的网页加载速度更快,本文总结了一下几个注意点...2013-10-13
- 本篇文章主要介绍了ThinkPHP+jquery实现“加载更多”功能代码,以实例代码讲诉了加载更多的代码实现,非常具有实用价值,需要的朋友可以参考下 ...2017-03-13
- 这篇文章主要介绍了C#实现带进度条的ListView 的相关资料,需要的朋友可以参考下...2020-06-25
- 下面小编就为大家带来一篇C#获取鼠标在listview右键点击单元格的内容方法。小编觉得挺不错的,现在就分享给大家,也给大家做个参考。一起跟随小编过来看看吧...2020-06-25
- 下面小编就为大家带来一篇用C++面向对象的方式动态加载so的方法。小编觉得挺不错的,现在就分享给大家,也给大家做个参考。一起跟随小编过来看看吧...2020-04-25
jQuery Easyui使用(二)之可折叠面板动态加载无效果的解决方法
这篇文章主要介绍了jQuery Easyui使用之可折叠面板动态加载无效果的解决方案,非常不错,具有参考借鉴价值,感兴趣的朋友一起看下吧...2016-08-24- 这篇文章主要介绍了基于Pycharm加载多个项目过程图解,文中通过示例代码介绍的非常详细,对大家的学习或者工作具有一定的参考学习价值,需要的朋友可以参考下...2020-04-22
- 这篇文章主要介绍了jQuery实现模仿微博下拉滚动条加载数据效果,涉及jQuery响应下拉滚动事件动态操作页面元素的技巧,需要的朋友可以参考下...2015-12-27
C#中调用DLL时未能加载文件或程序集错误的处理方法(详解)
下面小编就为大家带来一篇C#中调用DLL时未能加载文件或程序集错误的处理方法(详解)。小编觉得挺不错的,现在就分享给大家,也给大家做个参考。一起跟随小编过来看看吧...2020-06-25- 在网上有很多关于判断图片是否已经加载完毕的文章,但是有的浏览器并不适合,下面小编给大家分享一些有关JavaScript判断图片是否已经加载完毕的方法汇总,需要的朋友参考下...2016-02-12
- 这篇文章主要介绍了解决vue-loader加载不上的问题,具有很好的参考价值,希望对大家有所帮助。一起跟随小编过来看看吧...2020-10-21
- 这篇文章主要为大家详细介绍了javascript自定义加载loading效果,文中示例代码介绍的非常详细,具有一定的参考价值,感兴趣的小伙伴们可以参考一下...2020-09-15