等比例生成缩略图的php程序
等比例生成缩略图的php教程程序
这个程序很实现,但只是用来进来等比例生成缩略图哦,你要把文件上传到服务器,然后再由此函数来操作,有需要的朋友参考一下。
function reSizeImg($imgSrc, $resize_width, $resize_height, $isCut=false) {
//图片的类型
$type = substr ( strrchr ( $imgSrc, "." ), 1 );
//初始化图象
if ($type == "jpg") {
$im = imagecreatefromjpeg ( $imgSrc );
}
if ($type == "gif") {
$im = imagecreatefromgif ( $imgSrc );
}
if ($type == "png") {
$im = imagecreatefrompng ( $imgSrc );
}
//目标图象地址
$full_length = strlen ( $imgSrc );
$type_length = strlen ( $type );
$name_length = $full_length - $type_length;
$name = substr ( $imgSrc, 0, $name_length - 1 );
$dstimg = $name . "_s." . $type;$width = imagesx ( $im );
$height = imagesy ( $im );//生成图象
//改变后的图象的比例
$resize_ratio = ($resize_width) / ($resize_height);
//实际图象的比例
$ratio = ($width) / ($height);
if (($isCut) == 1) //裁图
{
if ($ratio >= $resize_ratio) //高度优先
{
$newimg = imagecreatetruecolor ( $resize_width, $resize_height );
imagecopyresampled ( $newimg, $im, 0, 0, 0, 0, $resize_width, $resize_height, (($height) * $resize_ratio), $height );
ImageJpeg ( $newimg, $dstimg );
}
if ($ratio < $resize_ratio) //宽度优先
{
$newimg = imagecreatetruecolor ( $resize_width, $resize_height );
imagecopyresampled ( $newimg, $im, 0, 0, 0, 0, $resize_width, $resize_height, $width, (($width) / $resize_ratio) );
ImageJpeg ( $newimg, $dstimg );
}
} else //不裁图
{
if ($ratio >= $resize_ratio) {
$newimg = imagecreatetruecolor ( $resize_width, ($resize_width) / $ratio );
imagecopyresampled ( $newimg, $im, 0, 0, 0, 0, $resize_width, ($resize_width) / $ratio, $width, $height );
ImageJpeg ( $newimg, $dstimg );
}
if ($ratio < $resize_ratio) {
$newimg = imagecreatetruecolor ( ($resize_height) * $ratio, $resize_height );
imagecopyresampled ( $newimg, $im, 0, 0, 0, 0, ($resize_height) * $ratio, $resize_height, $width, $height );
ImageJpeg ( $newimg, $dstimg );
}
}
ImageDestroy ( $im );
}
调用方法简单,直接reSizeImg就可以了,参考很简单。
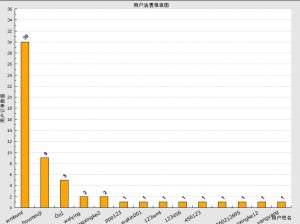
<?php

$datay=array();      //纵坐标数据

$datax=array();     //横坐标数据

foreach ($usernums as $key => $value){
$datay[] = $value;
$datax[] = $userids[$key];
}

require_once (‘jpgraph-3.0.7/jpgraph/jpgraph.php’);
require_once (‘jpgraph-3.0.7/jpgraph/jpgraph_bar.php’);

// Create the graph. These two calls are always required
$graph = new Graph(800,600);    //图像高宽
$graph->SetScale(“textlin”);

$graph->xaxis->SetTickLabels($datax);

$graph->xaxis->SetFont(FF_VERDANA,FS_NORMAL,10);
$graph->xaxis->SetLabelAngle(30);

$graph->yaxis->scale->SetGrace(20);
$graph->xaxis->scale->SetGrace(20);
// Add a drop shadow
$graph->SetShadow();

// Adjust the margin a bit to make more room for titles
$graph->img->SetMargin(40,30,20,40);

// Create a bar pot
$bplot = new BarPlot($datay);

// Adjust fill color
$bplot->SetFillColor(‘orange’);
$bplot->value->Show();
$bplot->value->SetFont(FF_ARIAL,FS_BOLD,10);
$bplot->value->SetAngle(45);
$bplot->value->SetFormat(‘%d’);
$graph->Add($bplot);

// Setup the titles
$graph->title->Set(iconv(“UTF-8″, “gb2312″,”用户消费报表图”));
$graph->xaxis->title->Set(iconv(“UTF-8″, “gb2312″,”用户姓名”));
$graph->yaxis->title->Set(iconv(“UTF-8″, “gb2312″,”用户订单数量”));

$graph->xaxis->title->SetFont(FF_SIMSUN,FS_BOLD);
$graph->yaxis->title->SetFont(FF_SIMSUN,FS_BOLD);
$graph->title->SetFont(FF_SIMSUN,FS_BOLD);

// Display the graph
$graph->Stroke();

?>
验证码在php教程中是经常会用到了,下面我们为你提供了一些关于php验证码生成类与程序,直接复制下去就可以直接用的哦,下面看代码。
<?php
session_start();
Header("Content-type: image/gif");
class SecurityCode
{
private $codes = '';
function __construct()
{
$code = '0-1-2-3-4-5-6-7-8-9-A-B-C-D-E-F-G-H-I-J-K-L-M-N-O-P-Q-R-S-T-U-V-W-X-Y-Z';
$codeArray = explode('-',$code);
shuffle($codeArray);
$this->codes = implode('',array_slice($codeArray,0,4));
}
public function CreateImg()
{
$_SESSION['check_pic'] = $this->codes;
$img = imagecreate(70,25);
imagecolorallocate($img,222,222,222);
$testcolor1 = imagecolorallocate($img,255,0,0);
$testcolor2 = imagecolorallocate($img,51,51,51);
$testcolor3 = imagecolorallocate($img,0,0,255);
$testcolor4 = imagecolorallocate($img,255,0,255);
for ($i = 0; $i < 4; $i++)
{
imagestring($img,rand(5,6),8 + $i * 15,rand(2,8),$this->codes[$i],rand(1,4));
}
imagegif($img);
}
}
$code = new SecurityCode();
$code->CreateImg();
$code = NULL;
?>
代码二
<?
session_start();
for($i=0; $i<4; $i++){
$rand.= dechex(rand(1,15));
}
$_SESSION[check_pic]=$rand;
//echo $_SESSION[check_pic];
// 设置图片大小">图片大小
$im = imagecreatetruecolor(100,30);
// 设置颜色
$bg=imagecolorallocate($im,0,0,0);
$te=imagecolorallocate($im,255,255,255);
// 把字符串写在图像左上角
imagestring($im,rand(5,6),rand(25,30),5,$rand,$te);
// 输出图像
header("Content-type:image/jpeg");
imagejpeg($im);
?>
<?
$handle = opendir('./'); //当前目录
while (false !== ($file = readdir($handle))) { //遍历该php教程文件所在目录
list($filesname,$kzm)=explode(".",$file);//获取扩展名
if ($kzm=="gif" or $kzm=="jpg") { //文件过滤
if (!is_dir('./'.$file)) { //文件夹过滤
$array[]=$file;//把符合条件的文件名存入数组
}
}
}
$suiji=array_rand($array); //使用array_rand函数从数组中随机抽出一个单元
?>
<img src="<?=$array[$suiji]?>">
实例二
<?php
/**********************************************
* Filename : img.php
* Author : freemouse
* web : www.111cn.net * email :freemouse1981@gmail.com
* Date : 2010/12/27
* Usage:
* <img src=img.php>
* <img src=img.php?folder=images2/>
***********************************************/
if($_GET['folder']){
$folder=$_GET['folder'];
}else{
$folder='/images/';
}
//存放图片文件的位置
$path = $_SERVER['DOCUMENT_ROOT']."/".$folder;
$files=array();
if ($handle=opendir("$path")) {
while(false !== ($file = readdir($handle))) {
if ($file != "." && $file != "..") {
if(substr($file,-3)=='gif' || substr($file,-3)=='jpg') $files[count($files)] = $file;
}
}
}
closedir($handle);$random=rand(0,count($files)-1);
if(substr($files[$random],-3)=='gif') header("Content-type: image/gif");
elseif(substr($files[$random],-3)=='jpg') header("Content-type: image/jpeg");
readfile("$path/$files[$random]");
?>
readrand.php(此程序实际上是生成一句网页特效语言)
<?
$arrayall=file("tp.txt");读出tp.txt内容到数组
$arrays=count($arrayall);
if ($arrays==1){//because rand(0,0) is wrong
$selectrand=0;
}else{
srand((double)microtime()*1000000);//设定随机数种子
$selectrand=rand(0,$arrays-1);
}
$exstr=explode(chr(9),$arrayall[$selectrand]);//从全部中随机取出一个并分割
?>
document.write('<a href="<? echo $exstr[1];?>" target="new"><img src="<? echo $exstr[2];?>" width="200" height="50" alt="<? echo $exstr[0];?>" ></a>');
HTML文件
<html>
<body>
<script language='javascript' src='readrand.php'>
</script>
</body>
</html>
(你可以把scripty放到你需要的位置,并可以加入setTimeout()函数以实现定时刷新)
随机广告代码
<?php
#########随机广告显示##########
function myads(){
$dir="ads"; #设置存放记录的目录
//$dir="ads"; #设置存放记录的目录
$ads="$dir/ads.txt"; #设置广告代码文件
$log ="$dir/ads.log"; #设置ip记录文件
$ads_lines=file($ads);
$lines=count($ads_lines);#文件总行数
####读出广告总数$ads_count和显示次数到数组$display_array########
$ads_count=0;
$display_count=0;
for ($i=0;$i<$lines;$i++){
if((!strcmp(substr($ads_lines[$i],0,7),"display"))){
$ads_count+=1;
$display_array[$ads_count]=substr($ads_lines[$i],8);
$display_count+=$display_array[$ads_count];
}
}
####决定随机显示序号$display_rand#####
srand((double)microtime()*1000000);
$display_rand = rand(1,$display_count);
###决定广告序号$ads_num######
$pricount=0;
$ads_num=1;
for($i=1; $i<=$ads_count; $i++) {
$pricount += $display_array[$i];
if ($display_rand<=$pricount) {$ads_num=$i;break;}
}
#####播放广告########
$num=0;
$flag=0;
for($i=0;$i<$lines;$i++){
if((!strcmp(substr($ads_lines[$i],0,7),"display"))){$num++;}
if(($num==$ads_num)and($flag==0)){$flag=1;continue;}
if(($flag==1)and strcmp($ads_lines[$i][0],"#")){echo $ads_lines[$i];continue;}
if(($flag==1)and(!(strcmp($ads_lines[$i][0],"#")))){break;}
}
####纪录广告显示次数#########
$fp=fopen($log,"a");
fputs($fp,date( "Y-m-d H:i:s " ).getenv("REMOTE_ADDR")."==>".$ads_num."n");
fclose($fp);
}
?>
广告代码文件ads.txt
以下为引用的内容:
########每个广告代码之间用'#'隔开,display为显示加权数,越大显示次数越多######
display=10
<a href="广告1连接地址">
<img src=/images/banner/webjxcomad1.gif" alt="广告1"> </a>
################################
display=10
<a href="广告2连接地址" target=_blank>
<img src=images/banner/webjxcomad2.gif" width="468" height="60" alt="广告2" border="0"></a>
1. 从中我们可以看到imagecreatetruecolor函数的作用明显地是创建一幅黑色的背景图片,它的第一个参数为所创建图片的宽,第二个参数为所创建图片的高,我们把这个函数的返回值(图像标识符)存入变量里面。
2.imagecreatefromjpeg作用就是将要进行分割的图片读到内存里面(这里大家可能有纪疑问:我直接从硬微盘里读不就得了,为什么还要先读到内存里呢?打个不恰当的比方,大家平时在用钱的时相信大家不会口袋里不会放太多,一般到用的时候才从银行里面取,这里也是一样,这张图片不用它的时候我把它放在硬盘里面,当要对这张图片进行分割或其它操作时就把它读到内存里面,说白了,内存给程序提供了一个运行的舞台)
3.再看imagecopyresampled函数它的作用是将原图片分割好,然后将它和采样拷贝(我理解为投影)到用imagecreatefromjpeg创建好的背景图片上。
<?php教程
// The file
$filename = 'temp/Sunset.jpg';
$percent = 0.5;
// Content type
header('Content-type: image/jpeg');
// Get new dimensions
list($width, $height) = getimagesize($filename);
$new_width = $width * $percent;
$new_height = $height * $percent;//以原图片的长宽的0.5为新的长宽来创建新的图片此图片的标志为$image_p
$image_p = imagecreatetruecolor($new_width, $new_height);
//从 JPEG文件或URL新建一图像
$image = imagecreatefromjpeg($filename);
//将原始图片从坐标(100,100)开始分割,分割的长度(400),高度为(300)原图片的一半,将分割好的图片放在从坐标(0,0)开始的已建好的区域里
imagecopyresampled($image_p, $image, 0, 0, 100, 100, $new_width, $new_height, 400, 300);// Output
imagejpeg($image_p, null, 100);//quality为图片输出的质量范围从 0(最差质量,文件更小)到 100(最佳质量,文件最大)。
?>
上面的例子是把$image图片从坐标(100,100)进行分割,分割后的宽为400,高为300,然后再将此图片从坐标(0,0)处开始投影到图片$image_p上,,投影的宽为$new_width,高为$new_height。
<?php
// 文件及缩放尺寸
//$imgfile = 'smp.jpg';
//$percent = 0.2;
header('Content-type: image/jpeg');
list($width, $height) = getimagesize($imgfile);
$newwidth = $width * $percent;
$newheight = $height * $percent;
$thumb = ImageCreateTrueColor($newwidth,$newheight);
$source = imagecreatefromjpeg($imgfile);
imagecopyresized($thumb, $source, 0, 0, 0, 0, $newwidth, $newheight, $width, $height);
imagejpeg($thumb);
?>更详细教程
<?php
/*构造函数-生成缩略图+水印,参数说明:
$srcFile-图片文件名,
$dstFile-另存文件名,
$markwords-水印文字,
$markimage-水印图片,
$dstW-图片保存宽度,
$dstH-图片保存高度,
$rate-图片保存品质*/
makethumb("a.jpg","b.jpg","50","50");
function makethumb($srcFile,$dstFile,$dstW,$dstH,$rate=100,$markwords=null,$markimage=null)
{
$data = GetImageSize($srcFile);
switch($data[2])
{
case 1:
$im=@ImageCreateFromGIF($srcFile);
break;
case 2:
$im=@ImageCreateFromJPEG($srcFile);
break;
case 3:
$im=@ImageCreateFromPNG($srcFile);
break;
}
if(!$im) return False;
$srcW=ImageSX($im);
$srcH=ImageSY($im);
$dstX=0;
$dstY=0;
if ($srcW*$dstH>$srcH*$dstW)
{
$fdstH = round($srcH*$dstW/$srcW);
$dstY = floor(($dstH-$fdstH)/2);
$fdstW = $dstW;
}
else
{
$fdstW = round($srcW*$dstH/$srcH);
$dstX = floor(($dstW-$fdstW)/2);
$fdstH = $dstH;
}
$ni=ImageCreateTrueColor($dstW,$dstH);
$dstX=($dstX<0)?0:$dstX;
$dstY=($dstX<0)?0:$dstY;
$dstX=($dstX>($dstW/2))?floor($dstW/2):$dstX;
$dstY=($dstY>($dstH/2))?floor($dstH/s):$dstY;
$white = ImageColorAllocate($ni,255,255,255);
$black = ImageColorAllocate($ni,0,0,0);
imagefilledrectangle($ni,0,0,$dstW,$dstH,$white);// 填充背景色
ImageCopyResized($ni,$im,$dstX,$dstY,0,0,$fdstW,$fdstH,$srcW,$srcH);
if($markwords!=null)
{
$markwords=iconv("gb2312","UTF-8",$markwords);
//转换文字编码
ImageTTFText($ni,20,30,450,560,$black,"simhei.ttf",$markwords); //写入文字水印
//参数依次为,文字大小|偏转度|横坐标|纵坐标|文字颜色|文字类型|文字内容
}
elseif($markimage!=null)
{
$wimage_data = GetImageSize($markimage);
switch($wimage_data[2])
{
case 1:
$wimage=@ImageCreateFromGIF($markimage);
break;
case 2:
$wimage=@ImageCreateFromJPEG($markimage);
break;
case 3:
$wimage=@ImageCreateFromPNG($markimage);
break;
}
imagecopy($ni,$wimage,500,560,0,0,88,31); //写入图片水印,水印图片大小">图片大小默认为88*31
imagedestroy($wimage);
}
ImageJpeg($ni,$dstFile,$rate);
ImageJpeg($ni,$srcFile,$rate);
imagedestroy($im);
imagedestroy($ni);
}
?>
实例四
$thumbnail = new ImageResize();
$thumbnail->resizeimage(源图片完整路径, 缩略图宽度, 缩略图高度, 是否剪裁(0或者1), 新图片完整路径);
class ImageResize {
//图片类型
var $type;
//实际宽度
var $width;
//实际高度
var $height;
//改变后的宽度
var $resize_width;
//改变后的高度
var $resize_height;
//是否裁图
var $cut;
//源图象
var $srcimg;
//目标图象地址
var $dstimg;
//临时创建的图象
var $im;function resizeimage($img, $wid, $hei,$c,$dstpath) {
$this->srcimg = $img;
$this->resize_width = $wid;
$this->resize_height = $hei;
$this->cut = $c;
//图片的类型
$this->type = strtolower(substr(strrchr($this->srcimg,"."),1));
//初始化图象
$this->initi_img();
//目标图象地址
$this -> dst_img($dstpath);
//--
$this->width = imagesx($this->im);
$this->height = imagesy($this->im);
//生成图象
$this->newimg();
ImageDestroy ($this->im);
}function newimg() {
//改变后的图象的比例
$resize_ratio = ($this->resize_width)/($this->resize_height);//实际图象的比例
$ratio = ($this->width)/($this->height);if(($this->cut)=="1") {
//裁图 高度优先
if($ratio>=$resize_ratio){
$newimg = imagecreatetruecolor($this->resize_width,$this->resize_height);
imagecopyresampled($newimg, $this->im, 0, 0, 0, 0, $this->resize_width,$this->resize_height, (($this->height)*$resize_ratio), $this->height);
ImageJpeg ($newimg,$this->dstimg);
}
//裁图 宽度优先
if($ratio<$resize_ratio) {
$newimg = imagecreatetruecolor($this->resize_width,$this->resize_height);
imagecopyresampled($newimg, $this->im, 0, 0, 0, 0, $this->resize_width, $this->resize_height, $this->width, (($this->width)/$resize_ratio));
ImageJpeg ($newimg,$this->dstimg);
}
} else {
//不裁图
if($ratio>=$resize_ratio) {
$newimg = imagecreatetruecolor($this->resize_width,($this->resize_width)/$ratio);
imagecopyresampled($newimg, $this->im, 0, 0, 0, 0, $this->resize_width, ($this->resize_width)/$ratio, $this->width, $this->height);
ImageJpeg ($newimg,$this->dstimg);
}
if($ratio<$resize_ratio) {
$newimg = imagecreatetruecolor(($this->resize_height)*$ratio,$this->resize_height);
imagecopyresampled($newimg, $this->im, 0, 0, 0, 0, ($this->resize_height)*$ratio, $this->resize_height, $this->width, $this->height);
ImageJpeg ($newimg,$this->dstimg);
}
}
}//初始化图象
function initi_img() {
if($this->type=="jpg") {
$this->im = imagecreatefromjpeg($this->srcimg);
}
if($this->type=="gif") {
$this->im = imagecreatefromgif($this->srcimg);
}
if($this->type=="png") {
$this->im = imagecreatefrompng($this->srcimg);
}
if($this->type=="bmp") {
$this->im = $this->imagecreatefrombmp($this->srcimg);
}
}//图象目标地址
function dst_img($dstpath) {
$full_length = strlen($this->srcimg);
$type_length = strlen($this->type);
$name_length = $full_length-$type_length;
$name = substr($this->srcimg,0,$name_length-1);
$this->dstimg = $dstpath;
//echo $this->dstimg;
}
function ConvertBMP2GD($src, $dest = false) {
if(!($src_f = fopen($src, "rb"))) {
return false;
}
if(!($dest_f = fopen($dest, "wb"))) {
return false;
}
$header = unpack("vtype/Vsize/v2reserved/Voffset", fread($src_f,14));
$info = unpack("Vsize/Vwidth/Vheight/vplanes/vbits/Vcompression/Vimagesize/Vxres/Vyres/Vncolor/Vimportant", fread($src_f, 40));
extract($info);
extract($header);
if($type != 0x4D42) { // signature "BM"
return false;
}
$palette_size = $offset - 54;
$ncolor = $palette_size / 4;
$gd_header = "";
// true-color vs. palette
$gd_header .= ($palette_size == 0) ? "xFFxFE" : "xFFxFF";
$gd_header .= pack("n2", $width, $height);
$gd_header .= ($palette_size == 0) ? "x01" : "x00";
if($palette_size) {
$gd_header .= pack("n", $ncolor);
}
// no transparency
$gd_header .= "xFFxFFxFFxFF";fwrite($dest_f, $gd_header);
if($palette_size) {
$palette = fread($src_f, $palette_size);
$gd_palette = "";
$j = 0;
while($j < $palette_size) {
$b = $palette{$j++};
$g = $palette{$j++};
$r = $palette{$j++};
$a = $palette{$j++};
$gd_palette .= "$r$g$b$a";
}
$gd_palette .= str_repeat("x00x00x00x00", 256 - $ncolor);
fwrite($dest_f, $gd_palette);
}$scan_line_size = (($bits * $width) + 7) >> 3;
$scan_line_align = ($scan_line_size & 0x03) ? 4 - ($scan_line_size &
0x03) : 0;for($i = 0, $l = $height - 1; $i < $height; $i++, $l--) {
// BMP stores scan lines starting from bottom
fseek($src_f, $offset + (($scan_line_size + $scan_line_align) * $l));
$scan_line = fread($src_f, $scan_line_size);
if($bits == 24) {
$gd_scan_line = "";
$j = 0;
while($j < $scan_line_size) {
$b = $scan_line{$j++};
$g = $scan_line{$j++};
$r = $scan_line{$j++};
$gd_scan_line .= "x00$r$g$b";
}
}
else if($bits == 8) {
$gd_scan_line = $scan_line;
}
else if($bits == 4) {
$gd_scan_line = "";
$j = 0;
while($j < $scan_line_size) {
$byte = ord($scan_line{$j++});
$p1 = chr($byte >> 4);
$p2 = chr($byte & 0x0F);
$gd_scan_line .= "$p1$p2";
}
$gd_scan_line = substr($gd_scan_line, 0, $width);
}
else if($bits == 1) {
$gd_scan_line = "";
$j = 0;
while($j < $scan_line_size) {
$byte = ord($scan_line{$j++});
$p1 = chr((int) (($byte & 0x80) != 0));
$p2 = chr((int) (($byte & 0x40) != 0));
$p3 = chr((int) (($byte & 0x20) != 0));
$p4 = chr((int) (($byte & 0x10) != 0));
$p5 = chr((int) (($byte & 0x08) != 0));
$p6 = chr((int) (($byte & 0x04) != 0));
$p7 = chr((int) (($byte & 0x02) != 0));
$p8 = chr((int) (($byte & 0x01) != 0));
$gd_scan_line .= "$p1$p2$p3$p4$p5$p6$p7$p8";
}
$gd_scan_line = substr($gd_scan_line, 0, $width);
}
fwrite($dest_f, $gd_scan_line);
}
fclose($src_f);
fclose($dest_f);
return true;
}function imagecreatefrombmp($filename) {
$tmp_name = tempnam("/tmp", "GD");
if($this->ConvertBMP2GD($filename, $tmp_name)) {
$img = imagecreatefromgd($tmp_name);
unlink($tmp_name);
return $img;
}
return false;
}
}
相关文章
- 这篇文章主要介绍了c#生成高清缩略图的二个示例,需要的朋友可以参考下...2020-06-25
- 这款批量生成缩略图代码可以生成指定大小的小图哦,并且支持文件批量上传。 这款教程会用到php文件 view.php config.php funs.php index.php 功能: -------...2016-11-25
- 这篇文章主要介绍了C#实现为一张大尺寸图片创建缩略图的方法,涉及C#创建缩略图的相关图片操作技巧,需要的朋友可以参考下...2020-06-25
- if( isset($_FILES['upImg']) ) { if( $userGroup[$loginArr['group']]['upload'] == 0 ) { echo '{"error":"您所在的用户组无权上传图片!"}'; } else...2016-11-25
- 这篇文章主要给大家介绍了在CentOS系统下编译安装nginx及配置缩略图插件的方法教程,文中给出了详细的安装步骤,对大家具有一定的参考价值,有需要的朋友们下面来一起看看吧。...2017-07-06
- 今天写了一个上传多张图片并生成缩略图的小程序。当然因为是菜鸟,所以写的一般。但还是学到了不少东西。现在上代码。...2021-09-22
- php 加水印 等比例缩放程序 function watermark($desImg,$waterImg,$positon=1,$saveas=false,$alpha=30) 011 { 012 //获取目图片的基本信息 013 $temp=pathinfo(...2016-11-25
- 这篇文章主要介绍了Nginx配合php实现生成实时缩略图功能,这在一些特殊场合可能会要用到,需要的朋友可以参考下...2016-01-27
- 对于生成缩略图一般做法是通过后端语言php等来生成,但是为了给服务器减压,我们或许可以从前端来着手,先生成好不同尺寸的缩略图,传给后端,而后端只需要将前端传过来的图片进行存储就好了...2020-10-03
- 这款图片上传源代码是一款可以上传图片并且还具有给上传的图片生成缩略图与增加水印功能哦,可以说是一款完美的图片上传类哦。 代码如下 复制代码 ...2016-11-25
- 生成jpg缩略图字节,本人的小软件中需要用到的功能,所以自己做了一个函数,和大家分享 为什么要生成字节而不是文件,这是为了方便后续处理啦^_^...2020-06-25
- <!doctype html public "-//w3c//dtd xhtml 1.0 transitional//en" "http://www.w3.org/tr/xhtml1/dtd/xhtml1-transitional.dtd"> <html xmlns="http://www.w3.org/1...2016-11-25
- 这篇文章主要介绍了C#获取视频某一帧的缩略图的方法,涉及执行CMD命令及针对视频文件操作的技巧,具有一定的实用价值,需要的朋友可以参考下...2020-06-25
- 缩略图如果是图片我们直接使用php gD库就可实现了,本文章要介绍的是Imagick把pdf生成png缩略图方法,这里我们要利用一个插件了,下面我来给大家演示一个实例。 php_im...2016-11-25
- 这款图片上传代码可以把上传的图片增加水印,生成小图片,同时还可以生成文字水印。 代码如下 复制代码 class upimages { var $annexf...2016-11-25
- 这篇文章主要介绍了ASP.NET创建动态缩略图的方法,实例分析了asp.net动态操作图片的相关技巧,需要的朋友可以参考下...2021-09-22
- 代码如下 复制代码 <!doctype html public "-//w3c//dtd xhtml 1.0 transitional//en" "http://www.w3.org/tr/xhtml1/dtd/xhtml1-transitional....2016-11-25
- 使用.net的方法GetThumbnailImage生成的缩略图失真严重,这里推荐一种不失真生成缩略图的方法...2021-09-22
- 等比例生成缩略图的php程序 这个程序很实现,但只是用来进来等比例生成缩略图哦,你要把文件上传到服务器,然后再由此函数来操作,有需要的朋友参考一下。 等比例生成缩...2016-11-25
- 这篇文章主要介绍了PHP生成图片缩略图类,可实现针对图形文件的属性获取、转换、文件生成等功能,非常简便实用,需要的朋友可以参考下...2017-01-15