ASP.NET Core Token认证
翻译:Token Authentication in ASP.NET Core
令牌认证(Token Authentication)已经成为单页应用(SPA)和移动应用事实上的标准。即使是传统的B/S应用也能利用其优点。优点很明白:极少的服务端数据管理、可扩展性、可以使用单独的认证服务器和应用服务器分离。
如果你对令牌(token)不是太了解,可以看这篇文章( overview of token authentication and JWTs)
令牌认证在asp.net core中集成。其中包括保护Bearer Jwt的路由功能,但是移除了生成token和验证token的部分,这些可以自定义或者使用第三方库来实现,得益于此,MVC和Web api项目可以使用令牌认证,而且很简单。下面将一步一步实现,代码可以在https://github.com/nbarbettini/SimpleTokenProvider
下载。
ASP.NET Core令牌验证
首先,背景知识:认证令牌,例如JWTs,是通过http 认证头传递的,例如:
GET /foo
Authorization: Bearer [token]
令牌可以通过浏览器cookies。传递方式是header或者cookies取决于应用和实际情况,对于移动app,使用headers,对于web,推荐在html5 storage中使用cookies,来防止xss攻击。
asp.net core对jwts令牌的验证很简单,特别是你通过header传递。
1、生成 SecurityKey,这个例子,我生成对称密钥验证jwts通过HMAC-SHA256加密方式,在startup.cs中:
// secretKey contains a secret passphrase only your server knowsvar secretKey = "mysupersecret_secretkey!123";var signingKey = new SymmetricSecurityKey(Encoding.ASCII.GetBytes(secretKey));
验证 header中传递的JWTs
在 Startup.cs中,使用Microsoft.AspNetCore.Authentication.JwtBearer中的UseJwtBearerAuthentication 方法获取受保护的api或者mvc路由有效的jwt。
var tokenValidationParameters = new TokenValidationParameters
{// The signing key must match!ValidateIssuerSigningKey = true,
    IssuerSigningKey = signingKey,// Validate the JWT Issuer (iss) claimValidateIssuer = true,
    ValidIssuer = "ExampleIssuer",// Validate the JWT Audience (aud) claimValidateAudience = true,
    ValidAudience = "ExampleAudience",// Validate the token expiryValidateLifetime = true,// If you want to allow a certain amount of clock drift, set that here:ClockSkew = TimeSpan.Zero
};

app.UseJwtBearerAuthentication(new JwtBearerOptions
{
    AutomaticAuthenticate = true,
    AutomaticChallenge = true,
    TokenValidationParameters = tokenValidationParameters
});
通过这个中间件,任何[Authorize]的请求都需要有效的jwt:
签名有效;
过期时间;
有效时间;
Issuer 声明等于“ExampleIssuer”
订阅者声明等于 “ExampleAudience”
如果不是合法的JWT,请求终止,issuer声明和订阅者声明不是必须的,它们用来标识应用和客户端。
在cookies中验证JWTs
ASP.NET Core中的cookies 认证不支持传递jwt。需要自定义实现 ISecureDataFormat接口的类。现在,你只是验证token,不是生成它们,只需要实现Unprotect方法,其他的交给System.IdentityModel.Tokens.Jwt.JwtSecurityTokenHandler这个类处理。
using System;using System.IdentityModel.Tokens.Jwt;using System.Security.Claims;using Microsoft.AspNetCore.Authentication;using Microsoft.AspNetCore.Http.Authentication;using Microsoft.IdentityModel.Tokens;
namespace SimpleTokenProvider
{public class CustomJwtDataFormat : ISecureDataFormat<AuthenticationTicket>{private readonly string algorithm;private readonly TokenValidationParameters validationParameters; public CustomJwtDataFormat(string algorithm, TokenValidationParameters validationParameters)
        {this.algorithm = algorithm;this.validationParameters = validationParameters;
        } public AuthenticationTicket Unprotect(string protectedText)=> Unprotect(protectedText, null); public AuthenticationTicket Unprotect(string protectedText, string purpose)
        {var handler = new JwtSecurityTokenHandler();
            ClaimsPrincipal principal = null;
            SecurityToken validToken = null; try{
                principal = handler.ValidateToken(protectedText, this.validationParameters, out validToken); var validJwt = validToken as JwtSecurityToken; if (validJwt == null)
                {throw new ArgumentException("Invalid JWT");
                } if (!validJwt.Header.Alg.Equals(algorithm, StringComparison.Ordinal))
                {throw new ArgumentException($"Algorithm must be '{algorithm}'");
                } // Additional custom validation of JWT claims here (if any)            }catch (SecurityTokenValidationException)
            {return null;
            }catch (ArgumentException)
            {return null;
            } // Validation passed. Return a valid AuthenticationTicket:return new AuthenticationTicket(principal, new AuthenticationProperties(), "Cookie");
        } // This ISecureDataFormat implementation is decode-onlypublic string Protect(AuthenticationTicket data)
        {throw new NotImplementedException();
        } public string Protect(AuthenticationTicket data, string purpose)
        {throw new NotImplementedException();
        }
    }
}
在startup.cs中调用
var tokenValidationParameters = new TokenValidationParameters
{// The signing key must match!ValidateIssuerSigningKey = true,
    IssuerSigningKey = signingKey, // Validate the JWT Issuer (iss) claimValidateIssuer = true,
    ValidIssuer = "ExampleIssuer", // Validate the JWT Audience (aud) claimValidateAudience = true,
    ValidAudience = "ExampleAudience", // Validate the token expiryValidateLifetime = true, // If you want to allow a certain amount of clock drift, set that here:ClockSkew = TimeSpan.Zero
};

app.UseCookieAuthentication(new CookieAuthenticationOptions
{
    AutomaticAuthenticate = true,
    AutomaticChallenge = true,
    AuthenticationScheme = "Cookie",
    CookieName = "access_token",
    TicketDataFormat = new CustomJwtDataFormat(
        SecurityAlgorithms.HmacSha256,
        tokenValidationParameters)
});
如果请求中包含名为access_token的cookie验证为合法的JWT,这个请求就能返回正确的结果,如果需要,你可以加上额外的jwt chaims,或者复制jwt chaims到ClaimsPrincipal在CustomJwtDataFormat.Unprotect方法中,上面是验证token,下面将在asp.net core中生成token。
ASP.NET Core生成Tokens
在asp.net 4.5中,这个UseOAuthAuthorizationServer中间件可以轻松的生成tokens,但是在asp.net core取消了,下面写一个简单的token生成中间件,最后,有几个现成解决方案的链接,供你选择。
简单的token生成节点
首先,生成 POCO保存中间件的选项. 生成类:TokenProviderOptions.cs


using System;using Microsoft.IdentityModel.Tokens;
namespace SimpleTokenProvider
{public class TokenProviderOptions
    {public string Path { get; set; } = "/token"; public string Issuer { get; set; } public string Audience { get; set; } public TimeSpan Expiration { get; set; } = TimeSpan.FromMinutes(5); public SigningCredentials SigningCredentials { get; set; }
    }
}
View Code
现在自己添加一个中间件,asp.net core 的中间件类一般是这样的:
using System.IdentityModel.Tokens.Jwt;using System.Security.Claims;using System.Threading.Tasks;using Microsoft.AspNetCore.Http;using Microsoft.Extensions.Options;using Newtonsoft.Json;namespace SimpleTokenProvider
{public class TokenProviderMiddleware
    {private readonly RequestDelegate _next;private readonly TokenProviderOptions _options;public TokenProviderMiddleware(
            RequestDelegate next,
            IOptions<TokenProviderOptions> options)
        {
            _next = next;
            _options = options.Value;
        }public Task Invoke(HttpContext context)
        {// If the request path doesn't match, skipif (!context.Request.Path.Equals(_options.Path, StringComparison.Ordinal))
            {return _next(context);
            }// Request must be POST with Content-Type: application/x-www-form-urlencodedif (!context.Request.Method.Equals("POST")               || !context.Request.HasFormContentType)
            {
                context.Response.StatusCode = 400;return context.Response.WriteAsync("Bad request.");
            }return GenerateToken(context);
        }
    }
}
View Code
这个中间件类接受TokenProviderOptions作为参数,当有请求且请求路径是设置的路径(token或者api/token),Invoke方法执行,token节点只对 POST请求而且包括form-urlencoded内容类型(Content-Type: application/x-www-form-urlencoded),因此调用之前需要检查下内容类型。
最重要的是GenerateToken,这个方法需要验证用户的身份,生成jwt,传回jwt:
private async Task GenerateToken(HttpContext context)
{var username = context.Request.Form["username"];var password = context.Request.Form["password"]; var identity = await GetIdentity(username, password);if (identity == null)
    {
        context.Response.StatusCode = 400;await context.Response.WriteAsync("Invalid username or password.");return;
    } var now = DateTime.UtcNow; // Specifically add the jti (random nonce), iat (issued timestamp), and sub (subject/user) claims.// You can add other claims here, if you want:var claims = new Claim[]
    {new Claim(JwtRegisteredClaimNames.Sub, username),new Claim(JwtRegisteredClaimNames.Jti, Guid.NewGuid().ToString()),new Claim(JwtRegisteredClaimNames.Iat, ToUnixEpochDate(now).ToString(), ClaimValueTypes.Integer64)
    }; // Create the JWT and write it to a stringvar jwt = new JwtSecurityToken(
        issuer: _options.Issuer,
        audience: _options.Audience,
        claims: claims,
        notBefore: now,
        expires: now.Add(_options.Expiration),
        signingCredentials: _options.SigningCredentials);var encodedJwt = new JwtSecurityTokenHandler().WriteToken(jwt); var response = new{
        access_token = encodedJwt,
        expires_in = (int)_options.Expiration.TotalSeconds
    }; // Serialize and return the responsecontext.Response.ContentType = "application/json";await context.Response.WriteAsync(JsonConvert.SerializeObject(response, new JsonSerializerSettings { Formatting = Formatting.Indented }));
}
View Code
大部分代码都很官方,JwtSecurityToken 类生成jwt,JwtSecurityTokenHandler将jwt编码,你可以在claims中添加任何chaims。验证用户身份只是简单的验证,实际情况肯定不是这样的,你可以集成 identity framework或者其他的,对于这个实例只是简单的硬编码:
private Task<ClaimsIdentity> GetIdentity(string username, string password)
{// DON'T do this in production, obviously!if (username == "TEST" && password == "TEST123")
    {return Task.FromResult(new ClaimsIdentity(new System.Security.Principal.GenericIdentity(username, "Token"), new Claim[] { }));
    } // Credentials are invalid, or account doesn't existreturn Task.FromResult<ClaimsIdentity>(null);
}
View Code
添加一个将DateTime生成timestamp的方法:
public static long ToUnixEpochDate(DateTime date)=> (long)Math.Round((date.ToUniversalTime() - new DateTimeOffset(1970, 1, 1, 0, 0, 0, TimeSpan.Zero)).TotalSeconds);
View Code
现在,你可以将这个中间件添加到startup.cs中了:
using System.Text;using Microsoft.AspNetCore.Builder;using Microsoft.AspNetCore.Hosting;using Microsoft.Extensions.Configuration;using Microsoft.Extensions.DependencyInjection;using Microsoft.Extensions.Logging;using Microsoft.Extensions.Options;using Microsoft.IdentityModel.Tokens;
namespace SimpleTokenProvider
{public partial class Startup
    {public Startup(IHostingEnvironment env)
        {var builder = new ConfigurationBuilder()
                .AddJsonFile("appsettings.json", optional: true);
            Configuration = builder.Build();
        } public IConfigurationRoot Configuration { get; set; } public void ConfigureServices(IServiceCollection services)
        {
            services.AddMvc();
        } // The secret key every token will be signed with.// In production, you should store this securely in environment variables// or a key management tool. Don't hardcode this into your application!private static readonly string secretKey = "mysupersecret_secretkey!123"; public void Configure(IApplicationBuilder app, IHostingEnvironment env, ILoggerFactory loggerFactory)
        {
            loggerFactory.AddConsole(LogLevel.Debug);
            loggerFactory.AddDebug();

            app.UseStaticFiles(); // Add JWT generation endpoint:var signingKey = new SymmetricSecurityKey(Encoding.ASCII.GetBytes(secretKey));var options = new TokenProviderOptions
            {
                Audience = "ExampleAudience",
                Issuer = "ExampleIssuer",
                SigningCredentials = new SigningCredentials(signingKey, SecurityAlgorithms.HmacSha256),
            };

            app.UseMiddleware<TokenProviderMiddleware>(Options.Create(options));

            app.UseMvc();
        }
    }
}
View Code
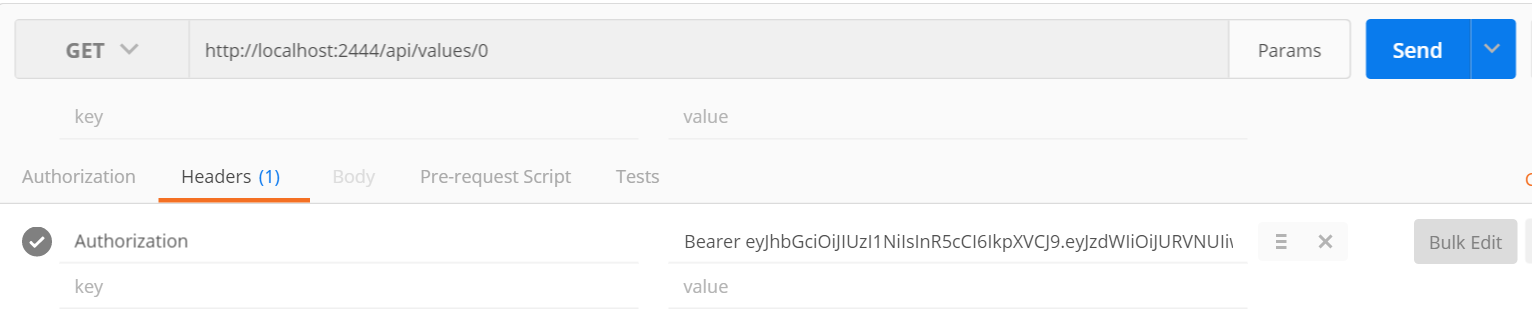
测试一下,推荐使用chrome 的postman:
POST /token
Content-Type: application/x-www-form-urlencoded

username=TEST&password=TEST123
View Code
结果:
200 OK
Content-Type: application/json

{  "access_token": "eyJhb...",  "expires_in": 300}
View Code
你可以使用jwt工具查看生成的jwt内容。如果开发的是移动应用或者单页应用,你可以在后续请求的header中存储jwt,如果你需要在cookies中存储的话,你需要对代码修改一下,需要将返回的jwt字符串添加到cookie中。
测试下:
其他方案
下面是比较成熟的项目,可以在实际项目中使用:
AspNet.Security.OpenIdConnect.Server – ASP.NET 4.x的验证中间件。
OpenIddict – 在identity上添加OpenId验证。
IdentityServer4 – .NET Core认证中间件(现在测试版本)。
下面的文章可以让你更加的了解认证:
Overview of Token Authentication Features
How Token Authentication Works in Stormpath
Use JWTs the Right Way!
谢谢阅读,第一次翻译。。。。。。。。
请多多指正。。。
https://stormpath.com/blog/token-authentication-asp-net-core
相关文章
Python3使用Selenium获取session和token方法详解
这篇文章主要介绍了Python3使用Selenium获取session和token方法详解,需要的朋友可以参考下...2021-02-17- 这篇文章主要介绍了vue项目中js-cookie的使用存储token操作,具有很好的参考价值,希望对大家有所帮助。一起跟随小编过来看看吧...2020-11-14
- 这篇文章主要介绍了详解ASP.NET Core Token认证,小编觉得挺不错的,现在分享给大家,也给大家做个参考。...2021-09-22
- 这篇文章主要介绍了asp.net core MVC之实现基于token的认证,文中通过示例代码介绍的非常详细,对大家的学习或者工作具有一定的参考学习价值,需要的朋友们下面随着小编来一起学习学习吧...2021-05-07
- 本篇文章主要介绍了基于ASP.NET Core数据保护生成验证token,小编觉得挺不错的,现在分享给大家,也给大家做个参考。一起跟随小编过来看看吧...2021-09-22
- 这篇文章主要为大家详细介绍了C# wx获取token的基本方法,具有一定的参考价值,感兴趣的小伙伴们可以参考一下...2020-06-25
- 这篇文章主要为大家详细介绍了.Net微信开发之如何解决access_token过期问题的方法,感兴趣的小伙伴们可以参考一下...2021-09-22
- 早上逛某乎的时候,遇到一位同学在问这个问题,很好奇jwt的存储位置。本文详细的介绍一下,感兴趣的可以了解一下...2021-06-27
- 这篇文章主要介绍了Django前后端分离csrf token获取方式,文中通过示例代码介绍的非常详细,对大家的学习或者工作具有一定的参考学习价值,需要的朋友们下面随着小编来一起学习学习吧...2020-12-25
Springboot 如何实现filter拦截token验证和跨域
这篇文章主要介绍了Springboot 如何实现filter拦截token验证和跨域操作,具有很好的参考价值,希望对大家有所帮助。如有错误或未考虑完全的地方,望不吝赐教...2021-08-12- 这篇文章主要为大家详细介绍了基于redis实现token验证用户是否登陆,文中示例代码介绍的非常详细,具有一定的参考价值,感兴趣的小伙伴们可以参考一下...2021-01-15
SpringBoot和Redis实现Token权限认证的实例讲解
这篇文章主要介绍了SpringBoot和Redis实现Token权限认证的实例讲解,具有很好的参考价值,希望对大家有所帮助。一起跟随小编过来看看吧...2021-02-18关于php微信订阅号开发之token验证后自动发送消息给订阅号但是没有消息返回的问题
最近做了个项目,当token验证之后,发送消息给订阅号,但是没有消息返回,下面小编通过本篇文章给大家分享我的解决办法...2015-12-24C#微信公众平台开发之access_token的获取存储与更新
这篇文章主要介绍了C#微信公众平台开发之access_token的获取存储与更新的相关资料,需要的朋友可以参考下...2020-06-25详解ASP.NET Core Web Api之JWT刷新Token
这篇文章主要介绍了详解ASP.NET Core Web Api之JWT刷新Token,文中通过示例代码介绍的非常详细,对大家的学习或者工作具有一定的参考学习价值,需要的朋友们下面随着小编来一起学习学习吧...2021-09-22- 这篇文章主要为大家详细介绍了微信开发中AccessToken的获取方法,具有一定的参考价值,感兴趣的小伙伴们可以参考一下...2021-09-22
微信公众平台开发之获得ACCESSTOKEN .Net代码解析
这篇文章主要为大家详细解析了微信公众平台开发之获得ACCESSTOKEN .Net代码,感兴趣的小伙伴们可以参考一下...2021-09-22- 这篇文章主要介绍了Jmeter设置全局变量token过程图解,文中通过示例代码介绍的非常详细,对大家的学习或者工作具有一定的参考学习价值,需要的朋友可以参考下...2020-09-05
- 这篇文章主要介绍了解决微服务中关于用户token处理到的坑,具有很好的参考价值,希望对大家有所帮助。如有错误或未考虑完全的地方,望不吝赐教...2021-08-26
springcloud 如何解决微服务之间token传递问题
这篇文章主要介绍了springcloud 如何解决微服务之间token传递问题,具有很好的参考价值,希望对大家有所帮助。如有错误或未考虑完全的地方,望不吝赐教...2022-03-07