php_imagick实现图片剪切、旋转、锐化、减色或增加特效

 更新时间:2016年11月25日 16:56  点击:1480
一个可以供PHP调用ImageMagick功能的PHP扩展。使用这个扩展可以使PHP具备和ImageMagick相同的功能。


ImageMagick是一套功能强大、稳定而且免费的工具集和开发包,可以用来读、写和处理超过185种基本格式的图片文件,包括流行的TIFF, JPEG, GIF, PNG, PDF以及PhotoCD等格式。利用ImageMagick,你可以根据web应用程序的需要动态生成图片, 还可以对一个(或一组)图片进行改变大小、旋转、锐化、减色或增加特效等操作,并将操作的结果以相同格式或其它格式保存。


php_imagick是PHP对图片处理的一个扩展包,可以完成对图片改变大小、旋转、锐化、减色或增加特效等操作。
一、windows下安装Imagick扩展:


1、下载 ImageMagick并安装

http://image_magick.veidrodis.com/image_magick/binaries/ImageMagick-6.6.2-10-Q16-windows-dll.exe

2、下载php_imagick.dll

http://valokuva.org/outside-blog-content/imagick-windows-builds/php53/imagick-2.3.0-dev/vc9_nts/php_imagick.dll

如果你用的是线程安全的php,请下载
http://valokuva.org/outside-blog-content/imagick- windows-builds/php53/imagick-2.3.0-dev/vc9_zts/php_imagick.dll

3、设置
在php.ini中添加
extension=php_imagick.dll ,重启web server


二、linux下安装Imagick扩展:


1.yum安装ImageMagick


yum install ImageMagick ImageMagick-devel

2.测试是否安装成功

convert -version

3.安装imagick扩展


01.wget http://pecl.php.net/get/imagick-3.1.0RC2.tgz02.tar xzvf imagick-3.1.0RC2.tgz03.cd imagick-3.1.0RC204.phpize05../configure06.make07.make install

4.编辑php.ini文件,在文件末尾添加如下代码

extension=imagick.so

5. 重新启动apache服务器

service httpd restart


三、案例
1. 边框处理


 代码如下 复制代码
//by www.111cn.net
header('Content-type: image/jpeg');
$image = new Imagick('test.jpg');
$color=new ImagickPixel();
$color->setColor("rgb(220,220,220)");
$image->borderImage($color,5,4);
$image->blurImage(5,5,imagick::CHANNEL_GREEN);
echo $image;


我们先来看个简单的实例

php_imagick程序示例

1.创建一个缩略图并显示出来

 代码如下 复制代码
<?php
header('Content-type: image/jpeg');
$image = new Imagick('image.jpg');
// If 0 is provided as a width or height parameter,// aspect ratio is maintained
$image->thumbnailImage(100, 0);
echo $image;
?>

2.创建一个目录下的缩略图,并保存

 代码如下 复制代码

<?php
$images = new Imagick(glob('images/*.JPG'));
foreach($images as $image) {
// Providing 0 forces thumbnailImage to maintain aspect ratio
$image->thumbnailImage(1024,0);
}
$images->writeImages();
?>

3.缩略GIF动画图片

 代码如下 复制代码

<?php
/* Create a new imagick object and read in GIF */
$im = new Imagick("example.gif");
/* Resize all frames */
foreach ($im as $frame) {
/* 50x50 frames */
$frame->thumbnailImage(50, 50);
/* Set the virtual canvas to correct size */
$frame->setImagePage(50, 50, 0, 0);
}/* Notice writeImages instead of writeImage */
$im->writeImages("example_small.gif", true);
?>

现在我们进入正题吧,

例1

裁切/生成缩略图/添加水印, 自动检测和处理 GIF

调用方式:

 代码如下 复制代码

include 'imagick.class.php';

$image = new lib_image_imagick();

$image->open('a.gif');
$image->resize_to(100, 100, 'scale_fill');
$image->add_text('1024i.com', 10, 20);
$image->add_watermark('1024i.gif', 10, 50);
$image->save_to('x.gif');

imagick.class.php 

 代码如下 复制代码

<?php

class lib_image_imagick
{
 private $image = null;
 private $type = null;

 // 构造函数
 public function __construct(){}


 // 析构函数
 public function __destruct()
 {
     if($this->image!==null) $this->image->destroy();
 }

 // 载入图像
 public function open($path)
 {
  $this->image = new Imagick( $path );
  if($this->image)
  {
      $this->type = strtolower($this->image->getImageFormat());
  }
  return $this->image;
 }
 

 public function crop($x=0, $y=0, $width=null, $height=null)
 {
     if($width==null) $width = $this->image->getImageWidth()-$x;
     if($height==null) $height = $this->image->getImageHeight()-$y;
     if($width<=0 || $height<=0) return;
    
     if($this->type=='gif')
     {
            $image = $this->image;
         $canvas = new Imagick();
        
         $images = $image->coalesceImages();
         foreach($images as $frame){
             $img = new Imagick();
             $img->readImageBlob($frame);
                $img->cropImage($width, $height, $x, $y);

                $canvas->addImage( $img );
                $canvas->setImageDelay( $img->getImageDelay() );
                $canvas->setImagePage($width, $height, 0, 0);
            }
           
            $image->destroy();
         $this->image = $canvas;
     }
     else
     {
         $this->image->cropImage($width, $height, $x, $y);
     }
 }

 /*
 * 更改图像大小
 $fit: 适应大小方式
 'force': 把图片强制变形成 $width X $height 大小
 'scale': 按比例在安全框 $width X $height 内缩放图片, 输出缩放后图像大小 不完全等于 $width X $height
 'scale_fill': 按比例在安全框 $width X $height 内缩放图片,安全框内没有像素的地方填充色, 使用此参数时可设置背景填充色 $bg_color = array(255,255,255)(红,绿,蓝, 透明度) 透明度(0不透明-127完全透明))
 其它: 智能模能 缩放图像并载取图像的中间部分 $width X $height 像素大小
 $fit = 'force','scale','scale_fill' 时: 输出完整图像
 $fit = 图像方位值 时, 输出指定位置部分图像
 字母与图像的对应关系如下:
 
 north_west   north   north_east
 
 west         center        east
 
 south_west   south   south_east
 
 */
 public function resize_to($width = 100, $height = 100, $fit = 'center', $fill_color = array(255,255,255,0) )
 {
    
     switch($fit)
     {
         case 'force':
             if($this->type=='gif')
             {
                 $image = $this->image;
                 $canvas = new Imagick();
                
                 $images = $image->coalesceImages();
                 foreach($images as $frame){
                     $img = new Imagick();
                     $img->readImageBlob($frame);
                        $img->thumbnailImage( $width, $height, false );

                        $canvas->addImage( $img );
                        $canvas->setImageDelay( $img->getImageDelay() );
                    }
                    $image->destroy();
                 $this->image = $canvas;
             }
             else
             {
                 $this->image->thumbnailImage( $width, $height, false );
             }
             break;
         case 'scale':
             if($this->type=='gif')
             {
                 $image = $this->image;
                 $images = $image->coalesceImages();
                 $canvas = new Imagick();
                 foreach($images as $frame){
                     $img = new Imagick();
                     $img->readImageBlob($frame);
                        $img->thumbnailImage( $width, $height, true );

                        $canvas->addImage( $img );
                        $canvas->setImageDelay( $img->getImageDelay() );
                    }
                    $image->destroy();
                 $this->image = $canvas;
             }
             else
             {
                 $this->image->thumbnailImage( $width, $height, true );
             }
             break;
         case 'scale_fill':
             $size = $this->image->getImagePage();
             $src_width = $size['width'];
             $src_height = $size['height'];
            
                $x = 0;
                $y = 0;
               
                $dst_width = $width;
                $dst_height = $height;

       if($src_width*$height > $src_height*$width)
    {
     $dst_height = intval($width*$src_height/$src_width);
     $y = intval( ($height-$dst_height)/2 );
    }
    else
    {
     $dst_width = intval($height*$src_width/$src_height);
     $x = intval( ($width-$dst_width)/2 );
    }

                $image = $this->image;
                $canvas = new Imagick();
               
                $color = 'rgba('.$fill_color[0].','.$fill_color[1].','.$fill_color[2].','.$fill_color[3].')';
             if($this->type=='gif')
             {
                 $images = $image->coalesceImages();
                 foreach($images as $frame)
                 {
                     $frame->thumbnailImage( $width, $height, true );

                     $draw = new ImagickDraw();
                        $draw->composite($frame->getImageCompose(), $x, $y, $dst_width, $dst_height, $frame);

                        $img = new Imagick();
                        $img->newImage($width, $height, $color, 'gif');
                        $img->drawImage($draw);

                        $canvas->addImage( $img );
                        $canvas->setImageDelay( $img->getImageDelay() );
                        $canvas->setImagePage($width, $height, 0, 0);
                    }
             }
             else
             {
                 $image->thumbnailImage( $width, $height, true );
                
                 $draw = new ImagickDraw();
                    $draw->composite($image->getImageCompose(), $x, $y, $dst_width, $dst_height, $image);
                   
                 $canvas->newImage($width, $height, $color, $this->get_type() );
                    $canvas->drawImage($draw);
                    $canvas->setImagePage($width, $height, 0, 0);
             }
             $image->destroy();
             $this->image = $canvas;
             break;
   default:
    $size = $this->image->getImagePage();
       $src_width = $size['width'];
             $src_height = $size['height'];
            
                $crop_x = 0;
                $crop_y = 0;
               
                $crop_w = $src_width;
                $crop_h = $src_height;
               
          if($src_width*$height > $src_height*$width)
    {
     $crop_w = intval($src_height*$width/$height);
    }
    else
    {
        $crop_h = intval($src_width*$height/$width);
    }
               
       switch($fit)
             {
        case 'north_west':
            $crop_x = 0;
            $crop_y = 0;
            break;
           case 'north':
               $crop_x = intval( ($src_width-$crop_w)/2 );
               $crop_y = 0;
               break;
           case 'north_east':
               $crop_x = $src_width-$crop_w;
               $crop_y = 0;
               break;
           case 'west':
               $crop_x = 0;
               $crop_y = intval( ($src_height-$crop_h)/2 );
               break;
           case 'center':
               $crop_x = intval( ($src_width-$crop_w)/2 );
               $crop_y = intval( ($src_height-$crop_h)/2 );
               break;
           case 'east':
               $crop_x = $src_width-$crop_w;
               $crop_y = intval( ($src_height-$crop_h)/2 );
               break;
           case 'south_west':
               $crop_x = 0;
               $crop_y = $src_height-$crop_h;
               break;
           case 'south':
               $crop_x = intval( ($src_width-$crop_w)/2 );
               $crop_y = $src_height-$crop_h;
               break;
           case 'south_east':
               $crop_x = $src_width-$crop_w;
               $crop_y = $src_height-$crop_h;
               break;
           default:
               $crop_x = intval( ($src_width-$crop_w)/2 );
               $crop_y = intval( ($src_height-$crop_h)/2 );
             }
            
             $image = $this->image;
             $canvas = new Imagick();
            
          if($this->type=='gif')
             {
                 $images = $image->coalesceImages();
                 foreach($images as $frame){
                     $img = new Imagick();
                     $img->readImageBlob($frame);
                        $img->cropImage($crop_w, $crop_h, $crop_x, $crop_y);
                        $img->thumbnailImage( $width, $height, true );
                       
                        $canvas->addImage( $img );
                        $canvas->setImageDelay( $img->getImageDelay() );
                        $canvas->setImagePage($width, $height, 0, 0);
                    }
             }
             else
             {
                 $image->cropImage($crop_w, $crop_h, $crop_x, $crop_y);
                 $image->thumbnailImage( $width, $height, true );
                 $canvas->addImage( $image );
                 $canvas->setImagePage($width, $height, 0, 0);
             }
             $image->destroy();
             $this->image = $canvas;
     }
    
 }


 // 添加水印图片
 public function add_watermark($path, $x = 0, $y = 0)
 {
        $watermark = new Imagick($path);
        $draw = new ImagickDraw();
        $draw->composite($watermark->getImageCompose(), $x, $y, $watermark->getImageWidth(), $watermark->getimageheight(), $watermark);

     if($this->type=='gif')
     {
         $image = $this->image;
            $canvas = new Imagick();
         $images = $image->coalesceImages();
         foreach($image as $frame)
         {
                $img = new Imagick();
             $img->readImageBlob($frame);
                $img->drawImage($draw);
               
                $canvas->addImage( $img );
                $canvas->setImageDelay( $img->getImageDelay() );
            }
            $image->destroy();
         $this->image = $canvas;
     }
     else
     {
         $this->image->drawImage($draw);
     }
 }

 
 // 添加水印文字
 public function add_text($text, $x = 0 , $y = 0, $angle=0, $style=array())
 {
        $draw = new ImagickDraw();
        if(isset($style['font'])) $draw->setFont($style['font']);
        if(isset($style['font_size'])) $draw->setFontSize($style['font_size']);
     if(isset($style['fill_color'])) $draw->setFillColor($style['fill_color']);
     if(isset($style['under_color'])) $draw->setTextUnderColor($style['under_color']);
    
     if($this->type=='gif')
     {
         foreach($this->image as $frame)
         {
             $frame->annotateImage($draw, $x, $y, $angle, $text);
         }
     }
     else
     {
         $this->image->annotateImage($draw, $x, $y, $angle, $text);
     }
 }
 
 
 // 保存到指定路径
 public function save_to( $path )
 {
     if($this->type=='gif')
     {
         $this->image->writeImages($path, true);
     }
     else
     {
         $this->image->writeImage($path);
     }
 }

 // 输出图像
 public function output($header = true)
 {
     if($header) header('Content-type: '.$this->type);
     echo $this->image->getImagesBlob();  
 }

 
 public function get_width()
 {
        $size = $this->image->getImagePage();
        return $size['width'];
 }
 
 public function get_height()
 {
     $size = $this->image->getImagePage();
        return $size['height'];
 }

 // 设置图像类型, 默认与源类型一致
 public function set_type( $type='png' )
 {
     $this->type = $type;
        $this->image->setImageFormat( $type );
 }

 // 获取源图像类型
 public function get_type()
 {
  return $this->type;
 }


 // 当前对象是否为图片
 public function is_image()
 {
  if( $this->image )
   return true;
  else
   return false;
 }


 public function thumbnail($width = 100, $height = 100, $fit = true){ $this->image->thumbnailImage( $width, $height, $fit );} // 生成缩略图 $fit为真时将保持比例并在安全框 $width X $height 内生成缩略图片

 /*
 添加一个边框
 $width: 左右边框宽度
 $height: 上下边框宽度
 $color: 颜色: RGB 颜色 'rgb(255,0,0)' 或 16进制颜色 '#FF0000' 或颜色单词 'white'/'red'...
 */
 public function border($width, $height, $color='rgb(220, 220, 220)')
 {
  $color=new ImagickPixel();
  $color->setColor($color);
  $this->image->borderImage($color, $width, $height);
 }
 
 public function blur($radius, $sigma){$this->image->blurImage($radius, $sigma);} // 模糊
 public function gaussian_blur($radius, $sigma){$this->image->gaussianBlurImage($radius, $sigma);} // 高斯模糊
 public function motion_blur($radius, $sigma, $angle){$this->image->motionBlurImage($radius, $sigma, $angle);} // 运动模糊
 public function radial_blur($radius){$this->image->radialBlurImage($radius);} // 径向模糊

 public function add_noise($type=null){$this->image->addNoiseImage($type==null?imagick::NOISE_IMPULSE:$type);} // 添加噪点
 
 public function level($black_point, $gamma, $white_point){$this->image->levelImage($black_point, $gamma, $white_point);} // 调整色阶
 public function modulate($brightness, $saturation, $hue){$this->image->modulateImage($brightness, $saturation, $hue);} // 调整亮度、饱和度、色调

 public function charcoal($radius, $sigma){$this->image->charcoalImage($radius, $sigma);} // 素描
 public function oil_paint($radius){$this->image->oilPaintImage($radius);} // 油画效果
 
 public function flop(){$this->image->flopImage();} // 水平翻转
 public function flip(){$this->image->flipImage();} // 垂直翻转

}

利用php截屏或实现网页快照我们需要用一个工具:xvfb and wkhtmltoimagek哦,这个工具目前只能在linux系统中使用,下面有兴趣的朋友可进入参考。

在做旅游攻略时,需要把攻略页面生成PDF和Jpg图片,PDF生成用的是《MPDF把Html生成PDF》,而HTML生成Jpg又卡壳了。前期打算以纯程式的生成,但是除了调用别的网站提供的远程API生成Jpg,不然以单纯的程式(GD库和内置函数,或封装的类)都没找到完美的解决。

不得已,安装扩展wkhtmltoimage生成。

安装步骤如下:

1、服务器端下载安装wkhtmltoimage,32和64位有区别,心情天空安装的是centos 5.8 32位。但是下载了 wkhtmltoimage 0.11版本但是出现以下错误,

Pixmap: Cannot create a QPixmap when no GUI is being used
QPixmap: Cannot create a QPixmap when no GUI is being used
QPixmap: Cannot create a QPixmap when no GUI is being used最后心情天空安装wkhtmltoimage-0.10.0_rc2-static-i386.tar.bz2低版本才可以正常生成。


32位
wget http://wkhtmltopdf.googlecode.com/files/wkhtmltoimage-0.10.0_rc2-static-i386.tar.bz2
tar jxf wkhtmltoimage-0.10.0_rc2-static-i386.tar.bz2
cp wkhtmltoimage-i386 /usr/local/bin/wkhtmltoimage
 
64位
wget http://wkhtmltopdf.googlecode.com/files/wkhtmltoimage-0.10.0_rc2-static-amd64.tar.bz2
mv wkhtmltoimage-0.10.0_rc2-static-amd64.tar.bz2 wkhtmltoimage-0.10.0_rc2-static-amd64.tar
tar -xvf wkhtmltoimage-0.10.0_rc2-static-amd64.tar
mv wkhtmltoimage-amd64 /usr/bin/wkhtmltoimage
就这样,安装成功,可以测试 wkhtmltoimage http://www.111cn.net/ screenshot.png

2、php执行wkhtmltoimage 生成图片

 代码如下 复制代码

set_time_limit(0);
shell_exec('/usr/local/bin/wkhtmltoimage http://www.111cn.net/ /usr/local/wwwroot/111cn.net/5eyi.jpg');

假若用foreach批量生成的话建议,sleep(10),每次生成后停顿几秒。

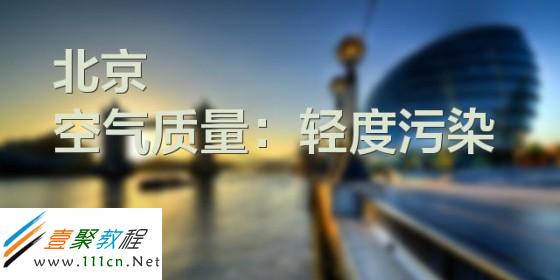
在php中要给图片加水印我们需要给php安装GD库了,这里我们不介绍GD库安装,只介绍怎么利用php给图片添加文字水印并添加文字阴影效果。

GD库,是php处理图形的扩展库,GD库提供了一系列用来处理图片的API,使用GD库可以处理图片,或者生成图片。 在网站上GD库通常用来生成缩略图,或者用来对图片加水印,或者用来生成汉字验证码,或者对网站数据生成报表等。

原图


生成效果图:

效果图


GD库的安装什么的网上都有,现在很多虚拟空间也都支持,这里就不再赘述。下面通过我实际应用代码的实例和相关的注释为大家介绍一下GD库的使用方法。

 代码如下 复制代码
$str="北京";
$str2= "空气质量:轻度污染";
// 通过图片生成一个对象$im
$im = imagecreatefromjpeg("images/3.jpg");
//载入字体zt.ttf
$fnt = "zt.ttf";
//创建颜色,用于文字字体的白和阴影的黑
$white=imagecolorallocate($im,222,229,207);
$black=imagecolorallocate($im,50,50,50);
//创建关于相对图片位置的函数,方便调用
$top=100;
$left=60;
$top2=170;
//在图片中添加文字,imagettftext (image,size,angle, x, y,color,fontfile,text)
imagettftext($im,41, 0, $left+1, $top+1, $black, $fnt, $str);
imagettftext($im,41, 0, $left, $top, $white, $fnt, $str);
imagettftext($im,43, 0, $left+1,$top2+1 , $black, $fnt, $str2);
imagettftext($im,43, 0, $left,$top2, $white, $fnt, $str2);
//将$im输出
ImageJpeg($im);
//销毁$im对象
ImageDestroy($im);

 
接下来详细解释一下:


 代码如下 复制代码
imagettftext (image,size,angle, x, y,color,fontfile,text)

 
imagettftext() 是将字符串 text画到 image所代表的图像上,从坐标 x,y(左上角为 0, 0)开始,角度为 angle,颜色为 color,使用 fontfile 所指定的 TrueType 字体文件。

由 x,y 所表示的坐标定义了第一个字符的基本点大概在字符的左下角。

angle 以角度表示,0 度为从左向右阅读文本,更高的值表示逆时针方向(即如果值为 90 则表示从下向上阅读文本)。

fontfile 是想要使用的 TrueType 字体的文件名。

text 是文本字符串,可以包含 UTF-8 字符序列。

color 是颜色的索引值。

在php中要实现图片增加水印我们要用到的函数有很多,imagecreatefromjpeg,imagecreatefrompng,getimagesize等等函数,这些都是属于php GD库的函数,所以我们必须在php.ini中打开GD库才可以让php使用这些函数生成图片水印了。

实现水印功能主要就是靠这些函数功能操作

1.imagecreatefromjpeg // 打开JPG图片 2.imagecreatefromgif    // 打开GIF图片
3.imagecreatefrompng // 打开PNG图片
4.imagecreatefromwbmp // 打开WBMP图片(比较少用)
5.getimagesize // 获取图片大小信息
6.imagecopymerge // 把多张图片整合(添加水印的主要函数)
7.imagejpeg // 保存JPG图片
8.imagegif    // 保存GIF图片
9.imagepng // 保存PNG图片

 代码如下 复制代码

<?php
 
echo img_water_mark("1.jpg","walter.gif",null,"2.jpg",5,80);
 
/**
 * 图片加水印(适用于png/jpg/gif格式)
 *
 * @author flynetcn
 *
 * @param $srcImg    原图片
 * @param $waterImg  水印图片
 * @param $savepath  保存路径
 * @param $savename  保存名字
 * @param $positon   水印位置
 *                   1:顶部居左, 2:顶部居右, 3:居中, 4:底部局左, 5:底部居右
 * @param $alpha     透明度 -- 0:完全透明, 100:完全不透明
 *
 * @return 成功 -- 加水印后的新图片地址
 *      失败 -- -1:原文件不存在, -2:水印图片不存在, -3:原文件图像对象建立失败
 *              -4:水印文件图像对象建立失败 -5:加水印后的新图片保存失败
 */
function img_water_mark($srcImg, $waterImg, $savepath=null, $savename=null, $positon=5, $alpha=30)
{
 $temp = pathinfo($srcImg);
 $name = $temp[basename];
 $path = $temp[dirname];
 $exte = $temp[extension];
 $savename = $savename ? $savename : $name;
 $savepath = $savepath ? $savepath : $path;
 $savefile = $savepath ."/". $savename;
 $srcinfo = @getimagesize($srcImg);
 if (!$srcinfo) {
  return -1;  //原文件不存在
 }
 $waterinfo = @getimagesize($waterImg);
 if (!$waterinfo) {
  return -2;  //水印图片不存在
 }
 $srcImgObj = image_create_from_ext($srcImg);
 if (!$srcImgObj) {
  return -3;  //原文件图像对象建立失败
 }
 $waterImgObj = image_create_from_ext($waterImg);
 if (!$waterImgObj) {
  return -4;  //水印文件图像对象建立失败
 }
 switch ($positon) {
 //1顶部居左
 case 1: $x=$y=0; break;
 //2顶部居右
 case 2: $x = $srcinfo[0]-$waterinfo[0]; $y = 0; break;
 //3居中
 case 3: $x = ($srcinfo[0]-$waterinfo[0])/2; $y = ($srcinfo[1]-$waterinfo[1])/2; break;
 //4底部居左
 case 4: $x = 0; $y = $srcinfo[1]-$waterinfo[1]; break;
 //5底部居右
 case 5: $x = $srcinfo[0]-$waterinfo[0]; $y = $srcinfo[1]-$waterinfo[1]; break;
 default: $x=$y=0;
 }
 imagecopymerge($srcImgObj, $waterImgObj, $x, $y, 0, 0, $waterinfo[0], $waterinfo[1], $alpha);
 switch ($srcinfo[2]) {
 case 1: imagegif($srcImgObj, $savefile); break;
 case 2: imagejpeg($srcImgObj, $savefile); break;
 case 3: imagepng($srcImgObj, $savefile); break;
 default: return -5;  //保存失败
 }
 imagedestroy($srcImgObj);
 imagedestroy($waterImgObj);
 return $savefile;
}
 
function image_create_from_ext($imgfile)
{
 $info = getimagesize($imgfile);
 $im = null;
 switch ($info[2]) {
 case 1: $im=imagecreatefromgif($imgfile); break;
 case 2: $im=imagecreatefromjpeg($imgfile); break;
 case 3: $im=imagecreatefrompng($imgfile); break;
 }
 return $im;
}

目前支持jpg、gif、png等图片格式。

用法举例:

 代码如下 复制代码

if($pic = watermark('./image.jpg','./watermark.png'))
{
    echo '<img src="' . $pic . '" border=0 />' ;
}
else
{
    echo '<img src="./image.jpg" border=0 />';
}

下面演示一个完整全水印增加函数

 代码如下 复制代码

<?php  
/************************************************************** 

参数说明:  
$max_file_size  : 上传文件大小限制, 单位BYTE  
$destination_folder : 上传文件路径  
$watermark   : 是否附加水印(1为加水印,其他为不加水印);  

使用说明:  
1. 将PHP.INI文件里面的"extension=php_gd2.dll"一行前面的;号去掉,因为我们要用到GD库;  
2. 将extension_dir =改为你的php_gd2.dll所在目录;  
**************************************************************/  

//上传文件类型列表  
$uptypes=array(  
   'image/jpg',  
   'image/jpeg',  
   'image/png',  
   'image/pjpeg',  
   'image/gif',  
   'image/bmp',  
   'image/x-png'  
);  

$max_file_size=2000000;     //上传文件大小限制, 单位BYTE  
$destination_folder="uploadimg/"; //上传文件路径  
$watermark=1;      //是否附加水印(1为加水印,其他为不加水印);  
$watertype=1;      //水印类型(1为文字,2为图片)  
$waterposition=1;     //水印位置(1为左下角,2为右下角,3为左上角,4为右上角,5为居中);  
$waterstring="http://www.111cn.net/";  //水印字符串  
$waterimg="xplore.gif";    //水印图片  
$imgpreview=1;      //是否生成预览图(1为生成,其他为不生成);  
$imgpreviewsize=1/1;    //缩略图比例  
?>  
<html>  
<head>  
<title>图片打水印程序演示!WWW.MOP8.COM</title>  
<style type="text/css">  
<!--  
body  
{  
    font-size: 9pt;  
}  
input  
{  
    background-color: #66CCFF;  
    border: 1px inset #CCCCCC;  
}  
-->  
</style>  
</head>  

<body>  
<center> 
<form enctype="multipart/form-data" method="post" name="upform">  
 上传文件:  
 <input name="upfile" type="file">  
 <input type="submit" value="上传"><P>  
 允许上传的文件类型为:<?=implode(', ',$uptypes)?>  
</form>  
<FONT COLOR="#FF0000">本演示空间由TuWoo提供,本程序采用文字水印的方式.</FONT></CENTER> 
<?php  
if ($_SERVER['REQUEST_METHOD'] == 'POST')  
{  
   if (!is_uploaded_file($_FILES["upfile"][tmp_name]))  
   //是否存在文件  
   {  
        echo "图片不存在!";  
        exit;  
   }  

   $file = $_FILES["upfile"];  
   if($max_file_size < $file["size"])  
   //检查文件大小  
   {  
       echo "文件太大!";  
       exit;  
   }  

   if(!in_array($file["type"], $uptypes))  
   //检查文件类型  
   {  
       echo "文件类型不符!".$file["type"];  
       exit;  
   }  

   if(!file_exists($destination_folder))  
   {  
       mkdir($destination_folder);  
   }  

   $filename=$file["tmp_name"];  
   $image_size = getimagesize($filename);  
   $pinfo=pathinfo($file["name"]);  
   $ftype=$pinfo['extension'];  
   $destination = $destination_folder.time().".".$ftype;  
   if (file_exists($destination) && $overwrite != true)  
   {  
       echo "同名文件已经存在了";  
       exit;  
   }  

   if(!move_uploaded_file ($filename, $destination))  
   {  
       echo "移动文件出错";  
       exit;  
   }  

   $pinfo=pathinfo($destination);  
   $fname=$pinfo[basename];  
   echo " <font color=red>已经成功上传</font><br>文件名:  <font color=blue>".$destination_folder.$fname."</font><br>";  
   echo " 宽度:".$image_size[0];  
   echo " 长度:".$image_size[1];  
   echo "<br> 大小:".$file["size"]." bytes";  

   if($watermark==1)  
   {  
       $iinfo=getimagesize($destination,$iinfo);  
       $nimage=imagecreatetruecolor($image_size[0],$image_size[1]);  
       $white=imagecolorallocate($nimage,255,255,255);  
       $black=imagecolorallocate($nimage,0,0,0);  
       $red=imagecolorallocate($nimage,255,0,0);  
       imagefill($nimage,0,0,$white);  
       switch ($iinfo[2])  
       {  
           case 1:  
           $simage =imagecreatefromgif($destination);  
           break;  
           case 2:  
           $simage =imagecreatefromjpeg($destination);  
           break;  
           case 3:  
           $simage =imagecreatefrompng($destination);  
           break;  
           case 6:  
           $simage =imagecreatefromwbmp($destination);  
           break;  
           default:  
           die("不支持的文件类型");  
           exit;  
       }  

       imagecopy($nimage,$simage,0,0,0,0,$image_size[0],$image_size[1]);  
       imagefilledrectangle($nimage,1,$image_size[1]-15,80,$image_size[1],$white);  

       switch($watertype)  
       {  
           case 1:   //加水印字符串  
           imagestring($nimage,2,3,$image_size[1]-15,$waterstring,$black);  
           break;  
           case 2:   //加水印图片  
           $simage1 =imagecreatefromgif("xplore.gif");  
           imagecopy($nimage,$simage1,0,0,0,0,85,15);  
           imagedestroy($simage1);  
           break;  
       }  

       switch ($iinfo[2])  
       {  
           case 1:  
           //imagegif($nimage, $destination);  
           imagejpeg($nimage, $destination);  
           break;  
           case 2:  
           imagejpeg($nimage, $destination);  
           break;  
           case 3:  
           imagepng($nimage, $destination);  
           break;  
           case 6:  
           imagewbmp($nimage, $destination);  
           //imagejpeg($nimage, $destination);  
           break;  
       }  

       //覆盖原上传文件  
       imagedestroy($nimage);  
       imagedestroy($simage);  
   }  

   if($imgpreview==1)  
   {  
   echo "<br>图片预览:<br>";  
   echo "<img src="".$destination."" width=".($image_size[0]*$imgpreviewsize)." height=".($image_size[1]*$imgpreviewsize);  
   echo " alt="图片预览:r文件名:".$destination."r上传时间:">";  
   }  
}  
?>  
</body>  
</html>

生成图形验证码需要使用php GD库来生成,如果你没开户GD库我们需要在php.ini文件找到extension=php_gd2.dll 去掉前面的;就行了,然后重启apache 或iis环境即可。

我们先来检查一下自己的php是不是打开了gd库。

 代码如下 复制代码

<?php
if(extension_loaded('gd')) {
  echo '你可以使用gd<br>';
  foreach(gd_info() as $cate=>$value)
    echo "$cate: $value<br>";
}else
  echo '你没有安装gd扩展';
?>

如果有返回信息就正确可以常用使用了


例1

 代码如下 复制代码

<?php
/**
 * vCode(m,n,x,y) m个数字  显示大小为n   边宽x   边高y
 * 自己改写记录session $code
 */
session_start();
vCode(4, 15); //4个数字,显示大小为15

function vCode($num = 4, $size = 20, $width = 0, $height = 0) {
 !$width && $width = $num * $size * 4 / 5 + 5;
 !$height && $height = $size + 10;
 // 去掉了 0 1 O l 等
 $str = "23456789abcdefghijkmnpqrstuvwxyzABCDEFGHIJKLMNPQRSTUVW";
 $code = '';
 for ($i = 0; $i < $num; $i++) {
  $code .= $str[mt_rand(0, strlen($str)-1)];
 }
 // 画图像
 $im = imagecreatetruecolor($width, $height);
 // 定义要用到的颜色
 $back_color = imagecolorallocate($im, 235, 236, 237);
 $boer_color = imagecolorallocate($im, 118, 151, 199);
 $text_color = imagecolorallocate($im, mt_rand(0, 200), mt_rand(0, 120), mt_rand(0, 120));
 // 画背景
 imagefilledrectangle($im, 0, 0, $width, $height, $back_color);
 // 画边框
 imagerectangle($im, 0, 0, $width-1, $height-1, $boer_color);
 // 画干扰线
 for($i = 0;$i < 5;$i++) {
  $font_color = imagecolorallocate($im, mt_rand(0, 255), mt_rand(0, 255), mt_rand(0, 255));
  imagearc($im, mt_rand(- $width, $width), mt_rand(- $height, $height), mt_rand(30, $width * 2), mt_rand(20, $height * 2), mt_rand(0, 360), mt_rand(0, 360), $font_color);
 }
 // 画干扰点
 for($i = 0;$i < 50;$i++) {
  $font_color = imagecolorallocate($im, mt_rand(0, 255), mt_rand(0, 255), mt_rand(0, 255));
  imagesetpixel($im, mt_rand(0, $width), mt_rand(0, $height), $font_color);
 }
 // 画验证码
 @imagefttext($im, $size , 0, 5, $size + 3, $text_color, 'c:\WINDOWS\Fonts\simsun.ttc', $code);
 $_SESSION["VerifyCode"]=$code;
 header("Cache-Control: max-age=1, s-maxage=1, no-cache, must-revalidate");
 header("Content-type: image/png;charset=gb2312");
 imagepng($im);
 imagedestroy($im);
}

?>

例2

使用PHP,结合session和GD库扩展开发的一个生成验证码的例子(w3c推荐),可以很方便的用于项目中。而且样式美观//首先开启session
session_start();
//定义前台显示验证码长&宽
$image_width = 120;
$image_height = 40;
$characters_on_image = 6;
$font = './monofont.ttf';
 
//The characters that can be used in the CAPTCHA code.
//avoid confusing characters (l 1 and i for example)
$possible_letters = '23456789bcdfghjkmnpqrstvwxyz';
$random_dots = 10;
$random_lines = 30;
$captcha_text_color="0x142864";
$captcha_noice_color = "0x142864";
//定义要生成验证码的字符串
$code = '';
 
$i = 0;
while ($i < $characters_on_image) {
$code .= substr($possible_letters, mt_rand(0, strlen($possible_letters)-1), 1);
$i++;
}
 
$font_size = $image_height * 0.75;
$image = @imagecreate($image_width, $image_height);
 
/* setting the background, text and noise colours here */
$background_color = imagecolorallocate($image, 255, 255, 255);
 
$arr_text_color = hexrgb($captcha_text_color);
$text_color = imagecolorallocate($image, $arr_text_color['red'],
        $arr_text_color['green'], $arr_text_color['blue']);
 
$arr_noice_color = hexrgb($captcha_noice_color);
$image_noise_color = imagecolorallocate($image, $arr_noice_color['red'],
        $arr_noice_color['green'], $arr_noice_color['blue']);
 
/* generating the dots randomly in background */
for( $i=0; $i<$random_dots; $i++ ) {
imagefilledellipse($image, mt_rand(0,$image_width),
 mt_rand(0,$image_height), 2, 3, $image_noise_color);
}
 
/* generating lines randomly in background of image */
for( $i=0; $i<$random_lines; $i++ ) {
imageline($image, mt_rand(0,$image_width), mt_rand(0,$image_height),
 mt_rand(0,$image_width), mt_rand(0,$image_height), $image_noise_color);
}
 
/* create a text box and add 6 letters code in it */
$textbox = imagettfbbox($font_size, 0, $font, $code);
$x = ($image_width - $textbox[4])/2;
$y = ($image_height - $textbox[5])/2;
imagettftext($image, $font_size, 0, $x, $y, $text_color, $font , $code);
 
/* Show captcha image in the page html page */
header('Content-Type: image/jpeg');// defining the image type to be shown in browser widow
imagejpeg($image);//showing the image
imagedestroy($image);//destroying the image instance
//设置session,做验证
$_SESSION['6_letters_code'] = $code;
 
function hexrgb ($hexstr)
{
  $int = hexdec($hexstr);
 
  return array("red" => 0xFF & ($int >> 0x10),
               "green" => 0xFF & ($int >> 0x8),
               "blue" => 0xFF & $int);
}

个人推荐推荐第二个生成验证码程序代码,各位同学可尝试参考对比哦,最后一个是W3C标准生成的也是利用了php gd库。

[!--infotagslink--]

相关文章

  • 怎么用PS为人像脸部增加打散颗粒特效

    用PS将人像脸部打造成打散颗粒的效果,成品出来后很美,过程略复杂,需要耐心和细心。现在跟着步骤来做吧! 1、首先在PS里面打开这张图。 2、选择快速选择工具的增加...2016-12-21
  • js实现可爱的气泡特效

    这篇文章主要为大家详细介绍了js实现可爱的气泡特效,文中示例代码介绍的非常详细,具有一定的参考价值,感兴趣的小伙伴们可以参考一下...2020-09-05
  • ThingJS粒子特效一键实现雨雪效果

    在做3D项目时,我们经常需要模拟下雨,下雪的天气,有时也会模拟喷泉、着火等效果。这些效果需要使用名为粒子系统(particle)的技术来实现。使用ThingJS可以快速编写粒子效果,本文就来看看如何实现...2021-05-29
  • 原生js轮播特效

    这篇文章主要为大家详细介绍了原生js轮播特效,简单实用的代码,具有一定的参考价值,感兴趣的小伙伴们可以参考一下...2017-05-22
  • 利用photoshop打造酷炫的人物特效

    本教程的目的当然不是让你欣赏楚楚动人落雁沉鱼的异国美女,而是教你如何用看起来很糟糕的笔刷、一系列图片以及图层调整制作生化大片中的场景。 本教程难度三颗星,...2016-09-14
  • php利用Imagick把pdf生成png缩略图

    缩略图如果是图片我们直接使用php gD库就可实现了,本文章要介绍的是Imagick把pdf生成png缩略图方法,这里我们要利用一个插件了,下面我来给大家演示一个实例。 php_im...2016-11-25
  • 基于javascript html5实现3D翻书特效

    这篇文章主要介绍了基于javascript html5实现翻书特效的实现方法,具有一定的参考价值,感兴趣的小伙伴们可以参考一下...2016-03-18
  • 利用Opencv实现图片的油画特效实例

    这篇文章主要给大家介绍了关于利用Opencv实现图片的油画特效的相关资料,文中通过示例代码介绍的非常详细,对大家的学习或者工作具有一定的参考学习价值,需要的朋友们下面随着小编来一起学习学习吧...2021-02-28
  • 利用php_imagick实现复古效果的方法

    相信对于php_imagick很多人都不陌生,这篇文章先进行简单的介绍了php_imagick和简单的示例,而后通过示例代码介绍了利用php_imagick实现复古效果的方法,对大家的学习和工作具有一定的参考借鉴价值,有需要的朋友们下面来一起看看吧。...2016-10-20
  • HTML常用网页特效

    常用HTML特效代码 1。忽视右键   <body oncontextmenu="return false">   或   <body style="overflow-y:hidden"> 2。加入背景音乐   IE:<bgsound s...2016-09-20
  • C# 图片剪切与缩小的实例

    C# 剪切图片与缩小的实例,需要的朋友可以参考一下...2020-06-25
  • Winform下实现图片切换特效的方法

    这篇文章主要介绍了Winform下实现图片切换特效的方法,包括百叶窗、淡入、旋转等多种效果,需要的朋友可以参考下...2020-06-25
  • php使用imagick给图片加水印的方法

    下面我们来看一篇关于php使用imagick给图片加水印的方法吧,希望这篇文章能够让各位了解到imagick图片加水印的个方法方式。 <?php $image = new Imagick(); $ima...2016-11-25
  • php实现图片上传、剪切功能

    这篇文章主要为大家详细介绍了php实现图片上传、剪切功能,具有一定的参考价值,感兴趣的朋友可以参考一下...2016-05-10
  • 用PS制造动态下雨特效

    在动漫中有很多下雨的场景。这些场景都是怎么做到得呢?不难哦,用PS就能把它做出来。下面就是制作步骤。小编简单为大家介绍了一种方法:滤镜大法! 第一步,如下图操作所...2016-12-21
  • php等比例缩放图片及剪切图片代码分享

    这篇文章给大家分享的是使用php实现的等比例缩放图片及剪切图片的代码,非常的简单实用,附上用法,有需要的小伙伴可以参考下。...2016-02-18
  • ajax图片上传剪切

    允许用户以AJAX的方式上传图片 &middot;允许用户选择图片的一定区域 &middot;最后,提供一个裁减后图片的下载地址 我们将要用到三个文件 &middot;index.php - 包含图...2016-11-25
  • php在新浪云中使用imagick的方法

    imagick是一款php的图像处理插件了我们可以使用imagick来进行许多的一些操作了,下面我们来看一篇关于php在新浪云中使用imagick的方法吧,具体的细节如下。 php在新...2016-11-25
  • c#图片缩放图片剪切功能实现(等比缩放)

    c#图片缩放剪切功能实现,代码中包含了c#图片处理的一些基础知识,与大家分享...2020-06-25
  • PS如何制作线条特效?PS制作清晰明朗的线条特效教程

    本教程主要是详细介绍渲染类滤镜做特效的方法,步骤很简单,大家可以试试看,也能够加深对滤镜的理解。 1、ctrl+n中新建图像,填充黑色背景,用默认颜色使用【滤镜_渲染_分...2016-12-31