PHP 单例模式优点意义及如何实现
一、什么是单例模式?
1、含义
作为对象的创建模式,单例模式确保某一个类只有一个实例,而且自行实例化并向整个系统全局地提供这个实例。它不会创建实例副本,而是会向单例类内部存储的实例返回一个引用。
2、单例模式的三个要点:
(1). 需要一个保存类的唯一实例的静态成员变量:
private static $_instance;
(2). 构造函数和克隆函数必须声明为私有的,防止外部程序new类从而失去单例模式的意义:
private function __construct()
{
$this->_db = pg_connect('xxxx');
}
private function __clone()
{
}//覆盖__clone()方法,禁止克隆
(3). 必须提供一个访问这个实例的公共的静态方法(通常为getInstance方法),从而返回唯一实例的一个引用
public static function getInstance()
{
if(! (self::$_instance instanceof self) )
{
self::$_instance = new self();
}
return self::$_instance;
}
二、为什么要使用单例模式?
多数人都是从单例模式的字面上的意思来理解它的用途, 认为这是对系统资源的节省, 可以避免重复实例化, 是一种"计划生育". 而PHP每次执行完页面都是会从内存中清理掉所有的资源. 因而PHP中的单例实际每次运行都是需要重新实例化的, 这样就失去了单例重复实例化的意义了. 单单从这个方面来说, PHP的单例的确有点让各位失望. 但是单例仅仅只有这个功能和应用吗? 答案是否定的,我们一起来看看。
php的应用主要在于数据库应用, 所以一个应用中会存在大量的数据库操作, 在使用面向对象的方式开发时(废话), 如果使用单例模式, 则可以避免大量的new 操作消耗的资源。
如果系统中需要有一个类来全局控制某些配置信息, 那么使用单例模式可以很方便的实现. 这个可以参看zend Framework的FrontController部分。
在一次页面请求中, 便于进行调试, 因为所有的代码(例如数据库操作类db)都集中在一个类中, 我们可以在类中设置钩子, 输出日志,从而避免到处var_dump, echo。
1、PHP缺点:
PHP语言是一种解释型的脚本语言,这种运行机制使得每个PHP页面被解释执行后,所有的相关资源都会被回收。也就是说,PHP在语言级别上没有办法让某个对象常驻内存,这和asp.net、Java等编译型是不同的,比如在Java中单例会一直存在于整个应用程序的生命周期里,变量是跨页面级的,真正可以做到这个实例在应用程序生命周期中的唯一性。然而在PHP中,所有的变量无论是全局变量还是类的静态成员,都是页面级的,每次页面被执行时,都会重新建立新的对象,都会在页面执行完毕后被清空,这样似乎PHP单例模式就没有什么意义了,所以PHP单例模式我觉得只是针对单次页面级请求时出现多个应用场景并需要共享同一对象资源时是非常有意义的。
2、单例模式在PHP中的应用场合:
(1)、应用程序与数据库交互
一个应用中会存在大量的数据库操作,比如过数据库句柄来连接数据库这一行为,使用单例模式可以避免大量的new操作,因为每一次new操作都会消耗内存资源和系统资源。
(2)、控制配置信息
如果系统中需要有一个类来全局控制某些配置信息, 那么使用单例模式可以很方便的实现.
三、如何实现单例模式?
1、普通的数据库访问例子:
<?php
......
//初始化一个数据库句柄
$db = new DB(...);

//添加用户信息
$db->addUserInfo(...);

......

//在函数中访问数据库,查找用户信息
function getUserInfo()
{
    $db = new DB(...);//再次new 数据库类,和数据库建立连接
    $db = query(....);//根据查询语句访问数据库
}

?>
2、应用单例模式对数据库进行操作:
<?php
class DB
{
    private $_db;
    private static $_instance;

    private function __construct(...)
    {
        $this->_db = pg_connect(...);//postgrsql
    }

    private function __clone() {};  //覆盖__clone()方法,禁止克隆

    public static function getInstance()
    {
        if(! (self::$_instance instanceof self) ) {
            self::$_instance = new self();
        }
        return self::$_instance;
    }

    public function addUserInfo(...)
    {
    }
     public function getUserInfo(...)
    {
    }

}

//test
$db = DB::getInstance();
$db->addUserInfo(...);
$db->getUserInfo(...);

?>
下面的代码是PDO操作数据库类的一个封装,采用了单例模式:
<?php
/**
 * MyPDO
 */
class MyPDO
{
    protected static $_instance = null;
    protected $dbName = '';
    protected $dsn;
    protected $dbh;

    /**
     * 构造
     *
     * @return MyPDO
     */
    private function __construct($dbHost, $dbUser, $dbPasswd, $dbName, $dbCharset)
    {
        try {
            $this->dsn = 'mysql:host='.$dbHost.';dbname='.$dbName;
            $this->dbh = new PDO($this->dsn, $dbUser, $dbPasswd);
            $this->dbh->exec('SET character_set_connection='.$dbCharset.', character_set_results='.$dbCharset.', character_set_client=binary');
        } catch (PDOException $e) {
            $this->outputError($e->getMessage());
        }
    }

    /**
     * 防止克隆
     *
     */
    private function __clone() {}

    /**
     * Singleton instance
     *
     * @return Object
     */
    public static function getInstance($dbHost, $dbUser, $dbPasswd, $dbName, $dbCharset)
    {
        if (self::$_instance === null) {
            self::$_instance = new self($dbHost, $dbUser, $dbPasswd, $dbName, $dbCharset);
        }
        return self::$_instance;
    }

    /**
     * Query 查询
     *
     * @param String $strSql SQL语句
     * @param String $queryMode 查询方式(All or Row)
     * @param Boolean $debug
     * @return Array
     */
    public function query($strSql, $queryMode = 'All', $debug = false)
    {
        if ($debug === true) $this->debug($strSql);
        $recordset = $this->dbh->query($strSql);
        $this->getPDOError();
        if ($recordset) {
            $recordset->setFetchMode(PDO::FETCH_ASSOC);
            if ($queryMode == 'All') {
                $result = $recordset->fetchAll();
            } elseif ($queryMode == 'Row') {
                $result = $recordset->fetch();
            }
        } else {
            $result = null;
        }
        return $result;
    }

    /**
     * Update 更新
     *
     * @param String $table 表名
     * @param Array $arrayDataValue 字段与值
     * @param String $where 条件
     * @param Boolean $debug
     * @return Int
     */
    public function update($table, $arrayDataValue, $where = '', $debug = false)
    {
        $this->checkFields($table, $arrayDataValue);
        if ($where) {
            $strSql = '';
            foreach ($arrayDataValue as $key => $value) {
                $strSql .= ", `$key`='$value'";
            }
            $strSql = substr($strSql, 1);
            $strSql = "UPDATE `$table` SET $strSql WHERE $where";
        } else {
            $strSql = "REPLACE INTO `$table` (`".implode('`,`', array_keys($arrayDataValue))."`) VALUES ('".implode("','", $arrayDataValue)."')";
        }
        if ($debug === true) $this->debug($strSql);
        $result = $this->dbh->exec($strSql);
        $this->getPDOError();
        return $result;
    }

    /**
     * Insert 插入
     *
     * @param String $table 表名
     * @param Array $arrayDataValue 字段与值
     * @param Boolean $debug
     * @return Int
     */
    public function insert($table, $arrayDataValue, $debug = false)
    {
        $this->checkFields($table, $arrayDataValue);
        $strSql = "INSERT INTO `$table` (`".implode('`,`', array_keys($arrayDataValue))."`) VALUES ('".implode("','", $arrayDataValue)."')";
        if ($debug === true) $this->debug($strSql);
        $result = $this->dbh->exec($strSql);
        $this->getPDOError();
        return $result;
    }

    /**
     * Replace 覆盖方式插入
     *
     * @param String $table 表名
     * @param Array $arrayDataValue 字段与值
     * @param Boolean $debug
     * @return Int
     */
    public function replace($table, $arrayDataValue, $debug = false)
    {
        $this->checkFields($table, $arrayDataValue);
        $strSql = "REPLACE INTO `$table`(`".implode('`,`', array_keys($arrayDataValue))."`) VALUES ('".implode("','", $arrayDataValue)."')";
        if ($debug === true) $this->debug($strSql);
        $result = $this->dbh->exec($strSql);
        $this->getPDOError();
        return $result;
    }

    /**
     * Delete 删除
     *
     * @param String $table 表名
     * @param String $where 条件
     * @param Boolean $debug
     * @return Int
     */
    public function delete($table, $where = '', $debug = false)
    {
        if ($where == '') {
            $this->outputError("'WHERE' is Null");
        } else {
            $strSql = "DELETE FROM `$table` WHERE $where";
            if ($debug === true) $this->debug($strSql);
            $result = $this->dbh->exec($strSql);
            $this->getPDOError();
            return $result;
        }
    }

    /**
     * execSql 执行SQL语句
     *
     * @param String $strSql
     * @param Boolean $debug
     * @return Int
     */
    public function execSql($strSql, $debug = false)
    {
        if ($debug === true) $this->debug($strSql);
        $result = $this->dbh->exec($strSql);
        $this->getPDOError();
        return $result;
    }

    /**
     * 获取字段最大值
     *
     * @param string $table 表名
     * @param string $field_name 字段名
     * @param string $where 条件
     */
    public function getMaxValue($table, $field_name, $where = '', $debug = false)
    {
        $strSql = "SELECT MAX(".$field_name.") AS MAX_VALUE FROM $table";
        if ($where != '') $strSql .= " WHERE $where";
        if ($debug === true) $this->debug($strSql);
        $arrTemp = $this->query($strSql, 'Row');
        $maxValue = $arrTemp["MAX_VALUE"];
        if ($maxValue == "" || $maxValue == null) {
            $maxValue = 0;
        }
        return $maxValue;
    }

    /**
     * 获取指定列的数量
     *
     * @param string $table
     * @param string $field_name
     * @param string $where
     * @param bool $debug
     * @return int
     */
    public function getCount($table, $field_name, $where = '', $debug = false)
    {
        $strSql = "SELECT COUNT($field_name) AS NUM FROM $table";
        if ($where != '') $strSql .= " WHERE $where";
        if ($debug === true) $this->debug($strSql);
        $arrTemp = $this->query($strSql, 'Row');
        return $arrTemp['NUM'];
    }

    /**
     * 获取表引擎
     *
     * @param String $dbName 库名
     * @param String $tableName 表名
     * @param Boolean $debug
     * @return String
     */
    public function getTableEngine($dbName, $tableName)
    {
        $strSql = "SHOW TABLE STATUS FROM $dbName WHERE Name='".$tableName."'";
        $arrayTableInfo = $this->query($strSql);
        $this->getPDOError();
        return $arrayTableInfo[0]['Engine'];
    }

    /**
     * beginTransaction 事务开始
     */
    private function beginTransaction()
    {
        $this->dbh->beginTransaction();
    }

    /**
     * commit 事务提交
     */
    private function commit()
    {
        $this->dbh->commit();
    }

    /**
     * rollback 事务回滚
     */
    private function rollback()
    {
        $this->dbh->rollback();
    }

    /**
     * transaction 通过事务处理多条SQL语句
     * 调用前需通过getTableEngine判断表引擎是否支持事务
     *
     * @param array $arraySql
     * @return Boolean
     */
    public function execTransaction($arraySql)
    {
        $retval = 1;
        $this->beginTransaction();
        foreach ($arraySql as $strSql) {
            if ($this->execSql($strSql) == 0) $retval = 0;
        }
        if ($retval == 0) {
            $this->rollback();
            return false;
        } else {
            $this->commit();
            return true;
        }
    }
    /**
     * checkFields 检查指定字段是否在指定数据表中存在
     *
     * @param String $table
     * @param array $arrayField
     */
    private function checkFields($table, $arrayFields)
    {
        $fields = $this->getFields($table);
        foreach ($arrayFields as $key => $value) {
            if (!in_array($key, $fields)) {
                $this->outputError("Unknown column `$key` in field list.");
            }
        }
    }

    /**
     * getFields 获取指定数据表中的全部字段名
     *
     * @param String $table 表名
     * @return array
     */
    private function getFields($table)
    {
        $fields = array();
        $recordset = $this->dbh->query("SHOW COLUMNS FROM $table");
        $this->getPDOError();
        $recordset->setFetchMode(PDO::FETCH_ASSOC);
        $result = $recordset->fetchAll();
        foreach ($result as $rows) {
            $fields[] = $rows['Field'];
        }
        return $fields;
    }

    /**
     * getPDOError 捕获PDO错误信息
     */
    private function getPDOError()
    {
        if ($this->dbh->errorCode() != '00000') {
            $arrayError = $this->dbh->errorInfo();
            $this->outputError($arrayError[2]);
        }
    }

    /**
     * debug
     *
     * @param mixed $debuginfo
     */
    private function debug($debuginfo)
    {
        var_dump($debuginfo);
        exit();
    }

    /**
     * 输出错误信息
     *
     * @param String $strErrMsg
     */
    private function outputError($strErrMsg)
    {
        throw new Exception('MySQL Error: '.$strErrMsg);
    }

    /**
     * destruct 关闭数据库连接
     */
    public function destruct()
    {
        $this->dbh = null;
    }
}
?>
调用方法:
<?php
require 'MyPDO.class.php';
$db = MyPDO::getInstance('localhost', 'root', '123456', 'test', 'utf8');
$db->query("select count(*) frome table");
$db->destruct();
?>今天发现一个很好用的中文分词工具。分享一下
CWS 是 Simple Chinese Word Segmentation 的首字母缩写(即:简易中文分词系统)。
这是一套基于词频词典的机械式中文分词引擎,它能将一整段的中文文本基本正确地切分成词。 词是中文的最小语素单位,但在书写时并不像英语会在词之间用空格分开, 所以如何准确并快速分词一直是中文分词的攻关难点。
SCWS 采用纯 C 语言开发,不依赖任何外部库函数,可直接使用动态链接库嵌入应用程序, 支持的中文编码包括 GBK、UTF-8 等。此外还提供了 PHP 扩展模块, 可在 PHP 中快速而方便地使用分词功能。
分词算法上并无太多创新成分,采用的是自己采集的词频词典,并辅以一定的专有名称,人名,地名, 数字年代等规则识别来达到基本分词,经小范围测试准确率在 90% ~ 95% 之间, 基本上能满足一些小型搜索引擎、关键字提取等场合运用。首次雏形版本发布于 2005 年底。
二、scws安装
# wget -c http://www.xunsearch.com/scws/down/scws-1.2.1.tar.bz2
# tar jxvf scws-1.2.1.tar.bz2
# cd scws-1.2.1
# ./configure --prefix=/usr/local/scws
# make && make install
三、scws的PHP扩展安装
# cd ./phpext
# phpize
# ./configure --with-php-config=/usr/local/php5410/bin/php-config
# make && make install
# echo "[scws]" >> /usr/local/php5410/etc/php.ini
# echo "extension = scws.so" >> /usr/local/php5410/etc/php.ini
# echo "scws.default.charset = utf-8" >> /usr/local/php5410/etc/php.ini
# echo "scws.default.fpath = /usr/local/scws/etc/" >> /usr/local/php5410/etc/php.ini
四、词库安装
# wget http://www.xunsearch.com/scws/down/scws-dict-chs-utf8.tar.bz2
# tar jxvf scws-dict-chs-utf8.tar.bz2 -C /usr/local/scws/etc/
# chown www:www /usr/local/scws/etc/dict.utf8.xdb
例子
<?php
header("Content-Type:text/html; charset=utf-8");
define('APP_ROOT', str_replace('\\', '/', dirname(__FILE__)));
$test = '真怕有一天我们再次成为交叉线,我想那时就再也不可能回归了,快乐永远是拿痛苦做代价,你现在多幸福,多快乐,你以后就会越伤心越难过,不想发生!';
function get_tags_arr($title)
{
require(APP_ROOT.'/pscws4.class.php');
$pscws = new PSCWS4();
$pscws->set_dict(APP_ROOT.'/scws/dict.utf8.xdb');
$pscws->set_rule(APP_ROOT.'/scws/rules.utf8.ini');
$pscws->set_ignore(true);
$pscws->send_text($title);
$words = $pscws->get_tops(5);
$tags = array();
foreach ($words as $val) {
$tags[] = $val['word'];
}
$pscws->close();
return $tags;
}
print_r(get_tags_arr($test));
function get_keywords_str($content){
require(APP_ROOT.'/phpanalysis.class.php');
PhpAnalysis::$loadInit = false;
$pa = new PhpAnalysis('utf-8', 'utf-8', false);
$pa->LoadDict();
$pa->SetSource($content);
$pa->StartAnalysis( false );
$tags = $pa->GetFinallyResult();
return $tags;
}
print(get_keywords_str($test));
CRS可作为缓存使用,在会话缓存、全页缓存、提升数据库查询性能等场景都有显著的优越性;CRS还可作为Key-Value存储使用,其保存的数据具备高可靠性,可每日生成冷备和通过流水日志回档。在排行榜、计数器应用、实时系统、阅后即焚类需要精准设定过期时间的应用、反垃圾系统等场景下可大大提高效率。
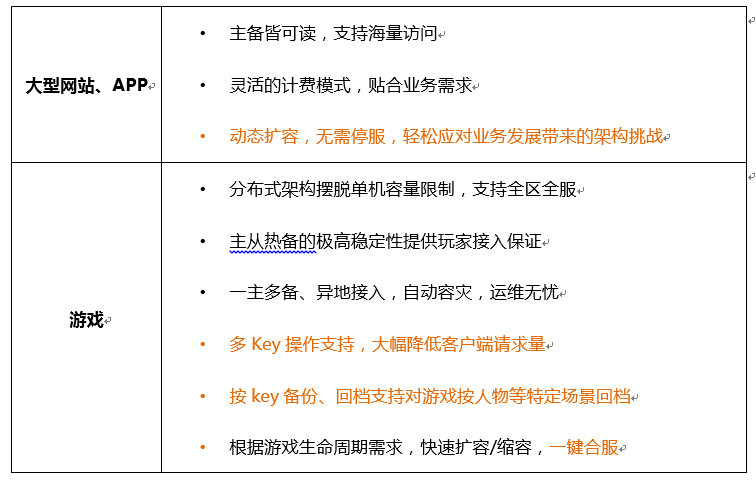
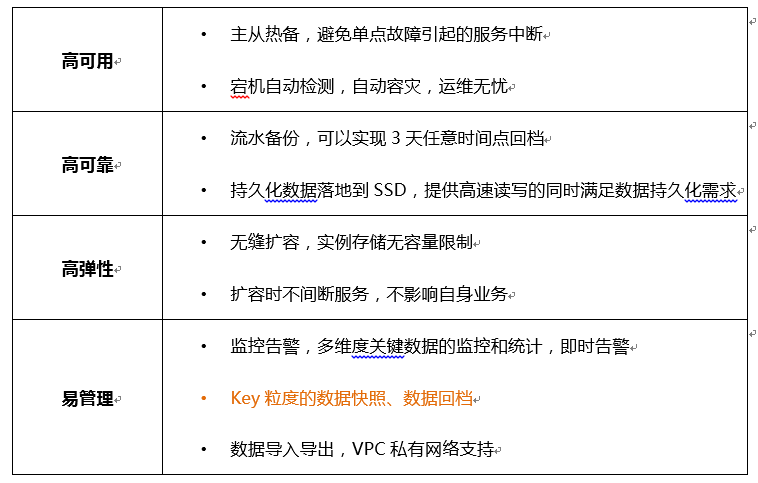
云存储Redis的使用场景,应用场景,产品特点和架构介绍:
使用场景
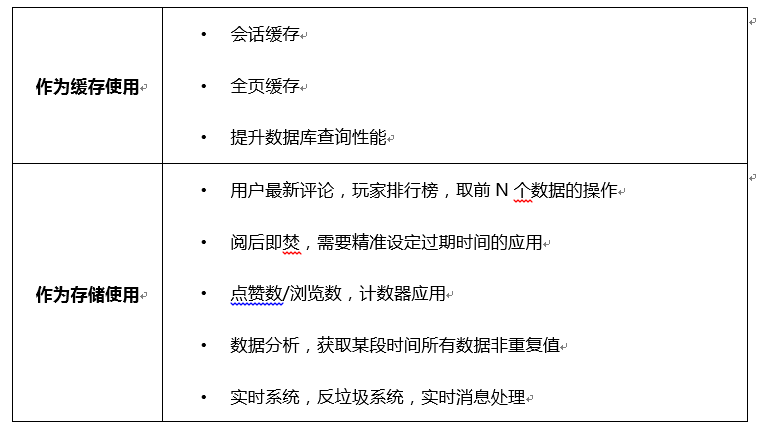
应用场景
产品特点
架构介绍

PHP运行前必备:
使用客户端phpredis,下载和参考地址:https://github.com/phpredis/phpredis
【示例代码】
<?php
/**以下参数分别填写您的redis实例内网IP,端口号,实例id和密码*/
$host = "192.168.0.2";
$port = 6379;
$instanceid = "c532952f-55dc-4c22-a941-63057e560788";
$pwd = "1234567q";
$redis = new Redis();
//连接redis
if ($redis->connect($host, $port) == false) {
die($redis->getLastError());
}
//鉴权
if ($redis->auth($instanceid . ":" . $pwd) == false) {
die($redis->getLastError());
}
/**接下来可以愉快的开始操作redis实例,可以参考:https://github.com/phpredis/phpredis */
//设置key
if ($redis->set("redis", "piaoyi.org") == false) {
die($redis->getLastError());
}
echo "set key redis OK, value is: piaoyi.org\n";
//获取key
$value = $redis->get("redis");
echo "get key redis is:".$value."\n";
?>
一个使用redis实现积分排行榜的小例子:
//积分排行榜类
class Ranks {
const PREFIX = 'rank:';
protected $redis = null;
public function __construct( Redis $redis ) {
$this->redis = $redis;
}
public function addScores( $member, $scores, $date="" ) {
if ( $date=="" ) $key = self::PREFIX . date( 'Ymd' );
else $key = self::PREFIX . $date;
return $this->redis->zIncrBy( $key, $scores, $member );
}
function getOneDayRankings( $date, $start, $stop ) {
$key = self::PREFIX . $date;
return $this->redis->zRevRange( $key, $start, $stop, true );
}
protected function getMultiDaysRankings( $dates, $outKey, $start, $stop ) {
$keys = array_map( function( $date ) {
return self::PREFIX . $date;
}, $dates );
$weights = array_fill( 0, count( $keys ), 1 );
$this->redis->zUnion( $outKey, $keys, $weights );//合集,相同key会求和累加
return $this->redis->zRevRange( $outKey, $start, $stop, true );
}
public function getYesterdayTop10() {
$date = date('Ymd' , strtotime('-1 day'));
return $this->getOneDayRankings( $date, 0, 9 );
}
public static function getCurrentMonthDates() {
$BeginDate=date('Y-m-01', strtotime(date("Y-m-d"))); //当前月第1天
$curDate=(int)date('d', strtotime(date("Y-m-d")));
$dates = array();
for ( $day = 0; $day < $curDate; $day++ ) {
$dates[] = date('Ymd' , strtotime("$BeginDate +$day day"));
}
return $dates;
}
public function getCurrentMonthTop10() {
$dates = self::getCurrentMonthDates();
return $this->getMultiDaysRankings( $dates, 'rank:current_month', 0, 9 );
}
}
上面这个类使用:
//实例化
$rank = new Ranks( $redis );
$rank->addScores(1, 3, "20151106");
$rank->addScores(2, 2, "20151106");
$rank->addScores(3, 1, "20151106");
$rank->addScores(1, 1, "20151107");
$rank->addScores(2, 3, "20151107");
$rank->addScores(3, 2, "20151107");
print_r($rank->getYesterdayTop10());
print_r($rank->getCurrentMonthTop10());
print_r($rank->getOneDayRankings("20151106",0,-1));
print_r($rank->getOneDayRankings("20151107",0,-1));
一些支持的方法:
Connection
connect, open - Connect to a server
pconnect, popen - Connect to a server (persistent)
auth - Authenticate to the server
select - Change the selected database for the current connection
close - Close the connection
setOption - Set client option
getOption - Get client option
ping - Ping the server
echo - Echo the given string
Keys and Strings
Strings(字符串)
append - Append a value to a key
bitcount - Count set bits in a string
bitop - Perform bitwise operations between strings
decr, decrBy - Decrement the value of a key
get - Get the value of a key
getBit - Returns the bit value at offset in the string value stored at key
getRange - Get a substring of the string stored at a key
getSet - Set the string value of a key and return its old value
incr, incrBy - Increment the value of a key
incrByFloat - Increment the float value of a key by the given amount
mGet, getMultiple - Get the values of all the given keys
mSet, mSetNX - Set multiple keys to multiple values
set - Set the string value of a key
setBit - Sets or clears the bit at offset in the string value stored at key
setex, psetex - Set the value and expiration of a key
setnx - Set the value of a key, only if the key does not exist
setRange - Overwrite part of a string at key starting at the specified offset
strlen - Get the length of the value stored in a key
Keys(键)
del, delete - Delete a key
dump - Return a serialized version of the value stored at the specified key.
exists - Determine if a key exists
expire, setTimeout, pexpire - Set a key's time to live in seconds
expireAt, pexpireAt - Set the expiration for a key as a UNIX timestamp
keys, getKeys - Find all keys matching the given pattern
scan - Scan for keys in the keyspace (Redis >= 2.8.0)
migrate - Atomically transfer a key from a Redis instance to another one
move - Move a key to another database
object - Inspect the internals of Redis objects
persist - Remove the expiration from a key
randomKey - Return a random key from the keyspace
rename, renameKey - Rename a key
renameNx - Rename a key, only if the new key does not exist
type - Determine the type stored at key
sort - Sort the elements in a list, set or sorted set
ttl, pttl - Get the time to live for a key
restore - Create a key using the provided serialized value, previously obtained with dump.
Hashes(哈希表)
hDel - Delete one or more hash fields
hExists - Determine if a hash field exists
hGet - Get the value of a hash field
hGetAll - Get all the fields and values in a hash
hIncrBy - Increment the integer value of a hash field by the given number
hIncrByFloat - Increment the float value of a hash field by the given amount
hKeys - Get all the fields in a hash
hLen - Get the number of fields in a hash
hMGet - Get the values of all the given hash fields
hMSet - Set multiple hash fields to multiple values
hSet - Set the string value of a hash field
hSetNx - Set the value of a hash field, only if the field does not exist
hVals - Get all the values in a hash
hScan - Scan a hash key for members
Lists(列表)
blPop, brPop - Remove and get the first/last element in a list
brpoplpush - Pop a value from a list, push it to another list and return it
lIndex, lGet - Get an element from a list by its index
lInsert - Insert an element before or after another element in a list
lLen, lSize - Get the length/size of a list
lPop - Remove and get the first element in a list
lPush - Prepend one or multiple values to a list
lPushx - Prepend a value to a list, only if the list exists
lRange, lGetRange - Get a range of elements from a list
lRem, lRemove - Remove elements from a list
lSet - Set the value of an element in a list by its index
lTrim, listTrim - Trim a list to the specified range
rPop - Remove and get the last element in a list
rpoplpush - Remove the last element in a list, append it to another list and return it (redis >= 1.1)
rPush - Append one or multiple values to a list
rPushx - Append a value to a list, only if the list exists
Sets(集合)
sAdd - Add one or more members to a set
sCard, sSize - Get the number of members in a set
sDiff - Subtract multiple sets
sDiffStore - Subtract multiple sets and store the resulting set in a key
sInter - Intersect multiple sets
sInterStore - Intersect multiple sets and store the resulting set in a key
sIsMember, sContains - Determine if a given value is a member of a set
sMembers, sGetMembers - Get all the members in a set
sMove - Move a member from one set to another
sPop - Remove and return a random member from a set
sRandMember - Get one or multiple random members from a set
sRem, sRemove - Remove one or more members from a set
sUnion - Add multiple sets
sUnionStore - Add multiple sets and store the resulting set in a key
sScan - Scan a set for members
Sorted sets(有序集合)
zAdd - Add one or more members to a sorted set or update its score if it already exists
zCard, zSize - Get the number of members in a sorted set
zCount - Count the members in a sorted set with scores within the given values
zIncrBy - Increment the score of a member in a sorted set
zInter - Intersect multiple sorted sets and store the resulting sorted set in a new key
zRange - Return a range of members in a sorted set, by index
zRangeByScore, zRevRangeByScore - Return a range of members in a sorted set, by score
zRangeByLex - Return a lexigraphical range from members that share the same score
zRank, zRevRank - Determine the index of a member in a sorted set
zRem, zDelete - Remove one or more members from a sorted set
zRemRangeByRank, zDeleteRangeByRank - Remove all members in a sorted set within the given indexes
zRemRangeByScore, zDeleteRangeByScore - Remove all members in a sorted set within the given scores
zRevRange - Return a range of members in a sorted set, by index, with scores ordered from high to low
zScore - Get the score associated with the given member in a sorted set
zUnion - Add multiple sorted sets and store the resulting sorted set in a new key
zScan - Scan a sorted set for members
Transactions(事务)
multi, exec, discard - Enter and exit transactional mode
watch, unwatch - Watches a key for modifications by another client.
Server(服务器端命令)
bgrewriteaof - Asynchronously rewrite the append-only file
bgsave - Asynchronously save the dataset to disk (in background)
config - Get or Set the Redis server configuration parameters
dbSize - Return the number of keys in selected database
flushAll - Remove all keys from all databases
flushDB - Remove all keys from the current database
info - Get information and statistics about the server
lastSave - Get the timestamp of the last disk save
resetStat - Reset the stats returned by info method.
save - Synchronously save the dataset to disk (wait to complete)
slaveof - Make the server a slave of another instance, or promote it to master
time - Return the current server time
slowlog - Access the Redis slowlog entries
使用 Redis 实现排行榜功能
排行榜功能是一个很普遍的需求。使用 Redis 中有序集合的特性来实现排行榜是又好又快的选择。
一般排行榜都是有实效性的,比如“用户积分榜”。如果没有实效性一直按照总榜来排,可能榜首总是几个老用户,对于新用户来说,那真是太令人沮丧了。
首先,来个“今日积分榜”吧,排序规则是今日用户新增积分从多到少。
那么用户增加积分时,都操作一下记录当天积分增加的有序集合。
假设今天是 2015 年 04 月 01 日,UID 为 1 的用户因为某个操作,增加了 5 个积分。
Redis 命令如下:
ZINCRBY rank:20150401 5 1
假设还有其他几个用户也增加了积分:
ZINCRBY rank:20150401 1 2
ZINCRBY rank:20150401 10 3
看看现在有序集合 rank:20150401 中的数据(withscores 参数可以附带获取元素的 score):
ZRANGE rank:20150401 0 -1 withscores
1) "2"
2) "1"
3) "1"
4) "5"
5) "3"
6) "10"
按照分数从高到低,获取 top10:
ZREVRANGE rank:20150401 0 9 withscores
1) "3"
2) "10"
3) "1"
4) "5"
5) "2"
6) "1"
因为只有三个元素,所以就查询出了这些数据。
如果每天记录当天的积分排行榜,那么其他花样百出的榜单也就简单了。
比如“昨日积分榜”:
ZREVRANGE rank:20150331 0 9 withscores
利用并集实现多天的积分总和,实现“上周积分榜”:
ZUNIONSTORE rank:last_week 7 rank:20150323 rank:20150324 rank:20150325 rank:20150326 rank:20150327 rank:20150328 rank:20150329 WEIGHTS 1 1 1 1 1 1 1
这样就将 7 天的积分记录合并到有序集合 rank:last_week 中了。权重因子 WEIGHTS 如果不给,默认就是 1。为了不隐藏细节,特意写出。
那么查询上周积分榜 Top10 的信息就是:
ZREVRANGE rank:last_week 0 9 withscores
“月度榜”、“季度榜”、“年度榜”等等就以此类推。
下面给出一个 PHP 版的简单实现。使用 Redis 依赖于 PHP 扩展 PhpRedis,代码还依赖于 Carbon 库,用于处理时间。代码量很少,所以就不敲注释了。
<?php
namespace Blog\Redis;
use \Redis;
use Carbon\Carbon;
class Ranks {
const PREFIX = 'rank:';
protected $redis = null;
public function __construct(Redis $redis) {
$this->redis = $redis;
}
public function addScores($member, $scores) {
$key = self::PREFIX . date('Ymd');
return $this->redis->zIncrBy($key, $scores, $member);
}
protected function getOneDayRankings($date, $start, $stop) {
$key = self::PREFIX . $date;
return $this->redis->zRevRange($key, $start, $stop, true);
}
protected function getMultiDaysRankings($dates, $outKey, $start, $stop) {
$keys = array_map(function($date) {
return self::PREFIX . $date;
}, $dates);
$weights = array_fill(0, count($keys), 1);
$this->redis->zUnion($outKey, $keys, $weights);
return $this->redis->zRevRange($outKey, $start, $stop, true);
}
public function getYesterdayTop10() {
$date = Carbon::now()->subDays(1)->format('Ymd');
return $this->getOneDayRankings($date, 0, 9);
}
public static function getCurrentMonthDates() {
$dt = Carbon::now();
$days = $dt->daysInMonth;
$dates = array();
for ($day = 1; $day <= $days; $day++) {
$dt->day = $day;
$dates[] = $dt->format('Ymd');
}
return $dates;
}
public function getCurrentMonthTop10() {
$dates = self::getCurrentMonthDates();
return $this->getMultiDaysRankings($dates, 'rank:current_month', 0, 9);
}
}
最近做一个php项目的时候,遇到一个问题。
功能:使用phpexcel导出数据。
问题描述:导出身份证后四位是0000
这是因为在excel中如果在一个默认的格中输入或复制超长数字字符串,它会显示为科学计算法。
方法一:设置单元格为文本
$objPHPExcel = new PHPExcel();

$objPHPExcel->setActiveSheetIndex(0);

$objPHPExcel->getActiveSheet()->setTitle('Simple');

//设置A3单元格为文本

$objPHPExcel->getActiveSheet()->getStyle('A3')->getNumberFormat()

->setFormatCode(PHPExcel_Style_NumberFormat::FORMAT_TEXT);

//也可以设置整行或整列的style

/*

//E 列为文本

$objPHPExcel->getActiveSheet()->getStyle('E')->getNumberFormat()

->setFormatCode(PHPExcel_Style_NumberFormat::FORMAT_TEXT);

//第三行为文本

$objPHPExcel->getActiveSheet()->getStyle('3')->getNumberFormat()

->setFormatCode(PHPExcel_Style_NumberFormat::FORMAT_TEXT);

*/
更多的格式可以在PHPExcel/Style/NumberFormat.php中找到。
注意:上述的设置对长数字字符串还是以文本方式来显示科学计数法的结果。
方法二:在设置值的时候显示的指定数据类型
$objPHPExcel = new PHPExcel();

$objPHPExcel->setActiveSheetIndex(0);

$objPHPExcel->getActiveSheet()->setTitle('Simple');

$objPHPExcel->getActiveSheet()->setCellValueExplicit('D1',123456789033, PHPExcel_Cell_DataType::TYPE_STRING);
方法三:在数字字符串前加一个空格使之成为字符串
$objPHPExcel = new PHPExcel();

$objPHPExcel->setActiveSheetIndex(0);

$objPHPExcel->getActiveSheet()->setTitle('Simple');

$objPHPExcel->getActiveSheet()->setCellValue('D1', ' ' . 123456789033);
推荐使用第二、三种,第一种没有根本解决问题。
本教程主要讲解PHP项目如何用实现memcache分布式,配置使用memcache存储session数据,以及memcache的SESSION数据如何同步。至于Memcache的安装配置,我们就不讲了,以前有两篇比较好的文章如下:
windows 64位系统配置安装Memcache缓存 http://www.111cn.net/sys/Windows/61708.htm
Linux系统Memcache安装配置详解 http://www.111cn.net/sys/linux/81920.htm
PHP分布式中使用Memcache来同步存储SESSION的步骤如下:
1、直接修改php.ini配置文件
session.save_handler = memcache
session.save_path = "tcp://127.0.0.100:11211"
2、利用目录下的 .htaccess 文件
php_value session.save_handler "memcache"
php_value session.save_path "tcp://127.0.0.1:11211"
说明:这个只是针对Apache的,目前使用Nginx的比较多,也不推荐此方式。
3、项目中修改配置
ini_set("session.save_handler", "memcache");
ini_set("session.save_path", "tcp://127.0.0.100:11211");
上面只是一些简单的说明,其实说点题外话,一般来说,做分布式,那肯定是有服务器权限的,所以推荐第一种。
memcache分布式实现、memcache分布式的数据同步、memcache保存session数据的实现
Memcache的分布式介绍
memcached虽然称为“分布式”缓存服务器,但服务器端并没有“分布式”功能。服务器端仅包括内存存储功能,其实现非常简单。至于memcached的分布式,则是完全由客户端程序库实现的。这种分布式是memcached的最大特点。
Memcached的分布式是什么意思?
这里多次使用了“分布式”这个词,但并未做详细解释。现在开始简单地介绍一下其原理,各个客户端的实现基本相同。
下面假设memcached服务器有node1~node3三台,应用程序要保存键名为“tokyo”“kanagawa”“chiba”“saitama”“gunma”的数据。
首先向memcached中添加“tokyo”。将“tokyo”传给客户端程序库后,客户端实现的算法就会根据“键”来决定保存数据的memcached服务器。服务器选定后,即命令它保存“tokyo”及其值。
同样,“kanagawa”“chiba”“saitama”“gunma”都是先选择服务器再保存。接下来获取保存的数据。获取时也要将要获取的键“tokyo”传递给函数库。函数库通过与数据保存时相同的算法,根据“键”选择服务器。使用的算法相同,就能选中与保存时相同的服务器,然后发送get命令。只要数据没有因为某些原因被删除,就能获得保存的值。
这样,将不同的键保存到不同的服务器上,就实现了memcached的分布式。 memcached服务器增多后,键就会分散,即使一台memcached服务器发生故障无法连接,也不会影响其他的缓存,系统依然能继续运行。
Php+memcache实现分布式:
我们PHP的PECL中的Memcache扩展能够有效的解决Memcache的分布式问题,主要的接口就是 addServer() 函数,具体关于addServer()函数的实现可以参考该扩展源代码。那么现在就存在第二个问题,就是说无法同步数据,可以理解为MySQL中Master/Slave的机制,就是说如果我们有多台的Memcache服务器,使用addServer函数的话,每个服务器存储的数据都是唯一的,也就是说每个memcached服务器上存储的数据不是统一的,而是各自保存了不通的数据。
配置使用memcache存储session数据
session.save_handler = memcache
session.save_path ="tcp://127.0.0.1:11211"
或者某个目录下的 .htaccess :
php_value session.save_handler"memcache"
php_value session.save_path "tcp://127.0.0.1:11211"
再或者在某个一个应用中:
ini_set("session.save_handler","memcache");
ini_set("session.save_path","tcp://127.0.0.1:11211");
使用多个 memcached server 时用逗号","隔开,并且和Memcache::addServer() 文档中说明的一样,可以带额外的参数"persistent"、"weight"、"timeout"、"retry_interval"等等,类似这样的:"tcp://host1:port1?persistent=1&weight=2,tcp://host2:port2"。
存session:
<?php
session_start();
if (!isset($_SESSION['TEST'])) {
   $_SESSION['TEST'] = time();
}
$_SESSION['TEST3'] = time();
print $_SESSION['TEST'];
print "<br><br>";
print $_SESSION['TEST3'];
print "<br><br>";
print session_id();
?>
从memcache中取回session数据
<?php
$memcache = memcache_connect('localhost',11211);
var_dump($memcache->get('19216821213c65cedec65b0883238c278eeb573e077'));
?>
会有看到
string(37)"TEST|i:1177556731;TEST3|i:1177556881;"
这样的输出,证明 session 正常工作
用 memcache 来存储 session 在读写速度上会比 files 时快很多,而且在多个服务器需要共用 session 时会比较方便,将这些服务器都配置成使用同一组 memcached 服务器就可以,减少了额外的工作量。缺点是 session 数据都保存在 memory 中,持久化方面有所欠缺,但对 session 数据来说也不是很大的问题。
另外,WS Memcached Session Handler for PHP 提供一种用session_set_save_handler 来利用 memcached 的方法。。
Linux下的Memcache安装
1. 如果通过下载源码进行安装,则需要下载最新版本http://memcached.googlecode.com/files/memcached-1.4.13.tar.gz。
如果通过apt-get方式安装,则无需下载。
2. 进行memcache的安装:
1).下载源码,进行编译安装
Memcache用到了libevent这个库用于Socket的处理,所以还需要安装libevent,libevent的最新版本是https://github.com/downloads/libevent/libevent/libevent-2.0.19-stable.tar.gz,如果你的系统已经安装了libevent,则不需要安装。
# cd /tmp
# wget http://www.danga.com/memcached/dist/memcached-1.2.0.tar.gz
# wgethttp://www.monkey.org/~provos/libevent-1.2.tar.gz
2.先安装libevent:
# tar zxvf libevent-1.2.tar.gz
# cd libevent-1.2
# ./configure --prefix=/usr
# make
# make install
测试libevent是否已经安装。
# ls -al /usr/lib | grep libevent
lrwxrwxrwx 1 root root 21 11?? 12 17:38libevent-1.2.so.1 -> libevent-1.2.so.1.0.3
-rwxr-xr-x 1 root root 263546 11?? 12 17:38libevent-1.2.so.1.0.3
-rw-r--r-- 1 root root 454156 11?? 12 17:38 libevent.a
-rwxr-xr-x 1 root root 811 11?? 12 17:38 libevent.la
lrwxrwxrwx 1 root root 21 11?? 12 17:38 libevent.so-> libevent-1.2.so.1.0.3
安装memcache
安装memcached,同时需要安装中指定libevent的安装位置:
# cd /tmp
# tar zxvf memcached-1.2.0.tar.gz
# cd memcached-1.2.0
# ./configure --with-libevent=/usr
# make
# make install
如果中间出现报错,请仔细检查错误信息,按照错误信息来配置或者增加相应的库或者路径。
安装完成后会把memcached放到 /usr/local/bin/memcached 。
测试是否成功安装memcached:
# ls -al /usr/local/bin/mem*
-rwxr-xr-x 1 root root 137986 11?? 12 17:39/usr/local/bin/memcached
-rwxr-xr-x 1 rootroot 140179 11?? 12 17:39 /usr/local/bin/memcached-debug
2)通过apt-get进行安装:
sudo apt-get install memcached,推荐通过该方式进行安装,比较简单,不容易出现错误。
启动memcache服务器:
memcached -d -m 50 -p 11211 -uroot
memcached常用启动参数描述:
-d:启动一个守护进程,
-m:分配给Memcache使用的内存数量,单位是MB,默认是64MB,
-u:运行Memcache的用户
-l:监听的服务器IP地址
-p:设置Memcache监听的端口,默认是11211注:-p(p为小写)
-c:设置最大并发连接数,默认是1024
-P:设置保存Memcache的pid文件注:-P(P为大写)
-h 显示帮助
安装Memcache的PHP扩展
通过地址http://pecl.php.net/get/memcache-2.2.6.tgz下载memcache最新的稳定版本。
安装php的memcache扩展有两种方式:
在linux下安装memcache扩展
可以使用php自带的pecl安装程序
# pecl install memcache
或apt-get安装php的memcache扩展
sudo apt-get installphp5-memcache
也可以从源码安装
# tar zxf memcache-2.2.3.tgz
# cd memcache-2.2.3
# /usr/local/servers/php5/bin/phpize
#./configure --enable-memcache=/usr/local/servers/memcached--with-php-config=/usr/local/servers/php5/bin/php-config--with-apxs2=/usr/sbin/apxs
# make && make inst
安装完后会有类似这样的提示:
Installing shared extensions:/usr/local/servers/php5/lib/php/extensions/no-debug-non-zts-20060922/
把这个记住,然后修改php.ini,把
extension_dir ="./"
修改为
extension_dir ="/usr/local/servers/php5/lib/php/extensions/"
并添加一行
extension="no-debug-non-zts-20060922/memcache.so"
在windows下安装memcache扩展
下载时要弄清楚自己的php版本,下载相对应的memcache扩展的版本,我用的是php5.2.6,下载地址为http://museum.php.net/php5/pecl-5.2.6-Win32.zip,解压后找到它的php_memcache.dll文件,放在php目录下的extension目录下,并在php.ini 加入一行 ‘extension=php_memcache.dll’。phpinfo下,看是否安装成功。
Php的memcache
使用实例:
< ?php
//连接
$mem = new Memcache;
$mem->connect("192.168.0.200", 12000);
//保存数据
$mem->set('key1', 'This is first value', 0, 60);
$val = $mem->get('key1');
echo "Get key1 value: " . $val ."<br/>";
//替换数据
$mem->replace('key1', 'This is replace value', 0,60);
$val = $mem->get('key1');
echo "Get key1 value: " . $val ."<br />";
//保存数组
$arr = array('aaa', 'bbb', 'ccc', 'ddd');
$mem->set('key2', $arr, 0, 60);
$val2 = $mem->get('key2');
echo "Get key2 value: ";
print_r($val2);
echo "<br />";
//删除数据
$mem->delete('key1');
$val = $mem->get('key1');
echo "Get key1 value: " . $val ."<br />";
//清除所有数据
$mem->flush();
$val2 = $mem->get('key2');
echo "Get key2 value: ";
print_r($val2);
echo "<br />";
//关闭连接
$mem->close();
?>
Memcached集群
Magent软件介绍
magent是一款开源的memcached代理服务器软件
地址: http://code.google.com/p/memagent/
安装magent到/usr/local/下
cd /usr/local
mkdir magent
cd magent/
wgethttp://memagent.googlecode.com/files/magent-0.5.tar.gz
tar zxvf magent-0.5.tar.gz
/sbin/ldconfig
sed -i "s/LIBS = -levent/LIBS =-levent -lm/g" Makefile
make
magent命令参数:
-hthis message
-u uid
-g gid
-p port, default is 11211. (0 to disable tcpsupport)
-s ip:port, set memcached server ip and port
-b ip:port, set backup memcached server ip andport
-l ip, local bind ip address, default is 0.0.0.0
-n number, set max connections, default is 4096
-D don't go to background
-k use ketama key allocation algorithm
-f file, unix socket path to listen on. defaultis off
-i number, max keep alive connections for onememcached server, default is 20
-v verbose
启动magent服务
magent -u root -n 4096 -l 127.0.0.1 -p12000 -s127.0.0.1:8086 -s 127.0.0.2:8086 -b 127.0.0.1:11213
magent的hash算法
magent采用的是:Consistent Hashing原理,Consistent Hashing如下所示:首先求出memcached服务器(节点)的哈希值,并将其配置到0~232的圆(continuum)上。 然后用同样的方法求出存储数据的键的哈希值,并映射到圆上。 然后从数据映射到的位置开始顺时针查找,将数据保存到找到的第一个服务器上。如果超过232仍然找不到服务器,就会保存到第一台memcached服务器上。
从上面的状态中添加一台memcached服务器。余数分布式算法由于保存键的服务器会发生巨大变化而影响缓存的命中率,但Consistent Hashing中,只有在continuum上增加服务器的地点逆时针方向的第一台服务器上的键会受到影响。
利用magent实现对memecache的分布式管理,搭建一套memcache集群服务
1、前端php对magent的访问跟对memcache访问相同,不需要做任何更改,对于插入的key,magent会把值散列到各个memcache服务上,只操作magent,不用关心后端处理
2、公司项目应用:南北各10台前端,南北各部署一套magent服务,主要是考虑电信网通的跨网访问.以北方为例,每个前端安装memcached服务(大内存机器可以启动多个服务),每个前端都安装magent服务,后端挂载全部机器的 memcached服务,启动参数:
magent-p 12000 -s 127.0.0.1:8086 -s 127.0.0.2:8086 -s 127.0.0.3:8086.......-s127.0.0.10:8086
,所有前端配置都是相同的,任何一个前端只需访问本地端口的magent,这样的memcache集群对应用带来很大便利.
比如项目的基本配置信息,早期策略只能在中控机生成配置文件,同步到各个前端,没有办法把配置信息放到缓存中,因为各个前端的memcache是不共享 的,一台机器缓存更新,其它机器是不更新的,用程序去控制更新,还是存在不稳定因素,而且随着服务增多,也不便于管理,部署了magent后,就可以解决 这个问题,任何一个前端更新数据=全局更新
这种部署还可以解决的应用:session共享
Magent使用举例
启动两个memcached进程,端口分别为11211和11212:
memcached -m 1 -u root -d -l 127.0.0.1 -p 11211
memcached -m 1 -u root -d -l 127.0.0.1 -p 11212
启动两个magent进程,端口分别为10000和11000:
magent -u root -n 51200 -l 127.0.0.1 -p 10000 -s127.0.0.1:11211 -b 127.0.0.1:11212
magent -u root -n 51200 -l 127.0.0.1 -p 11000 -s127.0.0.1:11212 -b 127.0.0.1:11211
-s 为要写入的memcached, -b 为备份用的memcached。
说明:测试环境用magent和memached的不同端口来实现,在生产环境中可以将magent和memached作为一组放到两台服务器上。
也就是说通过magent能够写入两个memcached。
magent使用
1、安装libevent:
wget http://monkey.org/~provos/libevent-1.4.13-stable.tar.gz
tar -xzvf libevent-1.4.13-stable.tar.gz
cd libevent-1.4.13-stable
./configure --prefix=/usr/local/libevent
make
make install
2、安装Memcached:
wget http://memcached.googlecode.com/files/memcached-1.4.4.tar.gz
tar -xzvf memcached-1.4.4.tar.gz
cd memcached-1.4.4
./configure --prefix=/usr/local/memcached --with-libevent=/usr/local/libevent
make
make install
ln -s /usr/local/libevent/lib/libevent-1.4.so.2 /usr/lib/
3、编译安装magent:
mkdir magent
cp magent-0.5.tar.gz magent
cd magent
tar -xzvf magent-0.5.tar.gz
/sbin/ldconfig
sed -i "s#LIBS = -levent#LIBS = -levent -lm#g" Makefile
vi magent.c 添加
#include <limits.h>
make
一、使用实例:
memcached -m 1 -u root -d -l 192.168.1.219 -p 11211
memcached -m 1 -u root -d -l 192.168.1.219 -p 11212
memcached -m 1 -u root -d -l 192.168.1.219 -p 11213
magent -u root -n 51200 -l 192.168.1.219 -p 12000 -s 192.168.1.219:11211 -s 192.168.1.219:11212 -b 192.168.1.219:11213
1、分别在11211、11212、11213端口启动3个Memcached进程,在12000端口开启magent代理程序;
2、11211、11212端口为主Memcached,11213端口为备份Memcached;
3、连接上12000的magent,set key1和set key2,根据哈希算法,key1被写入11212和11213端口的Memcached,key2被写入11212和11213端口的Memcached;
4、当11211、11212端口的Memcached死掉,连接到12000端口的magent取数据,数据会从11213端口的Memcached取出。
三、整个测试流程:
# telnet 192.168.1.219 12000
Trying 1192.168.1.219...
Connected to 192.168.1。219.
Escape character is '^]'.
stats
memcached agent v0.4
matrix 1 -> 192.168.1.219:11211, pool size 0
matrix 2 -> 192.168.1.219:11212, pool size 0
END
set key1 0 0 5
reesun
STORED
set key2 0 0 6
reesun1
STORED
quit
Connection closed by foreign host.
# telnet 192.168.1.219 11211
Trying 192.168.1.219...
Connected to 192.168.1.219.
Escape character is '^]'.
get key1
END
get key2
VALUE key2 0 6
reesun1
END
quit
Connection closed by foreign host.
# telnet 192.168.1.219 11212
Trying 192.168.1.219...
Connected to 1192.168.1.219.
Escape character is '^]'.
get key1
VALUE key1 0 5
reesun
END
get key2
END
quit
Connection closed by foreign host.
# telnet 192.168.1.219 11213
Trying 192.168.1.219...
Connected to 1192.168.1.219.
Escape character is '^]'.
get key1
VALUE key1 0 5
reesun
END
get key2
VALUE key2 0 6
reesun1
END
quit
Connection closed by foreign host.
相关文章
- 这篇文章主要介绍了Postgresl 如何选择正确的关闭模式,具有很好的参考价值,希望对大家有所帮助。一起跟随小编过来看看吧...2021-01-18
- 神马是“解释器模式”?先翻开《GOF》看看Definition:给定一个语言,定义它的文法的一种表示,并定义一个解释器,这个解释器使用该表示来解释语言中的句子。在开篇之前还是要科普几个概念: 抽象语法树: 解释器模式并未解释如...2014-06-07
- 很多集成的PHP环境(PHPnow WAMP Appserv等)自带的MySQL貌似都没有开启MySQL的严格模式,何为MySQL的严格模式,简单来说就是MySQL自身对数据进行严格的校验(格式、长度、类型等),比如一个整型字段我们写入一个字符串类型的数...2013-10-04
- 这篇文章主要为大家介绍了JavaScript设计模式中的装饰者模式,对JavaScript设计模式感兴趣的小伙伴们可以参考一下...2016-01-21
- 下面将把C#里实现IDispose模式的代码展现出来,大家一起来学习一下,它的使用场合也很多的,当我们手动对网站,数据库作封装时,都会用的到...2020-06-25
C# MVC模式中应该怎样区分应用程序逻辑(Controller层)和业务逻辑(Model层)?
这篇文章主要介绍了C# MVC模式中应该怎样区分应用程序逻辑(Controller层)和业务逻辑(Model层)?,这也小编做.NET项目时经常思考和让人混乱的一个问题,这篇文章写的挺好,一下清晰了许多,需要的朋友可以参考下...2020-06-25- 这篇文章主要介绍了JavaScript设计模式之职责链模式,对设计模式感兴趣的同学,可以参考下...2021-04-25
- 当我们在星际中开地图和几家电脑作战的时候,电脑的几个玩家相当于结盟,一旦我们出兵进攻某一家电脑,其余的电脑会出兵救援。 那么如何让各家电脑知道自己的盟友被攻击了...2016-11-25
- 这篇文章主要介绍了Java接口DAO模式代码原理及应用详解,文中通过示例代码介绍的非常详细,对大家的学习或者工作具有一定的参考学习价值,需要的朋友可以参考下...2020-11-03
- 这篇文章主要介绍了C#中的IDisposable模式用法,讲述了垃圾资源回收机制的实现,并对比分析了Dispose()方法、~DisposableClass()析构函数、虚方法Dispose(bool disposing)的原理,需要的朋友可以参考下...2020-06-25
- 版本:php_v2.0.6 在CloudsearchClient的类中,开启debug模式,设置为true 如:$opts = array('host'=>$host,'debug'=>true); 注意true不能加引号...2016-05-19
- 这篇文章主要为大家介绍了JavaScript设计模式中的状态模式,对JavaScript设计模式感兴趣的小伙伴们可以参考一下...2016-01-12
- 这篇文章主要介绍了C#使用Dispose模式实现手动对资源的释放,涉及C#采用Dispose模式操作资源的技巧,具有一定参考借鉴价值,需要的朋友可以参考下...2020-06-25
- 您是否遇到过孩子想要玩手机又不好拒绝,或者是您想要给孩子配一个联系用的手机有担心孩子玩手机上瘾?如果您购买的是小米手机,那么MIUI的儿童模式就能很好地解决这个问题...2016-12-21
- 这篇文章主要为大家介绍了JavaScript设计模式中的单例模式,对JavaScript设计模式感兴趣的小伙伴们可以参考一下...2016-01-21
- 本文实例讲述了php单例模式实现方法。...2015-03-15
vue-router history模式服务器端配置过程记录
vue路由有hash和history两种模式,这篇文章主要给大家介绍了关于vue-router history模式服务器端配置的相关资料,需要的朋友可以参考下...2021-06-08- 这篇文章主要介绍了JavaScript设计模式之命令模式,对设计模式感兴趣的同学,可以参考下...2021-04-25
- 我们建站的时候,开始是每次请求数据库都要重新连接的、这样显然不合理、然后自己封装了一个数据库操作类、DBTools.php、要解决一个连接多次使用的话、最好的办法是使...2016-11-25
- 这篇文章主要为大家介绍了JavaScript设计模式中的责任链模式,对JavaScript设计模式感兴趣的小伙伴们可以参考一下...2016-01-21