threeJs实现波纹扩散及光标浮动效果详解
更新时间:2023年3月17日 13:59 点击:1408 作者:MicahZJ
版本介绍
threejs版本
"version": "0.142.0",
vue版本
"version": "^3.0.0"
node版本
"version": "14.18.2"
正文
思路主要是:
- 建立圆柱模型,记得把上下两个面去除
- 建立立标模型
- 模型放在public文件下的model文件夹中
- 在动画里面做一个position.x,y,z的操作
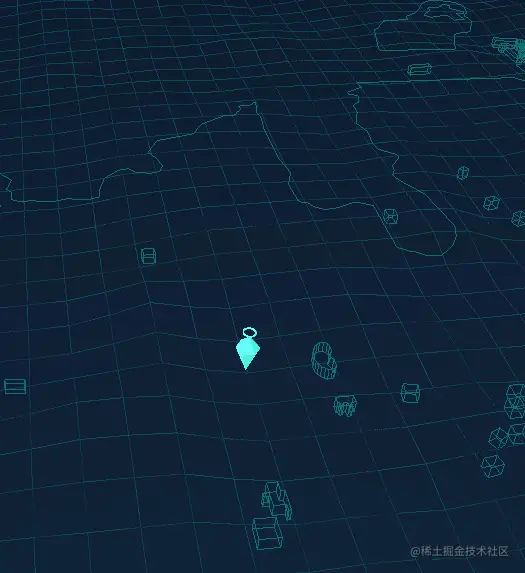
效果如下
核心代码
// 扩散动画
this.group2.scale.x = this.group2.scale.x + 0.1
this.group2.scale.y = this.group2.scale.y - 0.01
this.group2.scale.z = this.group2.scale.z + 0.1
if(this.group2.scale.x > 10){
  this.group2.scale.x = 1
  this.group2.scale.y = 1
  this.group2.scale.z = 1
}
// 上下抖动
const time = Date.now() * 0.005
this.group4.position.y = Math.cos( time ) * 1.75 + 2.25
导入即用
1. 新建一个ts文件
import * as THREE from "three";
import { OBJLoader } from "three/examples/jsm/loaders/OBJLoader.js";
import { MTLLoader } from "three/examples/jsm/loaders/MTLLoader.js";
import { OrbitControls } from "three/examples/jsm/controls/OrbitControls.js";
import { GLTFLoader } from "three/examples/jsm/loaders/GLTFLoader.js";
import { DRACOLoader } from "three/examples/jsm/loaders/DRACOLoader.js";
export default class ThreeD {
  private cylinderRadius: any; // 圆柱体半径
  private cylinderOpacity: any; // 圆柱体透明度
  private cylinderMesh: any; // 圆柱网格
  private scene: any; // 场景
  private camera: any; // 相机
  private renderer: any; // 渲染器
  private group: any; // 新的组对象,控制模型
  private group2: any; // 圆柱体模组
  private group3: any; // 圆柱体模组-普通点
  private group4: any; // 点位模型
  private controls: any; // 创建控件对象
  private path: any; // 路径
  private objName: any; // 模型
  private mtlName: any; // 材质
  private cameraX: Number; // 相机x
  private cameraY: Number; // 相机y
  private cameraZ: Number; // 相机z
  private objSize: Number; // 模型倍数
  private modelSpeed: Number; // 旋转速度
  private screenWidth: Number; // 旋转速度
  private screenHeight: Number; // 旋转速度
  constructor(
    cameraX: Number,
    cameraY: Number,
    cameraZ: Number,
    objSize: Number,
    modelSpeed: number
  ) {
    // this.path = path;
    // this.objName = objName;
    // this.mtlName = mtlName || null;
    this.cameraX = cameraX;
    this.cameraY = cameraY;
    this.cameraZ = cameraZ;
    this.objSize = objSize;
    this.screenWidth = 0
    this.screenHeight = 0
  }
  /**
   * 初始化
   * @param instance 容器dom
   */
  initThree(instance: HTMLElement | null) {
    // 场景宽高
    const width: any = instance && instance.clientWidth;
    const height: any = instance && instance.clientHeight;
    this.screenWidth = width;
    this.screenHeight = height;
    // 1. 创建场景对象Scene
    this.scene = new THREE.Scene();
    // 2. 创建相机对象fov 代表视角\aspect 宽高比\near 最近看到\far 最远看到
    this.camera = new THREE.PerspectiveCamera(50, width / height, 0.1, 200000);
    // 设置相机位置(眼睛位置或者说相机篇拍照位置x,y,z)
    this.camera.position.set(600, 300, 100);
    // 设置相机视角的角度
    this.camera.lookAt(0, 0, 0);
    // 3.创建组和模型
    this.group2 = new THREE.Group() // 组-总光圈
    this.group4 = new THREE.Group() // 组-光标
    // 创建光圈-总的
    this.loadGlbCylinder('Cylinder2.glb', '0', true,10,0,0,0);
    // 标注点
    this.loadGlbPoint('biaozhi.glb', '0', true,20);
    // 把group对象添加到场景中
    this.scene.add(this.group);
    this.scene.add(this.group2);
    this.scene.add(this.group3);
    this.scene.add(this.group4);
    // 4. 创建光源
    this.createPoint();
    // 5. 创建渲染器对象
    this.renderer = new THREE.WebGLRenderer();
    // 设置渲染器的大小
    this.renderer.setSize(Number(width), Number(height));
    // 增加背景颜色
    this.renderer.setClearColor(0xeeeeee, 0);
    // 将渲染器添加到div中
    instance && instance.append(this.renderer.domElement);
    // 7. 动画旋转
    this.animate();
  }
  // 创建glb模型-圆柱体
  /**
   *
   * @param obj 文件名字
   * @param name 模型名字
   * @param showFlag 是否展示
   * @param scale 放大倍数
   * @param x
   * @param y
   * @param z
   */
  loadGlbCylinder(obj:string,
                  name:string,
                  showFlag:any,
                  scale:number,
                  x:number,
                  y:number,
                  z:number) {
    const dracoLoader = new DRACOLoader();
    dracoLoader.setDecoderPath("three/js/libs/draco/gltf/");
    const loader = new GLTFLoader();
    loader.setDRACOLoader(dracoLoader);
    loader.load(
      `model/${obj}`,
      (gltf) => {
        const model = gltf.scene;
        model.position.set(x, y, z); // 模型坐标偏移量xyz
        model.scale.set(scale, scale, scale);
        model.name = name;
        model.visible = showFlag;
        model.traverse((object:any) => {
          if (object.isMesh) { // 开启透明度
            object.material.transparent = true;//开启透明
            object.material.opacity = 0.3;//设置透明度
          }
        })
        this.group2.add(model);
      },
      undefined,
      function (e) {
        console.error(e);
      }
    );
  }
  /**
   *  创建glb模型-圆柱体-普通
   * @param obj 文件名字
   * @param name 模型名字
   * @param showFlag 是否展示
   * @param scale 放大倍数
   * @param x
   * @param y
   * @param z
   */
  loadGlbPoint(obj:string,
               name:string,
               showFlag:any,
               scale:number) {
    const dracoLoader = new DRACOLoader();
    dracoLoader.setDecoderPath("three/js/libs/draco/gltf/");
    const loader = new GLTFLoader();
    loader.setDRACOLoader(dracoLoader);
    loader.load(
      `model/${obj}`,
      (gltf) => {
        const model = gltf.scene;
        model.position.set(0, 0, 0); // 模型坐标偏移量xyz
        model.scale.set(scale, scale, scale);
        model.name = name;
        model.visible = showFlag;
        model.traverse((object:any) => {
          if (object.isMesh) { // 开启透明度
            object.material.transparent = true;//开启透明
            object.material.opacity = 1;//设置透明度
          }
        })
        this.group4.add(model);
      },
      undefined,
      function (e) {
        console.error(e);
      }
    );
  }
  // 创建光源
  createPoint() {
    //环境光
    const ambientLight = new THREE.AmbientLight(0xffffff, 1);
    // ambientLight.position.set(400, 200, 300);
    this.scene.add(ambientLight);
  }
  // 动画效果
  animate() {
    const clock = new THREE.Clock();
    // 渲染
    const renderEvent = () => {
      // const spt = clock.getDelta() * 1000; // 毫秒
      // console.log("一帧的时间:毫秒", spt);
      // console.log("帧率FPS", 1000 / spt);
      //循环调用函数,请求再次执行渲染函数render,渲染下一帧
      requestAnimationFrame(renderEvent);
      // 将场景和摄像机传入到渲染器中
      this.renderer.render(this.scene, this.camera);
      // 围绕物体y轴自转
      // this.group.rotation.y -= 0.002;
      // 圆柱体扩散动画
      this.group2.scale.x = this.group2.scale.x + 0.5
      this.group2.scale.y = this.group2.scale.y - 0.01
      this.group2.scale.z = this.group2.scale.z + 0.5
      if(this.group2.scale.x > 50){
        this.group2.scale.x = 1
        this.group2.scale.y = 1
        this.group2.scale.z = 1
      }
      // 上下移动
      const time = Date.now() * 0.005
      this.group4.position.y = Math.cos( time ) * 1.75 + 2.25
    };
    renderEvent();
  }
}
2. 在要用的页面导入
- 在页面建立dom
<div class="zong-model" ref="dom"></div>
- 导入js
import ThreeD from "@/utils/threeD_fixed";
- 在onmounted中使用
threeObj = new ThreeD(8, 50, 60, 1, 2);
dom.value && threeObj.initThree(dom.value);
以上就是threeJs实现波纹扩散及光标浮动效果详解的详细内容,更多关于threeJs波纹扩散光标浮动的资料请关注猪先飞其它相关文章!
原文出处:https://juejin.cn/post/7211033231059533882
相关文章
使用 React 和 Threejs 创建一个VR全景项目的过程详解
这篇文章主要介绍了使用 React 和 Threejs 创建一个VR全景项目的过程详解,本文通过实例代码给大家介绍的非常详细,对大家的学习或工作具有一定的参考借鉴价值,需要的朋友可以参考下...2021-04-06React + Threejs + Swiper 实现全景图效果的完整代码
全景图效果非常漂亮给人带来极好的用户体验效果,那么基于前端开发如何实现这种效果呢,下面小编给大家带来了React + Threejs + Swiper 实现全景图效果,感兴趣的朋友一起看看吧...2021-06-28- 这篇文章主要介绍了如何用threejs实现实时多边形折射,对three.js库感兴趣的同学,可以参考下...2021-05-08
- 这篇文章主要为大家介绍了threeJs实现波纹扩散及光标浮动效果详解,有需要的朋友可以借鉴参考下,希望能够有所帮助,祝大家多多进步,早日升职加薪...2023-03-17
- 在Threejs中类似于我们现实世界,物体显示的颜色是由物体本身的颜色及光照的颜色相互叠加而得到的,这篇文章主要给大家介绍了关于threejs太阳光与阴影效果的相关资料,需要的朋友可以参考下...2022-04-05
- 这篇文章主要给大家介绍了关于threejs后期处理的基本使用方法之加特效的相关资料,文中通过实例代码介绍的非常详细,对大家的学习或者工作具有一定的参考学习价值,需要的朋友可以参考下...2022-01-24