Vue手写横向轮播图的实例
更新时间:2022年9月21日 08:25 点击:891 作者:new_liu
Vue手写横向轮播图
前提:自己封装的轮播图,暂时没测出bug~
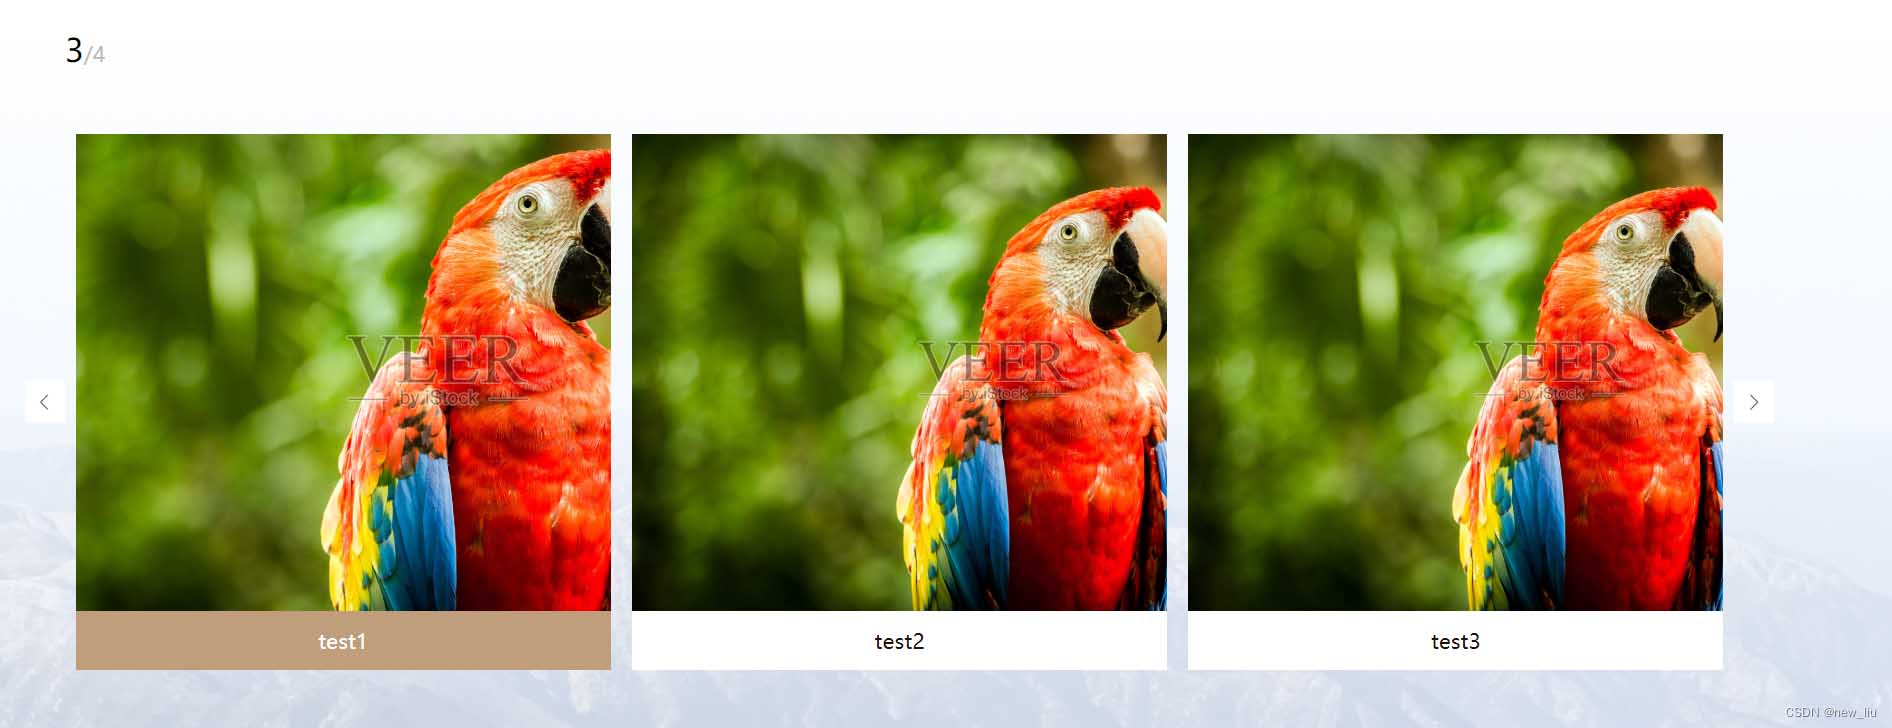
效果如下图,一行三个,点击上一张/下一张 向前或向后移动一格,窗口缩放会适当变形,不影响切换
<template>
  <div class="swiper-template">
    <div class="my-swiper-page">
      <div class="page-left">
        <span>{{ activeIndex + 1 }}</span
        >/{{ swiperList.length }}
      </div>
    </div>
    <div class="my-swiper-container" v-show="swiperList.length">
      <div class="my-swiper-wapper">
        <div class="arrow imgLeft" @click="clickLeft">
          <span class="el-icon-arrow-left"></span>
        </div>
        <div class="arrow imgRight" @click="clickRight">
          <span class="el-icon-arrow-right"></span>
        </div>
        <div ref="swiperDom" class="my-swiper-content">
          <ul ref="swiperDomUI" :style="ulStyle">
            <li
              v-for="(item, index) in swiperList"
              :key="item.id"
              class=""
              :style="{ width: liWidth + 'px' }"
              ref="liDom"
              @click="changeIndex(item, index)"
            >
              <div
                class="introduce-li-box"
                :class="index === activeIndex ? 'active' : ''"
              >
                <div class="introduce-img"><img :src="item.url" /></div>
                <div class="introduce-name">{{ item.name }}</div>
              </div>
            </li>
          </ul>
        </div>
      </div>
    </div>
  </div>
</template>
<script>
export default {
  props: {
    swiperList: {
      type: Array,
      default: () => [
        {
          name: 'test1',
          url: 'https://alifei04.cfp.cn/creative/vcg/veer/1600water/veer-130182553.jpg',
          path: '/detail'
        },
        {
          name: 'test2',
          url: 'https://alifei04.cfp.cn/creative/vcg/veer/1600water/veer-130182553.jpg',
          path: '/detail'
        },
        {
          name: 'test3',
          url: 'https://alifei04.cfp.cn/creative/vcg/veer/1600water/veer-130182553.jpg',
          path: '/detail'
        },
        {
          name: 'test4',
          url: 'https://alifei04.cfp.cn/creative/vcg/veer/1600water/veer-130182553.jpg',
          path: '/detail'
        }
      ]
    }
  },
  data() {
    return {
      activeIndex: 0, // 当前移动图片的索引值
      boxWidth: 0,
      liWidth: 0,
      ulStyle: { left: 0 }
    }
  },
  computed: {},
  created() {},
  mounted() {
    this.getWidth()
    window.addEventListener('resize', this.getWidth)
  },
  methods: {
    changeIndex(item, index) {
      this.activeIndex = index
      this.$router.push(item.path)
    },
    getWidth() {
      this.boxWidth = this.$refs.swiperDom.offsetWidth
      this.liWidth = this.boxWidth / 3
      if (this.activeIndex * this.liWidth > this.boxWidth) {
        this.ulStyle = {
          left: -this.activeIndex * this.liWidth + 'px'
        }
      }
    },
    clickLeft() {
      if (this.activeIndex > 0) {
        this.activeIndex-- // 索引值-1
        let offsetLeft = this.activeIndex * this.liWidth + this.liWidth

        let ulLeft = this.$refs.swiperDomUI.offsetLeft
        let distance = 0

        if (ulLeft < 0) {
          if (offsetLeft <= this.boxWidth) {
            if (-ulLeft > this.boxWidth) {
              distance = Math.abs(ulLeft + this.boxWidth)
            } else {
              distance = -ulLeft
            }
          } else {
            distance = offsetLeft - this.boxWidth
            if (distance >= this.liWidth) {
              distance = this.liWidth
            } else {
              distance = distance
            }
          }

          let index = 0
          let temp = window.setInterval(() => {
            if (index < distance && ulLeft < 0) {
              index += 2 // 每次向右移动的距离
              this.ulStyle = { left: ulLeft + index + 'px' }
            } else {
              window.clearInterval(temp)
            }
          }, 10)
        }
      }
    },
    clickRight() {
      if (this.activeIndex < this.swiperList.length - 1) {
        this.activeIndex++
        let offsetLeft = this.activeIndex * this.liWidth + this.liWidth
        if (offsetLeft > this.boxWidth) {
          let ulLeft = Math.abs(this.$refs.swiperDomUI.offsetLeft)
          let distance = offsetLeft - this.boxWidth - ulLeft
          let index = 0
          let temp = window.setInterval(() => {
            if (index < distance) {
              index += 2 // 每次向右移动的距离
              this.ulStyle = { left: -(ulLeft + index) + 'px' }
            } else {
              window.clearInterval(temp)
            }
          }, 10)
        }
      }
    }
  },
  destroyed() {
    window.removeEventListener('resize', this.getWidth)
  }
}
</script>
<style lang="scss" scoped>
.swiper-template {
  .my-swiper-page {
    font-size: 16px;
    color: #bababa;
    width: 100%;
    margin: 50px auto;
    justify-content: space-around;
    .page-left {
      text-align: left;
      width: 50%;
      padding-left: 30px;
      box-sizing: border-box;
      span {
        font-size: 24px;
        color: #000000;
      }
    }
  }
  .my-swiper-container {
    width: 100%;
    height: 405px;
    .my-swiper-wapper {
      width: 100%;
      height: 100%;
      position: relative;
      padding: 0 30px;
      font-size: 16px;
      box-sizing: border-box;
      .arrow {
        display: inline-block;
        cursor: pointer;
        background: #fff;
        padding: 7px;
        &:hover {
          background: #c09d7b;
          color: #fff;
        }
      }
      .imgLeft {
        text-align: left;
        position: absolute;
        left: 0;
        top: 50%;
        transform: translateY(-50%);
      }
      .imgRight {
        text-align: right;
        position: absolute;
        right: 0;
        top: 50%;
        transform: translateY(-50%);
      }
      .my-swiper-content {
        width: 100%;
        height: 100%;
        position: relative;
        overflow: hidden;
        ul {
          width: auto;
          white-space: nowrap;
          position: absolute;
          left: 0;
          li {
            display: inline-block;
            padding: 0 8px;
            box-sizing: border-box;
            .introduce-li-box {
              width: 100%;
              height: 405px;
              box-sizing: border-box;
              cursor: pointer;
              text-align: center;
              .introduce-img {
                width: 100%;
                height: 360px;
                overflow: hidden;
                img {
                  height: 100%;
                  -webkit-transition: all 0.61s;
                  transition: all 0.6s;
                  &:hover {
                    transform: scale(1.2);
                    -webkit-transform: scale(1.2);
                  }
                }
              }
              .introduce-name {
                width: 100%;
                height: 45px;
                line-height: 45px;
                font-size: 16px;
                color: #1f1205;
                background: #ffffff;
              }
              &:hover {
                .introduce-name {
                  background: #c09d7b;
                  color: #fff;
                }
              }
              &.active {
                .introduce-name {
                  // background: #c09d7b;
                  // color: #fff;
                }
              }
            }
          }
        }
      }
    }
  }
}
</style>
Vue常见的轮播图
很多页面里,项目里,轮播图几乎是无处不在,今天我们就来说说轮播图的写法
在轮播图数组list中,定义一个变量listIndex = 0表示第一张图片,默认渲染第一张图片即list[listIndex],然后获取每张图片的下标。点击切换图片时把当前图片的下标赋值给listIndex即可实现图片切换显示。
展示代码
<template>
<div class="home">
<div class="box" @mouseout="out" @mouseover="over">
<img
v-for="(item, index) in list"
v-show="listIndex === index"
:key="index"
:src="item"
alt=""
/>
<p class="left" @click="changePage(prevIndex)"><</p>
<ul>
<li
:class="{ color: index == listIndex }"
v-for="(item, index) in list"
@click="changePage(index)"
:key="index"
></li>
</ul>
<p class="right" @click="changePage(nextIndex)">></p>
</div>
</div>
</template>
<script>
export default {
  components: {},
  props: {},
  data() {
    return {
      list: [
        require("../../public/image/1.jpg"),
        require("../../public/image/2.jpg"),
        require("../../public/image/3.jpg"),
        require("../../public/image/4.jpg"),
      ],
      listIndex: 0, //默认显示第几张图片
      timer: null, //定时器
    };
  },
  computed: {
    //上一张
    prevIndex() {
      if (this.listIndex == 0) {
        return this.list.length - 1;
      } else {
        return this.listIndex - 1;
      }
    },
    //下一张
    nextIndex() {
      if (this.listIndex == this.list.length - 1) {
        return 0;
      } else {
        return this.listIndex + 1;
      }
    },
  },
  methods: {

    changePage(index) {
      this.listIndex = index;
    },
    //移除
    out() {
      this.setTimer();
    },
    //移入
    over() {
      clearInterval(this.timer);
    },
    //1秒切图
    setTimer() {
      this.timer = setInterval(() => {
        this.listIndex++;
        if (this.listIndex == this.list.length) {
          this.listIndex = 0;
        }
      }, 1000);
    },
  },
  created() {
    //定时器
    this.setTimer();
  },
  mounted() {},
};
</script>
<style scoped lang="less">
.home {
  width: 100%;
  height: 100%;
  display: flex;
  align-items: center;
  justify-content: center;
  .box {
    position: relative;
    width: 500px;
    height: 500px;
    img {
      width: 100%;
      height: 100%;
      z-index: 100;
    }
    p {
      cursor: pointer;
      color: white;
      font-size: 28px;
      display: flex;
      justify-content: center;
      align-items: center;
      width: 50px;
      height: 50px;
      background: rgba(0, 0, 0, 0.5);
    }
    .left {
      position: absolute;
      top: 50%;
      left: 0;
    }
    .right {
      position: absolute;
      top: 50%;
      right: 0;
    }
    ul {
      list-style: none;
      display: flex;
      justify-content: space-around;
      align-items: center;
      position: absolute;
      width: 150px;
      height: 20px;
      top: 90%;
      right: 35%;
      .color {
        background: red;
        color: red;
      }
      li {
        cursor: pointer;
        width: 10px;
        height: 10px;
        background: white;
        border-radius: 50%;
      }
    }
  }
}
</style>
以上为个人经验,希望能给大家一个参考,也希望大家多多支持猪先飞。
原文出处:https://blog.csdn.net/u013492323/article/details/125262415
相关文章
- 这篇文章主要介绍了vue中activated的用法,帮助大家更好的理解和使用vue框架,感兴趣的朋友可以了解下...2021-01-03
基于vue-simple-uploader封装文件分片上传、秒传及断点续传的全局上传插件功能
这篇文章主要介绍了基于vue-simple-uploader封装文件分片上传、秒传及断点续传的全局上传插件,本文给大家介绍的非常详细,对大家的学习或工作具有一定的参考借鉴价值,需要的朋友可以参考下...2021-02-23Antd-vue Table组件添加Click事件,实现点击某行数据教程
这篇文章主要介绍了Antd-vue Table组件添加Click事件,实现点击某行数据教程,具有很好的参考价值,希望对大家有所帮助。一起跟随小编过来看看吧...2020-11-17- 这篇文章主要介绍了Vue组件跨层级获取组件操作,具有很好的参考价值,希望对大家有所帮助。一起跟随小编过来看看吧...2020-07-28
- 这篇文章主要介绍了vue 实现动态路由的方法,文中示例代码非常详细,帮助大家更好的理解和学习,感兴趣的朋友可以了解下...2020-07-06
- 这篇文章主要介绍了Vue基于localStorage存储信息代码实例,文中通过示例代码介绍的非常详细,对大家的学习或者工作具有一定的参考学习价值,需要的朋友可以参考下...2020-11-16
antdesign-vue结合sortablejs实现两个table相互拖拽排序功能
这篇文章主要介绍了antdesign-vue结合sortablejs实现两个table相互拖拽排序功能,本文通过实例图文相结合给大家介绍的非常详细,对大家的学习或工作具有一定的参考借鉴价值,需要的朋友可以参考下...2021-01-09- 这篇文章主要介绍了vue 获取到数据但却渲染不到页面上的解决方法,文中通过示例代码介绍的非常详细,对大家的学习或者工作具有一定的参考学习价值,需要的朋友们下面随着小编来一起学习学习吧...2020-11-19
- 这篇文章主要介绍了vue 监听 Treeselect 选择项的改变操作,具有很好的参考价值,希望对大家有所帮助。一起跟随小编过来看看吧...2020-09-01
- 最常见的多环境配置,就是开发环境配置,和生产环境配置,本文主要介绍了vue项目多环境配置的实现,感兴趣的可以了解一下...2021-07-20
vue项目页面嵌入代码块vue-prism-editor的实现
这篇文章主要介绍了vue项目页面嵌入代码块vue-prism-editor的实现,本文给大家介绍的非常详细,对大家的学习或工作具有一定的参考借鉴价值,需要的朋友可以参考下...2020-10-30- 这篇文章主要介绍了Vue 3.0 中 jsx 语法使用,帮助大家更好的理解和使用vue框架,感兴趣的朋友可以了解下...2020-11-13
解决vue的router组件component在import时不能使用变量问题
这篇文章主要介绍了解决vue的router组件component在import时不能使用变量问题,具有很好的参考价值,希望对大家有所帮助。一起跟随小编过来看看吧...2020-07-27vue Treeselect下拉树只能选择第N级元素实现代码
这篇文章主要介绍了vue Treeselect下拉树只能选择第N级元素实现代码,具有很好的参考价值,希望对大家有所帮助。一起跟随小编过来看看吧...2020-09-01- 这篇文章主要为大家详细介绍了vue实现同时设置多个倒计时,文中示例代码介绍的非常详细,具有一定的参考价值,感兴趣的小伙伴们可以参考一下...2021-05-20
- 这篇文章主要介绍了Vue select 绑定动态变量的实例讲解,具有很好的参考价值,希望对大家有所帮助。一起跟随小编过来看看吧...2020-10-23
- 这篇文章主要为大家详细介绍了vue实现div单选多选功能,文中示例代码介绍的非常详细,具有一定的参考价值,感兴趣的小伙伴们可以参考一下...2020-07-16
Ant design vue table 单击行选中 勾选checkbox教程
这篇文章主要介绍了Ant design vue table 单击行选中 勾选checkbox教程,具有很好的参考价值,希望对大家有所帮助。一起跟随小编过来看看吧...2020-10-25vuejs element table 表格添加行,修改,单独删除行,批量删除行操作
这篇文章主要介绍了vuejs element table 表格添加行,修改,单独删除行,批量删除行操作,具有很好的参考价值,希望对大家有所帮助。一起跟随小编过来看看吧...2020-07-18- 这篇文章主要介绍了vue接口请求加密实例,具有很好的参考价值,希望对大家有所帮助。一起跟随小编过来看看吧...2020-08-12