ssm整合shiro使用详解
更新时间:2021年4月21日 15:01 点击:1397
这里有详细的ssm整合shiro步骤,需要先搭建ssm框架,教程在
https://www.jb51.net/article/195130.htm
整合shiro:
1.在pom.xml中引入依赖
<!--  shiro -->
    <!-- https://mvnrepository.com/artifact/org.apache.shiro/shiro-core -->
    <dependency>
      <groupId>org.apache.shiro</groupId>
      <artifactId>shiro-core</artifactId>
      <version>1.6.0</version>
    </dependency>

    <!-- https://mvnrepository.com/artifact/org.apache.shiro/shiro-web -->
    <dependency>
      <groupId>org.apache.shiro</groupId>
      <artifactId>shiro-web</artifactId>
      <version>1.6.0</version>
    </dependency>
    <!-- https://mvnrepository.com/artifact/org.apache.shiro/shiro-spring -->
    <dependency>
      <groupId>org.apache.shiro</groupId>
      <artifactId>shiro-spring</artifactId>
      <version>1.6.0</version>
    </dependency>

    <!-- https://mvnrepository.com/artifact/org.apache.shiro/shiro-ehcache -->
    <dependency>
      <groupId>org.apache.shiro</groupId>
      <artifactId>shiro-ehcache</artifactId>
      <version>1.6.0</version>
    </dependency>
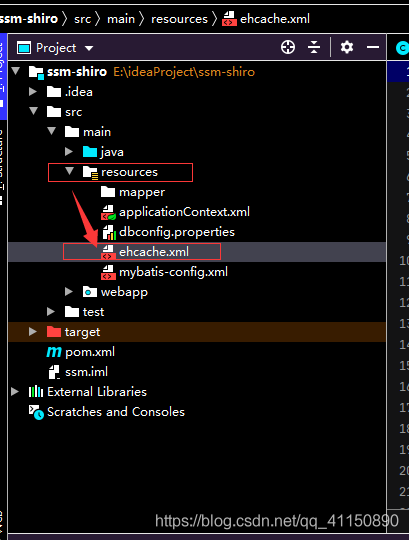
2.新建并配置缓存ehcache.xml
<ehcache>

    <!-- Sets the path to the directory where cache .data files are created.

         If the path is a Java System Property it is replaced by
         its value in the running VM.

         The following properties are translated:
         user.home - User's home directory
         user.dir - User's current working directory
         java.io.tmpdir - Default temp file path -->
    <diskStore path="java.io.tmpdir"/>

    <cache name="authorizationCache"
           eternal="false"
           timeToIdleSeconds="3600"
           timeToLiveSeconds="0"
           overflowToDisk="false"
           statistics="true">
    </cache>

    <cache name="authenticationCache"
           eternal="false"
           timeToIdleSeconds="3600"
           timeToLiveSeconds="0"
           overflowToDisk="false"
           statistics="true">
    </cache>

    <cache name="shiro-activeSessionCache"
           eternal="false"
           timeToIdleSeconds="3600"
           timeToLiveSeconds="0"
           overflowToDisk="false"
           statistics="true">
    </cache>

    <!--Default Cache configuration. These will applied to caches programmatically created through
        the CacheManager.

        The following attributes are required for defaultCache:

        maxInMemory       - Sets the maximum number of objects that will be created in memory
        eternal           - Sets whether elements are eternal. If eternal,  timeouts are ignored and the element
                            is never expired.
        timeToIdleSeconds - Sets the time to idle for an element before it expires. Is only used
                            if the element is not eternal. Idle time is now - last accessed time
        timeToLiveSeconds - Sets the time to live for an element before it expires. Is only used
                            if the element is not eternal. TTL is now - creation time
        overflowToDisk    - Sets whether elements can overflow to disk when the in-memory cache
                            has reached the maxInMemory limit.

        -->
    <defaultCache
        maxElementsInMemory="10000"
        eternal="false"
        timeToIdleSeconds="120"
        timeToLiveSeconds="120"
        overflowToDisk="true"
        />

    <!--Predefined caches.  Add your cache configuration settings here.
        If you do not have a configuration for your cache a WARNING will be issued when the
        CacheManager starts

        The following attributes are required for defaultCache:

        name              - Sets the name of the cache. This is used to identify the cache. It must be unique.
        maxInMemory       - Sets the maximum number of objects that will be created in memory
        eternal           - Sets whether elements are eternal. If eternal,  timeouts are ignored and the element
                            is never expired.
        timeToIdleSeconds - Sets the time to idle for an element before it expires. Is only used
                            if the element is not eternal. Idle time is now - last accessed time
        timeToLiveSeconds - Sets the time to live for an element before it expires. Is only used
                            if the element is not eternal. TTL is now - creation time
        overflowToDisk    - Sets whether elements can overflow to disk when the in-memory cache
                            has reached the maxInMemory limit.

        -->

    <!-- Sample cache named sampleCache1
        This cache contains a maximum in memory of 10000 elements, and will expire
        an element if it is idle for more than 5 minutes and lives for more than
        10 minutes.

        If there are more than 10000 elements it will overflow to the
        disk cache, which in this configuration will go to wherever java.io.tmp is
        defined on your system. On a standard Linux system this will be /tmp"
        -->
    <cache name="sampleCache1"
        maxElementsInMemory="10000"
        eternal="false"
        timeToIdleSeconds="300"
        timeToLiveSeconds="600"
        overflowToDisk="true"
        />

    <!-- Sample cache named sampleCache2
        This cache contains 1000 elements. Elements will always be held in memory.
        They are not expired. -->
    <cache name="sampleCache2"
        maxElementsInMemory="1000"
        eternal="true"
        timeToIdleSeconds="0"
        timeToLiveSeconds="0"
        overflowToDisk="false"
        />

    <!-- Place configuration for your caches following -->

</ehcache>
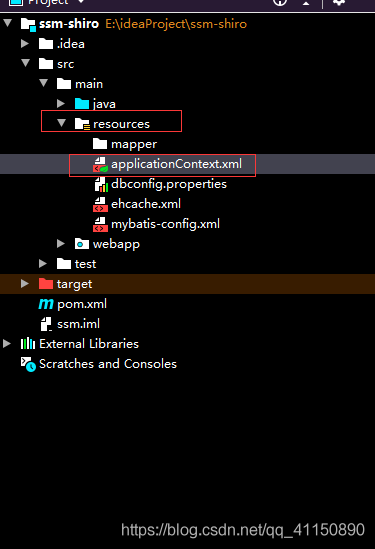
3.在spring配置文件applicationContext.xml配置shiro
<?xml version="1.0" encoding="UTF-8"?>
<beans xmlns="http://www.springframework.org/schema/beans"
xmlns:xsi="http://www.w3.org/2001/XMLSchema-instance"
xmlns:context="http://www.springframework.org/schema/context"
xmlns:aop="http://www.springframework.org/schema/aop" xmlns:tx="http://www.springframework.org/schema/tx"
xsi:schemaLocation="http://www.springframework.org/schema/beans http://www.springframework.org/schema/beans/spring-beans.xsd http://www.springframework.org/schema/context http://www.springframework.org/schema/context/spring-context.xsd http://www.springframework.org/schema/aop http://www.springframework.org/schema/aop/spring-aop.xsd http://www.springframework.org/schema/tx http://www.springframework.org/schema/tx/spring-tx.xsd">
<!-- spring 配置文件 主要配置和业务逻辑有关的 -->
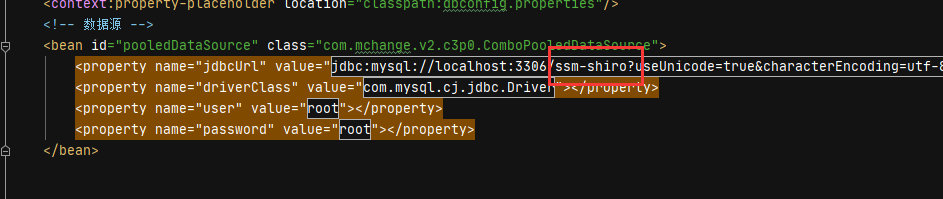
<context:property-placeholder location="classpath:dbconfig.properties"/>
<!-- 数据源 -->
<bean id="pooledDataSource" class="com.mchange.v2.c3p0.ComboPooledDataSource">
<property name="jdbcUrl" value="${jdbc.jdbcUrl}"></property>
<property name="driverClass" value="${jdbc.driverClass}"></property>
<property name="user" value="${jdbc.user}"></property>
<property name="password" value="${jdbc.password}"></property>
</bean>
<context:component-scan base-package="com.liuzhan">
<!-- 不能扫描控制器 -->
<context:exclude-filter type="annotation" expression="org.springframework.stereotype.Controller"/> </context:component-scan>
<!-- 配置和mybatis的整合 -->
<bean id="sqlSessionFactory" class="org.mybatis.spring.SqlSessionFactoryBean">
<!-- 指定mybatis 全局配置文件的位置 -->
<property name="configLocation" value="classpath:mybatis-config.xml"></property>
<property name="dataSource" ref="pooledDataSource"></property>
<!-- 指定mybatismapper文件的位置 -->
<!-- <property name="mapperLocations" value="classpath:mapper/*.xml"></property>-->
</bean>
<!-- 配置扫描器,将mybatis接口的实现加入到ioc容器中 -->
<bean class="tk.mybatis.spring.mapper.MapperScannerConfigurer">
<!-- 扫描所有的dao接口 -->
<property name="basePackage" value="com.liuzhan.dao"></property>
</bean>
<!-- 事务控制的配置 -->
<bean id="transactionManager" class="org.springframework.jdbc.datasource.DataSourceTransactionManager">
<!-- 控制数据源 -->
<property name="dataSource" ref="pooledDataSource"></property>
</bean>
<aop:config>
<!-- 切入点表达式 -->
<aop:pointcut expression="execution(* com.liuzhan.service..*(..) )" id="txPoint"/>
<!-- 配置事务 -->
<aop:advisor advice-ref="txAdvice" pointcut-ref="txPoint"/>
</aop:config>
<!-- 配置事务增强 事务如何切入 -->
<tx:advice id="txAdvice">
<tx:attributes>
<!-- 所有方法都是事务方法 -->
<tx:method name="*"/>
<!-- 以get开头的所有方法 -->
<tx:method name="get*" read-only="true"/>
</tx:attributes>
</tx:advice>
<!-- shiro -->
<!-- 配置自定义Realm -->
<bean id="myRealm" class="com.liuzhan.relams.ShiroRealm"/>
<!-- 安全管理器 -->
<bean id="securityManager" class="org.apache.shiro.web.mgt.DefaultWebSecurityManager">
<property name="realm" ref="myRealm"/>
</bean>
<!-- Shiro过滤器 核心-->
<bean id="shiroFilter" class="org.apache.shiro.spring.web.ShiroFilterFactoryBean">
<!-- Shiro的核心安全接口,这个属性是必须的 -->
<property name="securityManager" ref="securityManager"/>
<!-- 身份认证失败,则跳转到登录页面的配置 -->
<property name="loginUrl" value="/login.jsp"/>
<!-- 权限认证失败,则跳转到指定页面 -->
<property name="unauthorizedUrl" value="/noPermission.jsp"/>
<!-- Shiro连接约束配置,即过滤链的定义 -->
<property name="filterChainDefinitions">
<value>
<!--设置jsp文件可以匿名访问,静态文件,如js\html\css\img等
-->
<!--login/**= anon
/css/**=anon
/html/**=anon
/images/**=anon
/js/**=anon
-->
/noPermission.jsp=anon
<!--anon 表示匿名访问,不需要认证以及授权-->
/login.jsp=anon
<!-- 由于该请求http://localhost:8080/ssm_shiro_war_exploded/login是执行认证的请求路径,因此不能被拦截,不然永远无法执行认证 -->
/login = anon
<!-- logout 表示退出,当有/logout请求时,会执行退出,清除用户信息及角色和权限信息-->
/logout = logout
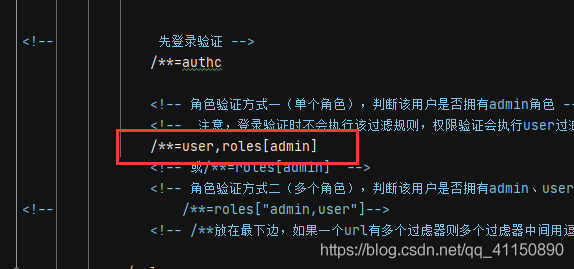
<!-- 先登录验证 -->
/**=authc
<!-- 角色验证方式一(单个角色),判断该用户是否拥有admin角色 -->
<!-- 注意,登录验证时不会执行该过滤规则,权限验证会执行user过滤规则,如果没有roles条件,默认是所有权限 -->
/**=user,roles[admin]
<!-- 或/**=roles[admin] -->
<!-- 角色验证方式二(多个角色),判断该用户是否拥有admin、user角色 -->
<!-- /**=roles["admin,user"]-->
<!-- /**放在最下边,如果一个url有多个过虑器则多个过虑器中间用逗号分隔,如:/** = user,roles[admin]-->
</value>
</property>
</bean>
<!-- 保证实现了Shiro内部lifecycle函数的bean执行 -->
<bean id="lifecycleBeanPostProcessor" class="org.apache.shiro.spring.LifecycleBeanPostProcessor"/>
<!-- 开启Shiro注解 -->
<bean class="org.springframework.aop.framework.autoproxy.DefaultAdvisorAutoProxyCreator"
depends-on= "lifecycleBeanPostProcessor"/>
<bean class="org.apache.shiro.spring.security.interceptor.AuthorizationAttributeSourceAdvisor">
<property name="securityManager" ref="securityManager"/>
</bean>
</beans>
4.自定义realm(内部定义认证和授权的逻辑代码)

package com.liuzhan.relams;

import com.liuzhan.entity.Users;
import com.liuzhan.service.UserService;
import org.apache.shiro.authc.AuthenticationException;
import org.apache.shiro.authc.AuthenticationInfo;
import org.apache.shiro.authc.AuthenticationToken;
import org.apache.shiro.authc.SimpleAuthenticationInfo;
import org.apache.shiro.authz.AuthorizationInfo;
import org.apache.shiro.authz.SimpleAuthorizationInfo;
import org.apache.shiro.realm.AuthorizingRealm;
import org.apache.shiro.subject.PrincipalCollection;
import org.springframework.beans.factory.annotation.Autowired;

import java.util.HashSet;
import java.util.List;
import java.util.Set;

public class ShiroRealm extends AuthorizingRealm {

    @Autowired
    UserService userService;


    /**
     * 用于授权。
     * @param principalCollection
     * @return
     */
    @Override
    protected AuthorizationInfo doGetAuthorizationInfo(PrincipalCollection principalCollection) {
        System.out.println("开始授权");
        String uName = principalCollection.getPrimaryPrincipal().toString() ;
        SimpleAuthorizationInfo info = new SimpleAuthorizationInfo() ;
        List<Users> list=userService.loginCheck(uName);
        //查询当前用户的角色,放在roleName中
        Set<String> roleName = new HashSet<>();
        roleName.add(list.get(0).getRole());

        //查询角色具有的权限,放在permissions中
        Set<String> permissions = new HashSet<>();
        permissions.add("manage other users");

        //把角色和权限放在授权类的对象中
        info.addRole(list.get(0).getRole());
        info.addStringPermission("manage other users");

        System.out.println("当前用户角色:"+info.getRoles());
        return info;
    }


    //认证
    //用户输入用户名和密码后,在controller调用login(token),进行认证,这边通过用户名查询密码
    //和token中用户名和密码进行比对,成功认证或失败
    @Override
    protected AuthenticationInfo doGetAuthenticationInfo(AuthenticationToken authenticationToken) throws AuthenticationException {

        System.out.println("开始登录认证");

        //获取用户名,去数据库取对应密码
        String uName = (String) authenticationToken.getPrincipal();
        List<Users> list=userService.loginCheck(uName);

        if(list.size()>0){
            System.out.println("用户存在");
            String uPwd=list.get(0).getuPwd();
            // 用户名存在,去数据库中去获取密码
            // 然后和token的用户名和密码对比
            // 第三个参数是选择realm,当有多个自定义realm时有用
            SimpleAuthenticationInfo info=new
                    SimpleAuthenticationInfo(uName, uPwd, "ShiroRealm");
            return info;
        }
        else{
            System.out.println("用户不存在");
            return null;
        }

    }
}
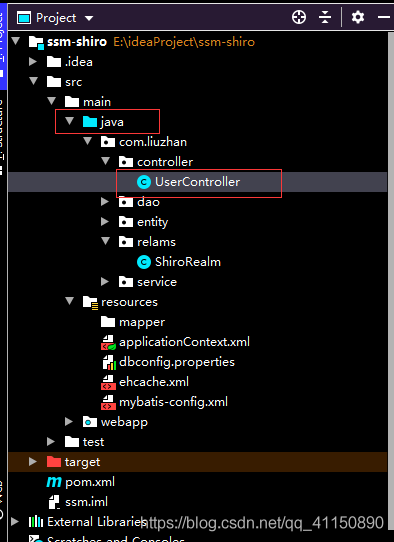
5.controller中相关代码
package com.liuzhan.controller;

import com.liuzhan.entity.Users;
import com.liuzhan.service.UserService;
import org.apache.shiro.SecurityUtils;
import org.apache.shiro.authc.AuthenticationException;
import org.apache.shiro.authc.UsernamePasswordToken;
import org.apache.shiro.subject.Subject;
import org.springframework.beans.factory.annotation.Autowired;
import org.springframework.stereotype.Controller;
import org.springframework.web.bind.annotation.RequestMapping;


@Controller
public class UserController {

    @Autowired
    UserService userService;

    @RequestMapping("/login")
    public String loginCheck(Users users){

        Subject subject=SecurityUtils.getSubject();
        if(!subject.isAuthenticated()) {
            UsernamePasswordToken token=new UsernamePasswordToken(users.getuName(),users.getuPwd());
            token.setRememberMe(true);
            try {
                //执行登录,会调用认证方法,如果认证失败,会抛出异常,执行catch
                subject.login(token);
            } catch (AuthenticationException e) {
                // TODO Auto-generated catch block
                System.out.println("登录失败:"+e.getMessage());
                return "login";
            }
        }
        //login(token)认证成功会执行这些语句
        System.out.println("登录成功");

        //这里如果直接 return "WEB-INF/jsp/index"的话,由于默认转发,地址栏不变,还是http://localhost:8080/ssm_shiro_war_exploded/login
        //仍然执行/login = anon过滤规则,不会执行下面的权限验证过滤规则 /**=user,roles[admin]

        //因此需要使用重定向"redirect:index",才能让 /**=user,roles[admin]过滤规则生效
        return "redirect:index";
    }

    @RequestMapping("/index")
    public String index() {
       return "WEB-INF/jsp/index";
    }
}

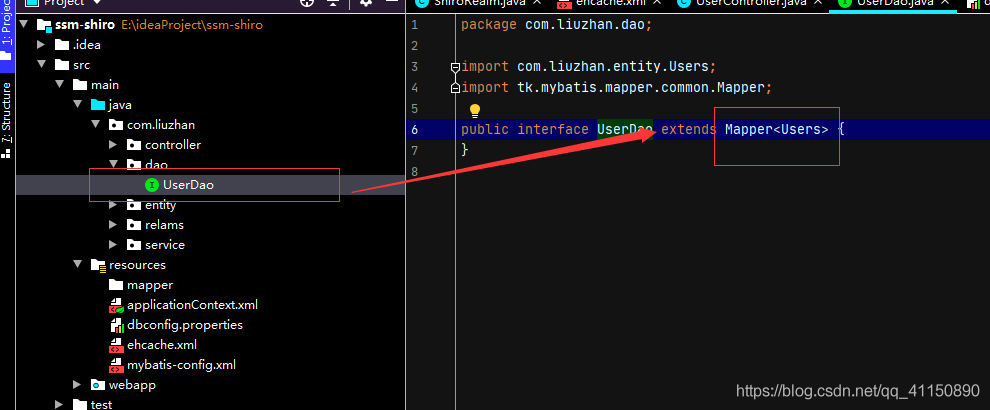
这里到dao service entity就不再粘贴代码了
6.数据库连接配置相关
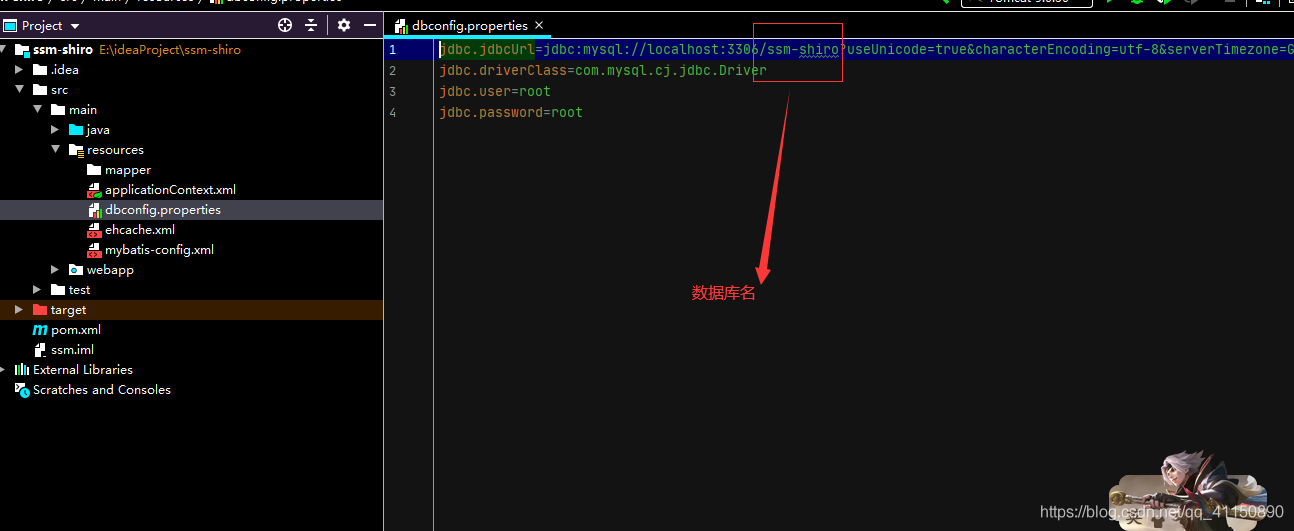
jdbc.jdbcUrl=jdbc:mysql://localhost:3306/ssm-shiro?useUnicode=true&characterEncoding=utf-8&serverTimezone=GMT%2B8
jdbc.driverClass=com.mysql.cj.jdbc.Driver
jdbc.user=root
jdbc.password=root
applicationContext.xml
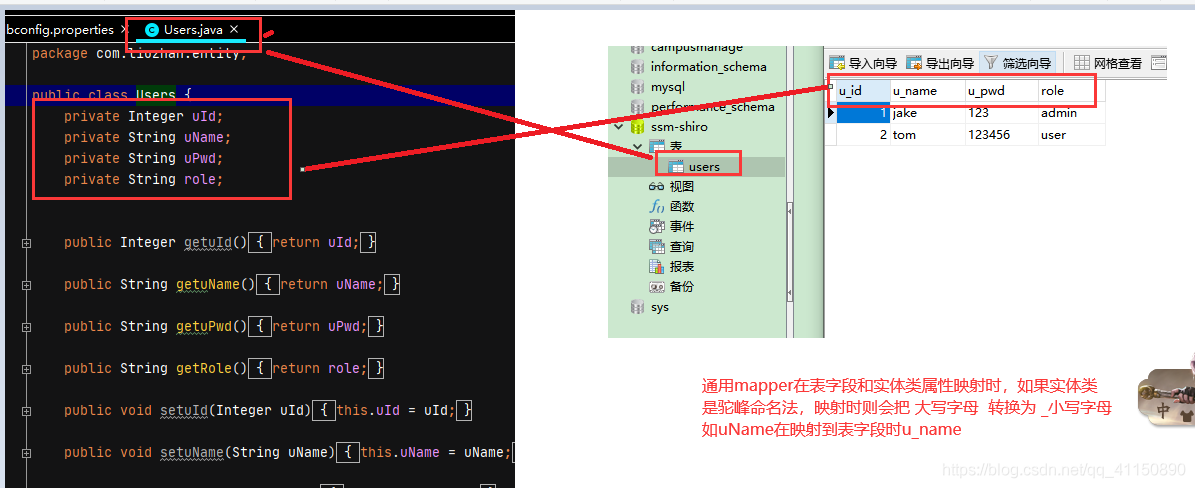
项目中用到的是通用mapper,实体类的类名和数据库的表名对应,实体类的属性和数据库表的字段名对应
测试
运行项目
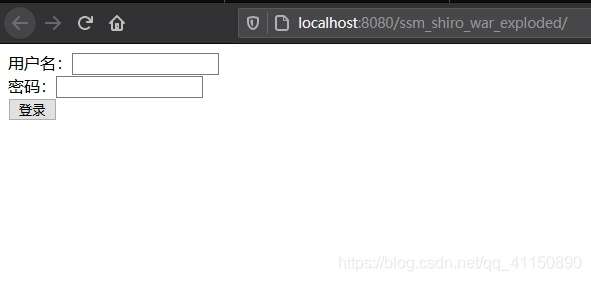
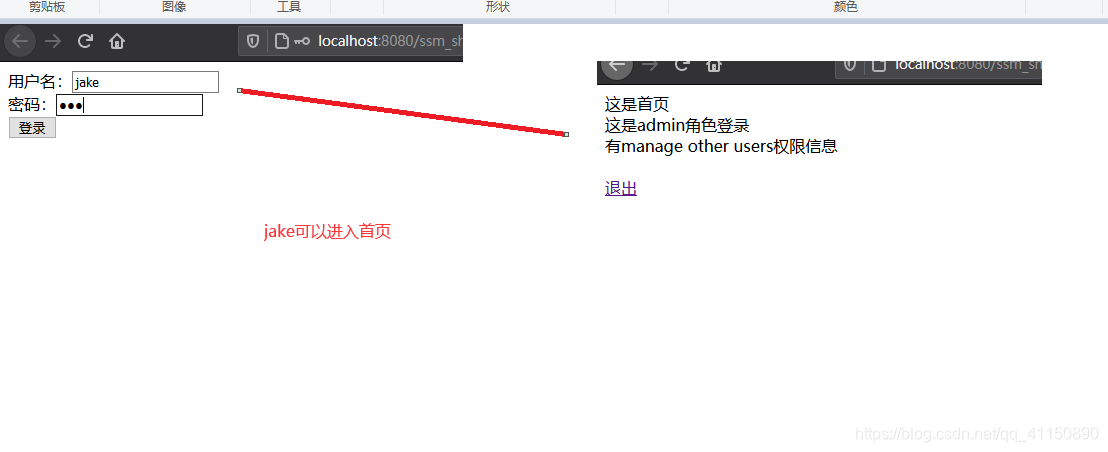
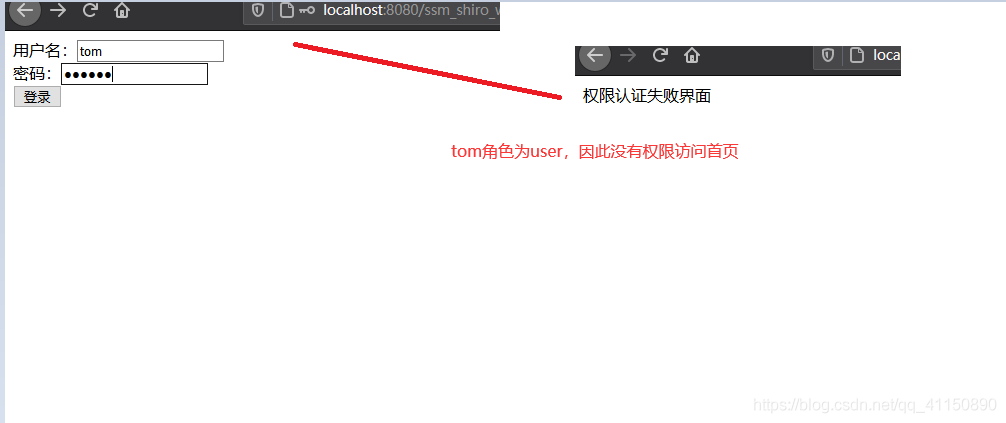
因为我shiro过滤链配置的是只有角色为admin的能进首页,角色为user不能进首页,会被拦截(数据库jake为admin,tom为user)
运行结果:
到此这篇关于ssm整合shiro使用详解的文章就介绍到这了,更多相关ssm整合shiro内容请搜索猪先飞以前的文章或继续浏览下面的相关文章希望大家以后多多支持猪先飞!
相关文章
- 这篇文章主要介绍了ssm+vue前后端分离框架整合实现(附源码),文中通过示例代码介绍的非常详细,对大家的学习或者工作具有一定的参考学习价值,需要的朋友们下面随着小编来一起学习学习吧...2020-07-09
解决Springboot整合shiro时静态资源被拦截的问题
这篇文章主要介绍了解决Springboot整合shiro时静态资源被拦截的问题,具有很好的参考价值,希望对大家有所帮助。一起跟随小编过来看看吧...2021-01-26- 这篇文章主要介绍了Java SSM框架如何添加写日志功能,文中通过示例代码介绍的非常详细,对大家的学习或者工作具有一定的参考学习价值,需要的朋友可以参考下...2020-09-25
- 这篇文章主要介绍了Java后端SSM框架图片上传功能实现方法解析,文中通过示例代码介绍的非常详细,对大家的学习或者工作具有一定的参考学习价值,需要的朋友可以参考下...2020-06-29
ThinkPhP+Apache+PHPstorm整合框架流程图解
这篇文章主要介绍了ThinkPhP+Apache+PHPstorm整合框架流程图解,文中通过示例代码介绍的非常详细,对大家的学习或者工作具有一定的参考学习价值,需要的朋友可以参考下...2020-11-23- 这篇文章给大家介绍了MAVEN的安装,配置与IDEA整合方法,本文给大家介绍的非常详细,对大家的学习或工作具有一定的参考借鉴价值,感兴趣的朋友跟随小编一起看看吧...2021-02-06
- 本文给大家推荐的是使用angularjs实现整合微信新推出的UI(weui)的全部过程,有相同需求的小伙伴可以参考下...2016-03-18
- 这篇文章主要为大家详细介绍了基于SSM实现学生管理系统,文中示例代码介绍的非常详细,具有一定的参考价值,感兴趣的小伙伴们可以参考一下...2020-12-18
Springboot使用Spring Data JPA实现数据库操作
Spring Data JPA 是 Spring 基于 Spring Data 框架、在JPA 规范的基础上开发的一个框架,使用 Spring Data JPA 可以极大地简化JPA 的写法,本章我们将详细介绍在Springboot中使用 Spring Data JPA 来实现对数据库的操作...2021-06-30- 这篇文章主要介绍了Springboot整合quartz产生错误及解决方案,文中通过示例代码介绍的非常详细,对大家的学习或者工作具有一定的参考学习价值,需要的朋友可以参考下...2020-06-03
- 这篇文章主要介绍了关于springboot整合swagger问题及解决方法,本文给大家介绍的非常详细,对大家的学习或工作具有一定的参考借鉴价值,需要的朋友可以参考下...2021-04-20
- 这篇文章主要介绍了Springboot shiro认证授权实现原理及实例,文中通过示例代码介绍的非常详细,对大家的学习或者工作具有一定的参考学习价值,需要的朋友可以参考下...2020-06-11
java、spring、springboot中整合Redis的详细讲解
这篇文章主要介绍了java、spring、springboot中整合Redis的详细讲解,文中通过示例代码介绍的非常详细,对大家的学习或者工作具有一定的参考学习价值,需要的朋友们下面随着小编来一起学习学习吧...2021-04-02Springboot+Vue+shiro实现前后端分离、权限控制的示例代码
这篇文章主要介绍了Springboot+Vue+shiro实现前后端分离、权限控制的示例代码,文中通过示例代码介绍的非常详细,对大家的学习或者工作具有一定的参考学习价值,需要的朋友们下面随着小编来一起学习学习吧...2020-07-16SpringBoot Shiro 权限注解不起作用的解决方法
本文主要介绍了SpringBoot Shiro 权限注解不起作用的解决方法,文中通过示例代码介绍的非常详细,具有一定的参考价值,感兴趣的小伙伴们可以参考一下...2021-07-29- JWT全称是json web token,它将用户信息加密到 token 里,服务器不保存任何用户信息,服务器通过使用保存的密钥验证 token 的正确性,只要正确即通过验证,这篇文章主要给大家介绍了关于SpringBoot整合JWT的相关资料,需要的朋友可以参考下...2021-06-29
Springboot jdbctemplate整合实现步骤解析
这篇文章主要介绍了Springboot jdbctemplate整合实现步骤解析,文中通过示例代码介绍的非常详细,对大家的学习或者工作具有一定的参考学习价值,需要的朋友可以参考下...2020-08-26- shiro可以直接和spring整合,但是这样需要单独配置spring用于整合shiro,在配置springmvc,接下来通过实例代码给大家介绍shiro 整合 SpringMVC 的方法,感兴趣的朋友一起看看吧...2021-08-14
- 这篇文章主要介绍了解决Shiro 处理ajax请求拦截登录超时的问题,具有很好的参考价值,希望对大家有所帮助。如有错误或未考虑完全的地方,望不吝赐教...2021-09-06
- 在为用户提供动态内容方面,PHP和MySQL是一个强大的组合。这些年来,这两项产品已经跨越了它们最初的应用舞台,现在,一些世界上最繁忙的网站也在应用它们。虽然它们当初都是...2016-11-25