详解SpringCloud Gateway 2020.0.2最新版
简述
官网:https://spring.io/projects/spring-cloud-gateway
GitHub地址:https://github.com/spring-cloud/spring-cloud-gateway
本文编写自2021年4月7日,当前SpringCloud最新版本为2020.0.2版本
本文使用版本为
SpringCloud 版本2020.0.2
spring-cloud-starter-gateway版本3.0.2
spring-boot-starter版本2.4.4
该项目提供了一个用于在Spring WebFlux之上构建API网关的库。 Spring Cloud Gateway旨在提供一种简单而有效的方法来路由到API,并为它们提供跨领域的关注点,例如:安全性,监视/指标和弹性。
特征
- 建立在Spring Framework 5,Project Reactor和Spring Boot 2.0之上
- 能够匹配任何请求属性上的路由。
- 谓词和过滤器特定于路由。
- 断路器集成。
- Spring Cloud DiscoveryClient集成
- 易于编写的谓词和过滤器
- 请求速率限制
- 路径改写
概念
什么是路由?
路由是构建网关的基本模块,由ID,目标URI,一系列的断言和过滤器组成,如果断言为true,则匹配该路由
什么是断言?
开发人员可以匹配HTTP请求中的所有内容(例如请求头或请求参数),如果请求与断言相匹配则进行路由
什么是过滤?
值得是Spring框架中GatewayFilter的实例,使用过滤器,可以使请求在被路由前/后进行修改
然后让我们先通过几个小demo先了解一下gateway的大概使用,然后我们在深入了解更多相关知识,这样比较容易理解。
独立版代码(静态路由)
依赖坐标
pom.xml
   <dependency>
            <groupId>org.springframework.boot</groupId>
            <artifactId>spring-boot-starter</artifactId>
            <version>2.4.4</version>
        </dependency>
				<dependency>
            <groupId>org.springframework.cloud</groupId>
            <artifactId>spring-cloud-starter-gateway</artifactId>
          	<version>3.0.2</version>
        </dependency>
配置
配置文件、配置类选择一个就ok
根据此配置,访问 http:localhost:9527/s 将直接转发到百度首页,页面内容展示百度首页内容
application.yml
server:
  port: 9527
spring:
  application:
    name: cloud-gateway
  # 以下是gateway的配置
  cloud:
    gateway:
      routes:
        - id: gateway_route_1
          uri: https://www.baidu.com/s
          predicates:
            - Path=/s/**
GatewayConfig.java org.example.springcloud.config.GatewayConfig
package org.example.springcloud.config;

import org.springframework.cloud.gateway.route.RouteLocator;
import org.springframework.cloud.gateway.route.builder.RouteLocatorBuilder;
import org.springframework.context.annotation.Bean;
import org.springframework.context.annotation.Configuration;

/**
 * @Auth: guohui.wang
 * @Date: 2021-04-07 11:07
 * @desc:
 */
@Configuration
public class GatewayConfig {
    /**
     * <p>将 "ip:${server.port}+${route.path}" 转发到 "${route.url}"</p>
     * <p>例 "120.0.0.1:9527/s" 转发到 "https://www.baidu.com/s"</p><br>
     * <p>可以尝试访问以下链接获取配置效果</p>
     * <li>"http://localhost:9527/s"</li>
     * <li>"http://localhost:9527/s?wd=spring"</li>
     * <br>
     * <div>
     * <b>routes().route(参数1,参数2).route(参数1,参数2)……</b>
     * <li>参数1:id,一个可以随便取得名字,标识此路由规则</li>
     * <li>参数2:具体的路由规则内容</li>
     *
     * <b>路由规则:</b>
     * <li>path: 网关服务地址之后的内容(比如上面的"/s")</li>
     * <li>uri: 符合path之后需要转发到的位置</li>
     * </div>
     *
     * @param builder
     * @return
     */
    @Bean
    public RouteLocator routes(RouteLocatorBuilder builder) {
        return builder
                .routes()
                .route("gateway_route_1",
                        r -> r.path("/s")
                                .uri("https://www.baidu.com/s")
                )
                .build();
    }
}
启动类
org.example.springcloud.GatewayMain9527
package org.example.springcloud;

import org.springframework.boot.SpringApplication;
import org.springframework.boot.autoconfigure.SpringBootApplication;
import org.springframework.cloud.netflix.eureka.EnableEurekaClient;

@SpringBootApplication
@EnableEurekaClient
public class GatewayMain9527 {
    public static void main(String[] args) {
        SpringApplication.run(GatewayMain9527.class, args);
    }
}
与erueka整合版(动态路由)
通过微服务名实现动态路由,这样可以在服务中心注册的对应的多个服务之间来回调用了。
需要三个微服务,服务结构:
父项目
- eureka服务,作为注册中心
- gateway服务,作为网关
- provider服务,作为网关转发的服务
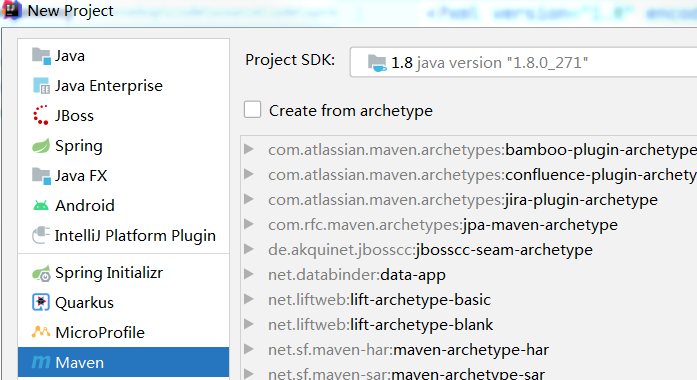
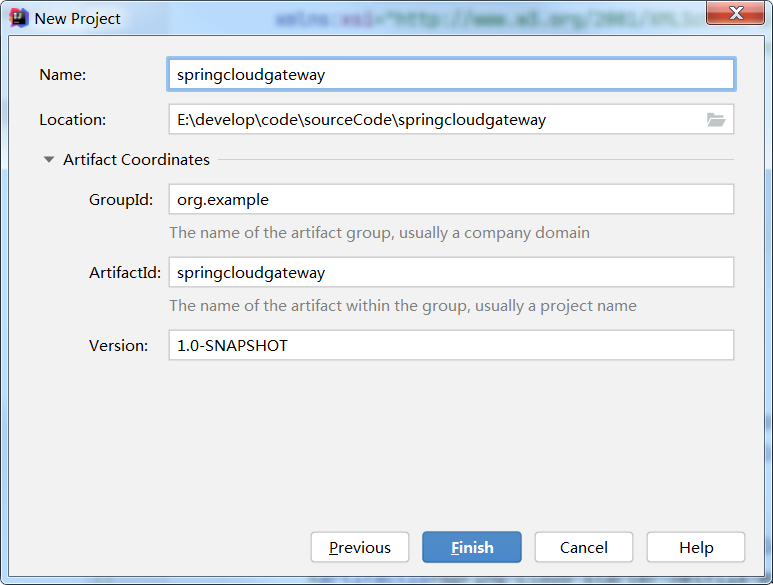
父项目
创建项目,选择maven(个人喜好也可选择SpringInitializr)->输入名称及相关信息(我这里起的名字是 springcloudgateway)->点击finish创建项目
修改pom,pom中添加版本控制
<dependencyManagement>
        <dependencies>
            <!-- https://mvnrepository.com/artifact/org.springframework.boot/spring-boot-dependencies -->
            <dependency>
                <groupId>org.springframework.boot</groupId>
                <artifactId>spring-boot-dependencies</artifactId>
                <version>2.4.4</version>
                <type>pom</type>
                <scope>import</scope>
            </dependency>

            <!-- https://mvnrepository.com/artifact/org.springframework.cloud/spring-cloud-dependencies -->
            <dependency>
                <groupId>org.springframework.cloud</groupId>
                <artifactId>spring-cloud-dependencies</artifactId>
                <version>2020.0.2</version>
                <type>pom</type>
                <scope>import</scope>
            </dependency>
        </dependencies>
    </dependencyManagement>
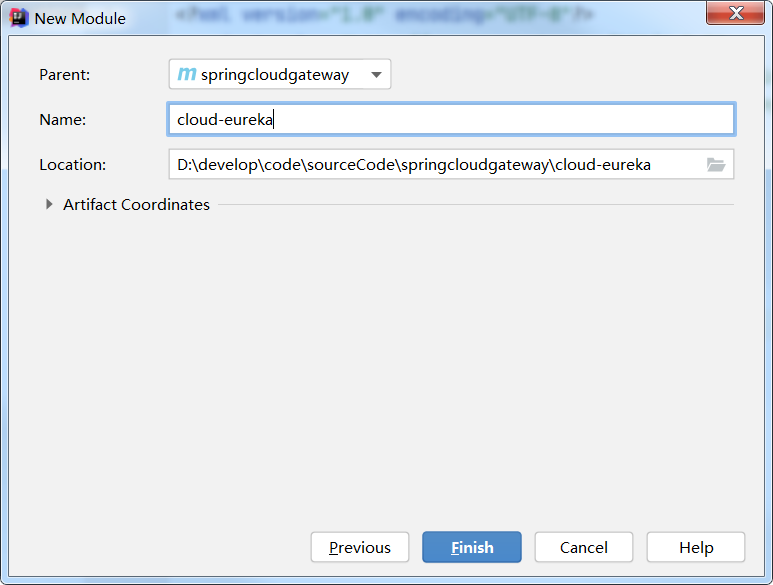
eureka模块
创建项目,选择maven(个人喜好也可选择SpringInitializr)->输入相关信息->Finish
我这里用的模块名:cloud-eureka
pom中添加坐标依赖
 <dependencies>
        <dependency>
            <groupId>org.springframework.cloud</groupId>
            <artifactId>spring-cloud-starter-netflix-eureka-server</artifactId>
        </dependency>
    </dependencies>
创建类EurekaApplication org.example.springcloud.eureka.EurekaApplication
package org.example.springcloud.eureka;

import org.springframework.boot.SpringApplication;
import org.springframework.boot.autoconfigure.SpringBootApplication;

@SpringBootApplication
@EnableEurekaServer
public class EurekaApplication {
    public static void main(String[] args) {
        SpringApplication.run(EurekaApplication.class, args);
    }
}
在main/resources下面创建application.yml 并添加配置
server:
  port: 9001
eureka:
  instance:
    hostname: localhost
  client:
    # 不向注册中心注册自己
    register-with-eureka: false
    # 表示自己端就是注册中心,不需要检索服务
    fetch-registry: false
    service-url:
      # 设置与eureka server交互地址查询服务和注册服务都需要依赖这个地址
      defaultZone: http://${eureka.instance.hostname}:${server.port}/eureka/
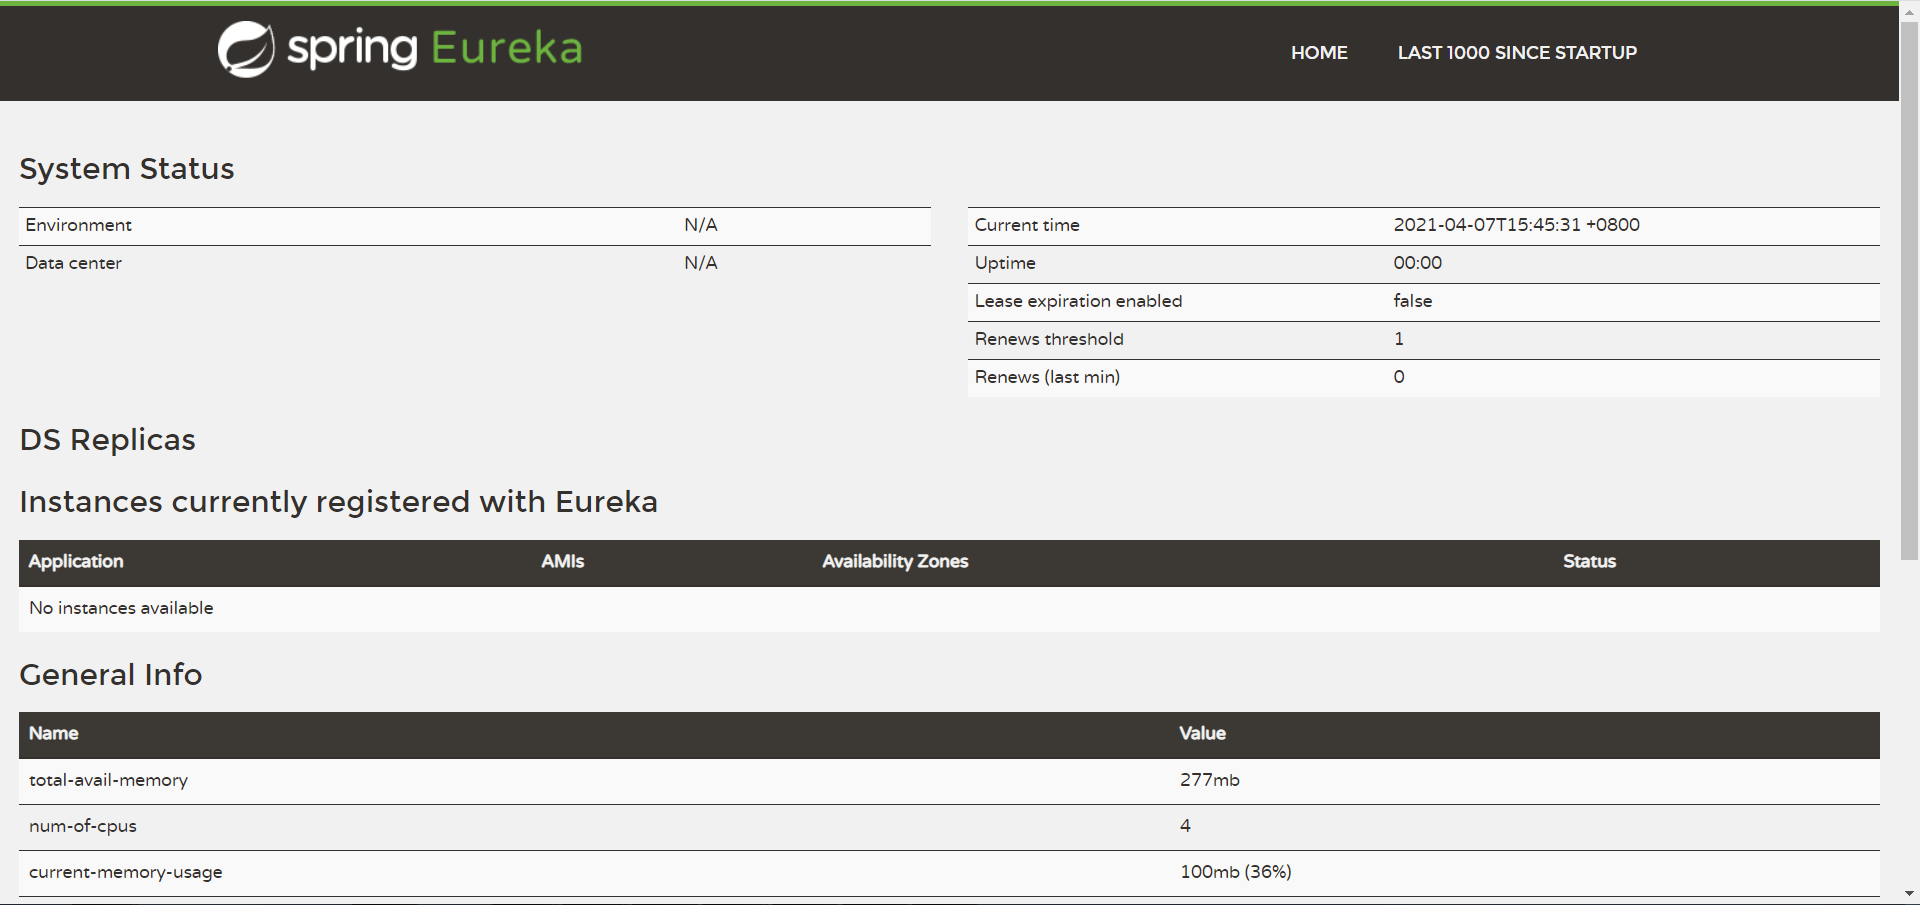
验证
启动服务没有问题(控制台内容略),并且访问 http://localhost:9001/ 可以打开页面:
provider模块
这个模块假装作为提供服务的微服务,用来测试网关是否生效的。
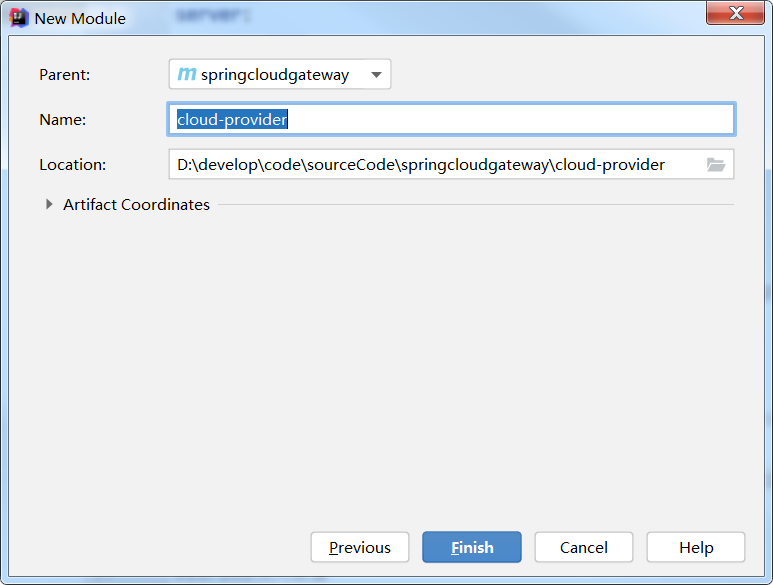
创建项目,选择maven(个人喜好也可选择SpringInitializr)->输入相关信息->Finish
我这里用的模块名:cloud-provider
pom中添加坐标依赖
<dependencies>
        <dependency>
            <groupId>org.springframework.boot</groupId>
            <artifactId>spring-boot-starter-web</artifactId>
        </dependency>
        <dependency>
            <groupId>org.springframework.cloud</groupId>
            <artifactId>spring-cloud-starter-netflix-eureka-client</artifactId>
        </dependency>
    </dependencies>
创建类ProviderApplication org.example.springcloud.provider.ProviderApplication
package org.example.springcloud.provider;

import org.springframework.boot.SpringApplication;
import org.springframework.boot.autoconfigure.SpringBootApplication;
import org.springframework.cloud.netflix.eureka.EnableEurekaClient;

@SpringBootApplication
@EnableEurekaClient
public class ProviderApplication {
    public static void main(String[] args) {
        SpringApplication.run(ProviderApplication.class, args);
    }
}
创建controller层类TestController org.example.springcloud.provider.controller.TestController
package org.example.springcloud.provider.controller;

import org.springframework.web.bind.annotation.GetMapping;
import org.springframework.web.bind.annotation.RequestMapping;
import org.springframework.web.bind.annotation.RestController;

@RequestMapping("/test")
@RestController
public class TestController {
    @GetMapping("/lb")
    public String lb() {
        return "访问成功";
    }
}
在main/resources下面创建application.yml 并添加配置
server:
  port: 9003
spring:
  application:
    name: cloud-provider
#eureka相关配置
eureka:
  instance:
    instance-id: cloud-provider-01
  client:
    service-url:
      defaultZone: http://127.0.0.1:9001/eureka
    register-with-eureka: true
    fetch-registry: true
验证
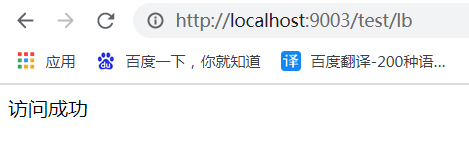
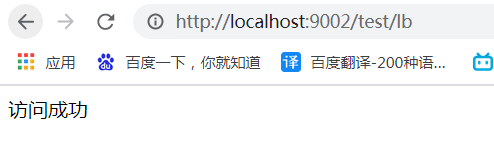
服务启动没问题,并且访问 http://localhost:9003/test/lb 可以获取到返回内容,说明接口没问题。
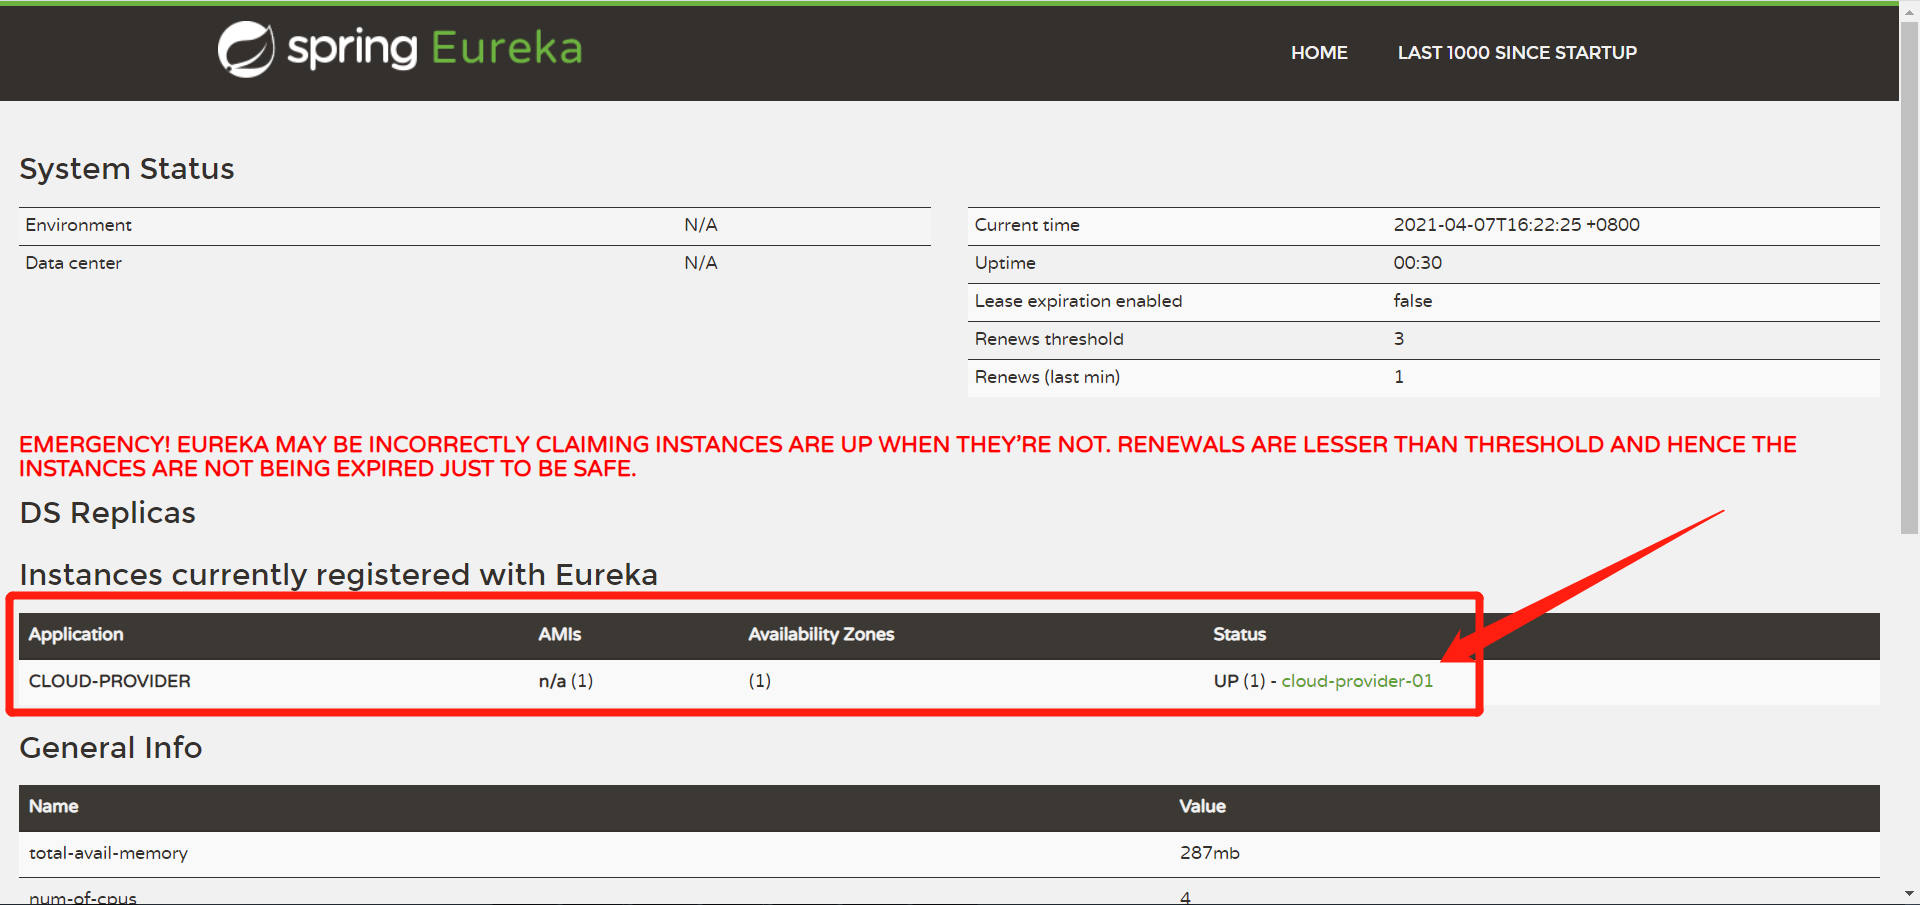
并且打开eureka页面 http://localhost:9001/ 可以看到服务已经注册进去,说明服务注册也没问题。
gateway模块 创建项目,选择maven(个人喜好也可选择SpringInitializr)->输入相关信息->Finish
我这里用的模块名:cloud-gateway

pom中添加坐标依赖
 <dependencies>
        <dependency>
            <groupId>org.springframework.cloud</groupId>
            <artifactId>spring-cloud-starter-gateway</artifactId>
        </dependency>
        <dependency>
            <groupId>org.springframework.cloud</groupId>
            <artifactId>spring-cloud-starter-netflix-eureka-client</artifactId>
        </dependency>
    </dependencies>
创建类GatewayApplication org.example.springcloud.gateway.GatewayApplication
package org.example.springcloud.gateway;

import org.springframework.boot.SpringApplication;
import org.springframework.boot.autoconfigure.SpringBootApplication;
import org.springframework.cloud.netflix.eureka.EnableEurekaClient;

@SpringBootApplication
@EnableEurekaClient
public class GatewayApplication {
    public static void main(String[] args) {
        SpringApplication.run(GatewayApplication.class, args);
    }
}
在main/resources下面创建application.yml 并添加配置
server:
port: 9002
spring:
application:
name: cloud-gateway
cloud:
gateway:
discovery:
locator:
#开启从注册中心动态创建路由功能,利用微服务名进行路由
enabled: true
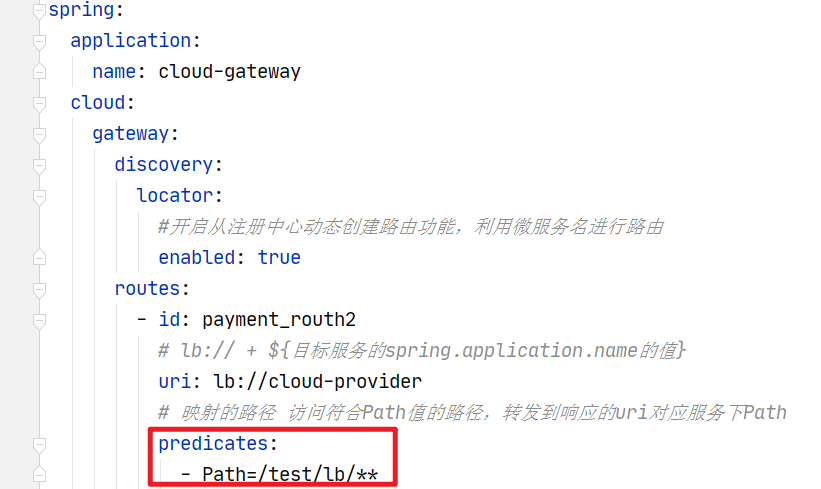
routes:
- id: payment_routh2
# lb:// + ${目标服务的spring.application.name的值}
uri: lb://cloud-provider
# 映射的路径 访问符合Path值的路径,转发到响应的uri对应服务下Path
predicates:
- Path=/test/lb/**
#eureka相关配置
eureka:
instance:
instance-id: cloud-gateway-01
client:
service-url:
defaultZone: http://127.0.0.1:9001/eureka
register-with-eureka: true
fetch-registry: true
验证
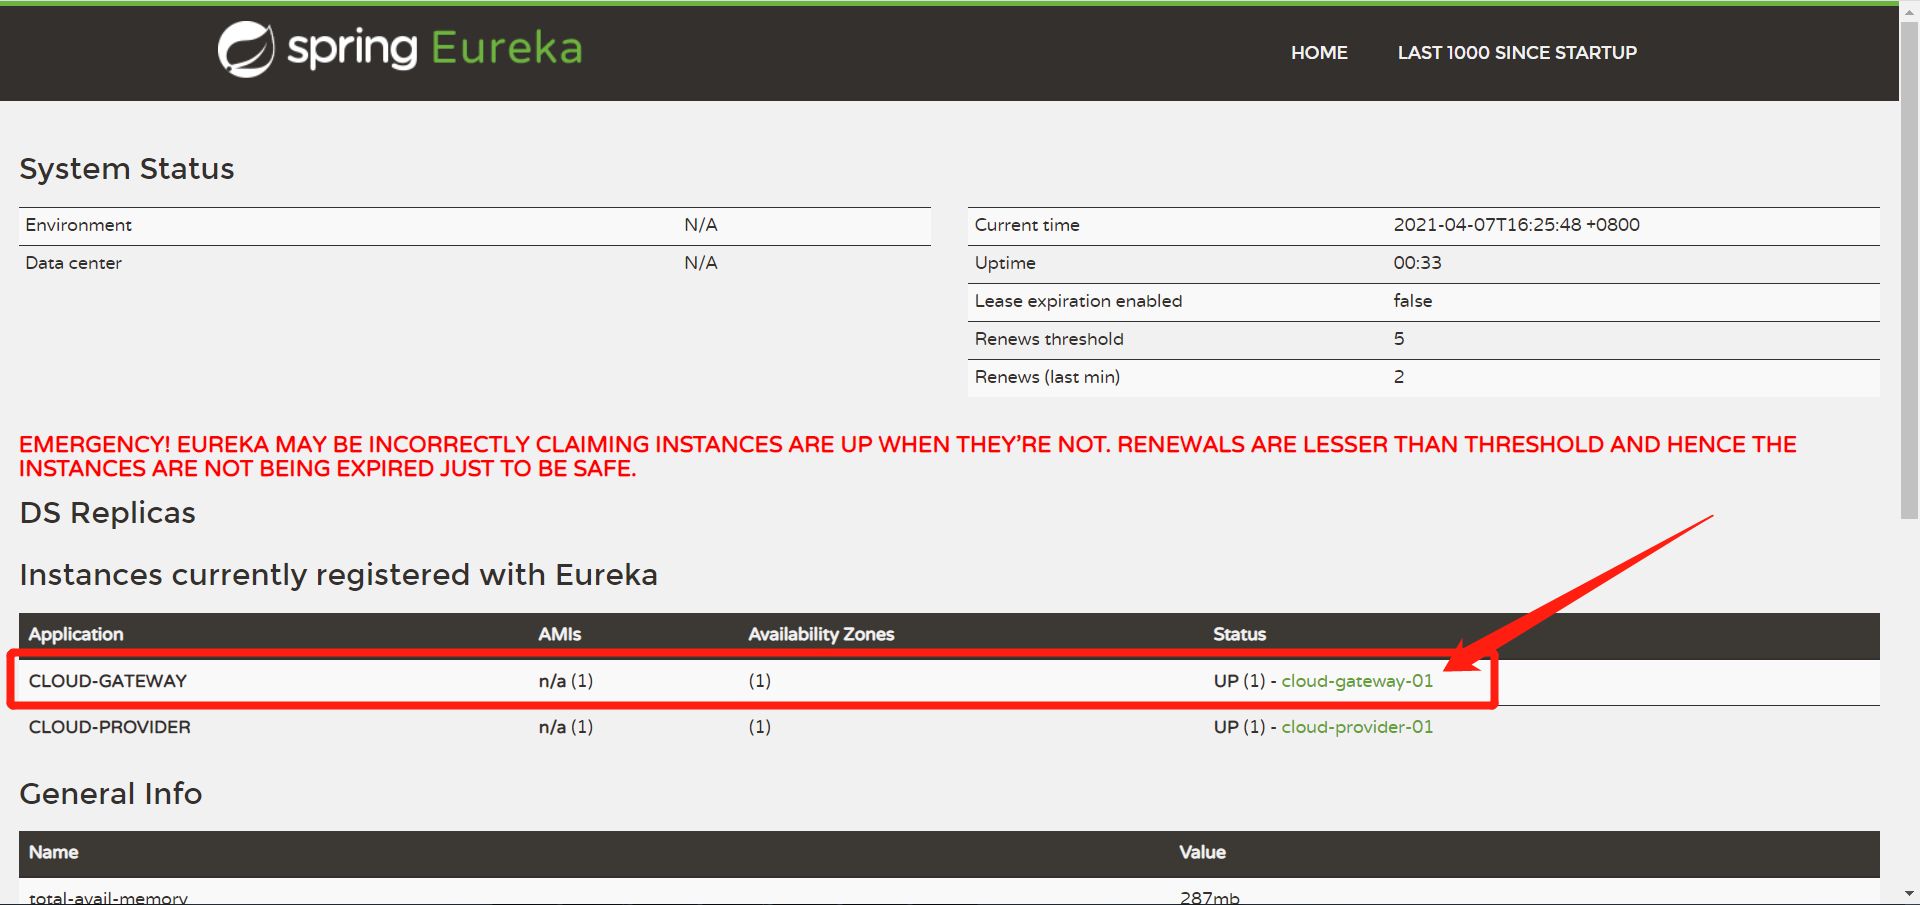
并且打开eureka页面 http://localhost:9001/ 可以看到服务已经注册进去,说明服务注册没问题。
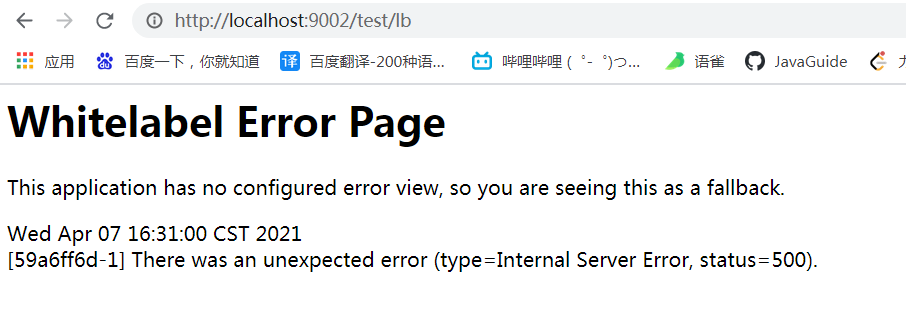
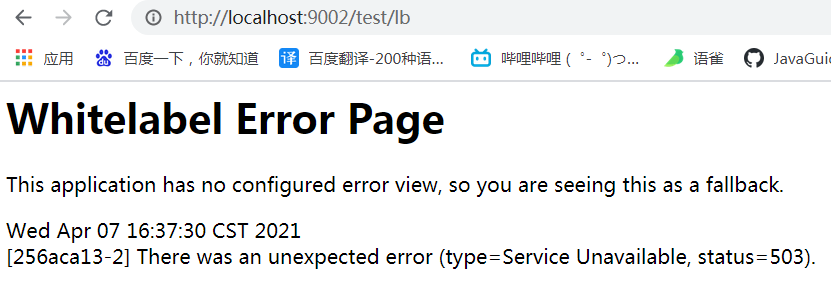
根据配置访问 http://localhost:9002/test/lb 如果出现正常返回页面,则说明网关配置成功。
但此时应该是访问失败的,会出现如下页面,并伴随控制台的如下报错:
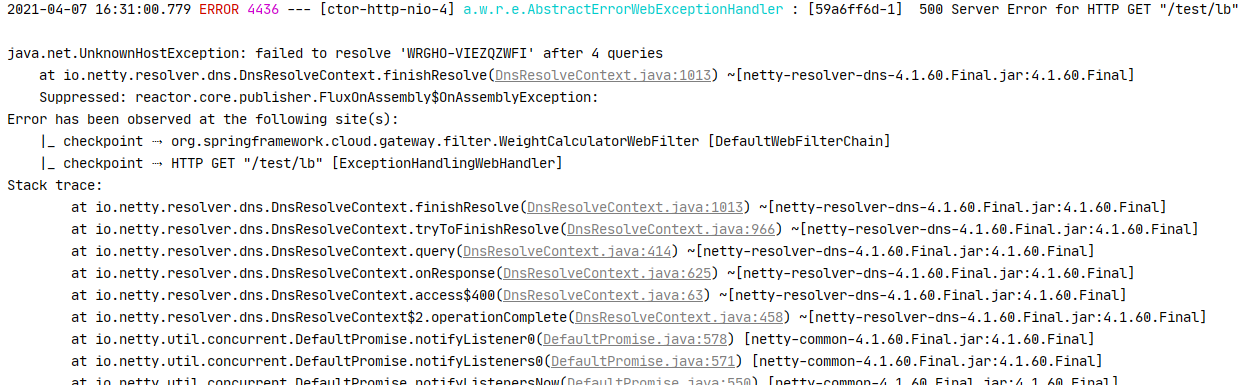
看,报错内容找我们的主机名了,java.net.UnknownHostException: failed to resolve 'WRGHO-VIEZQZWFI' after 4 queries 中的 ‘WRGHO-VIEZQZWFI' 就是我的主机名
不要着急,这时候我们往目标服务(也就是provider服务)中添加这样一条配置就ok了:
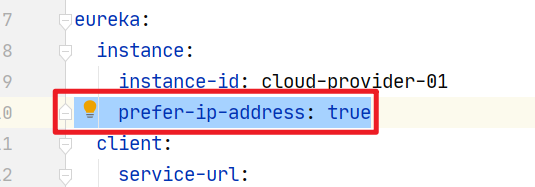
此配置项表示:表示在猜测主机名时,应优先使用服务器的IP地址,而不要使用OS报告的主机名
然后重启provider服务,重新访问,如果访问的时候报错503,看gateway控制台内容提示
No servers available for service: cloud-provider,说明服务虽然重启了但是还么有注册到服务中心里,我们等一小会等待注册进去再尝试就ok了。
错误页面和控制台提示内容:

至此我们应该对gateway的使用方法有个大体的了解和印象了,然后让我们继续学习相关知识。
断言(Predicate)
开发人员可以匹配HTTP请求中的所有内容(例如请求头或请求参数),如果请求与断言相匹配则进行路由。
也就是我们进行路由跳转的条件。
https://docs.spring.io/spring-cloud-gateway/docs/3.0.2/reference/html/#gateway-request-predicates-factories
在之前我们的配置中使用了如下图 Path 这样一种断言。
但是实际上我们还有好多种断言,我们可以通过官方文档查询到,可以看我下面的连接,但是最好自己去官网找到自己响应版本的文档看(鬼知道以后版本会不会出新的断言),并且官方文档有响应的例子以及解释。
https://docs.spring.io/spring-cloud-gateway/docs/3.0.2/reference/html/#gateway-request-predicates-factories
在我们的gateway服务启动时候,控制台业务打印出来我们断言的方式。
左图官方文档,右图启动控制台信息。

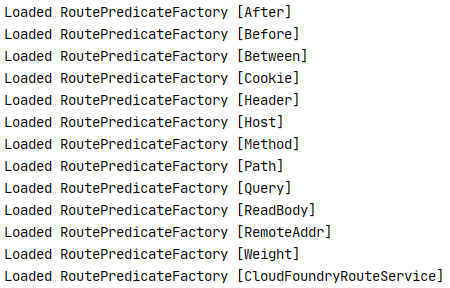
Spring Cloud Gateway将路由匹配作为Spring WebFlux HandlerMapping基础架构的一部分。 Spring Cloud Gateway包括许多内置的路由断言工厂。所有这些谓词都与HTTP请求的不同属性匹配。您可以将多个路由断言工厂与逻辑和语句结合使用。
断言种类:
After
该断言匹配在指定日期时间之后发生的请求。
- After=2017-01-20T17:42:47.789-07:00[America/Denver]
Before
该断言匹配在指定日期时间之前发生的请求。
- Before=2017-01-20T17:42:47.789-07:00[America/Denver]
Between 该断言匹配在两个指定日期时间之间发生的请求。
- Between=2017-01-20T17:42:47.789-07:00[America/Denver], 2017-01-21T17:42:47.789-07:00[America/Denver]
Cookie
该断言采用两个参数,即cookie名称和一个regexp(这是Java正则表达式)。该断言匹配具有给定名称且其值与正则表达式匹配的cookie。
- Cookie=chocolate, ch.p
Header
该断言采用两个参数,header名称和一个regexp(这是Java正则表达式)。该断言与具有给定名称的header匹配,该header的值与正则表达式匹配。
- Header=X-Request-Id, \d+
Host
该断言采用一个参数:主机名模式列表。该模式是带有的Ant样式的模式。作为分隔符。
该断言匹配与模式匹配的Host标头。
- Host=**.somehost.org,**.anotherhost.org
Method
该断言采用方法参数,该参数是一个或多个参数:要匹配的HTTP方法。
- Method=GET,POST
Path
该断言采用两个参数:Spring PathMatcher模式列表和一个称为matchTrailingSlash的可选标志(默认为true)。
- Path=/red/{segment},/blue/{segment}
Query
该断言采用两个参数:必需的参数和可选的regexp(这是Java正则表达式)。如果请求包含匹配配置的查询参数,则路由匹配。
- Query=green
RemoteAddr
该断言采用sources列表(最小大小为1),这些源是CIDR标记(IPv4或IPv6)字符串,例如192.168.0.1/16(其中192.168.0.1是IP地址,而16是子网掩码) )。
- RemoteAddr=192.168.1.1/24
ReadBody
文档中没写这个,但是启动的时候控制台显示了,RoutePredicateFactory的实现类ReadBodyRoutePredicateFactory写了一点注释。断言可读取主体并应用用户提供的断言在主体上运行。
主体被缓存在内存中,因此后续对断言的调用无需再次反序列化。
Weight
文档中没写这个,但是启动的时候控制台显示了,RoutePredicateFactory的实现类WeightRoutePredicateFactory也没写啥注释
过滤器(Filter)
GatewayFilter允许以某种方式修改传入的HTTP请求或传出的HTTP响应。路由过滤器的作用域是特定的路由。 Spring Cloud Gateway包括许多内置的GatewayFilter工厂。
GlobalFilter接口具有与GatewayFilter相同的签名。这些是特殊过滤器,有条件地应用于所有路由。
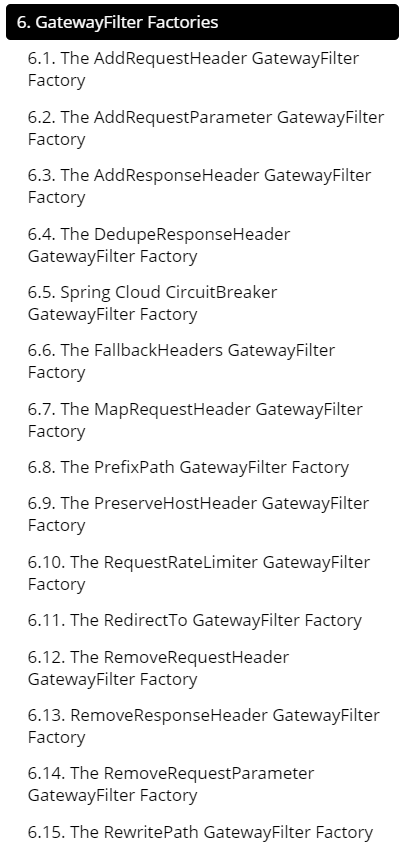
https://docs.spring.io/spring-cloud-gateway/docs/3.0.2/reference/html/#gatewayfilter-factories
在我看的这个文档中,有两种Filter(GatewayFilter和GlobalFilter)
GatewayFilter官网给出了这么31个过滤器工厂(工厂就是产生对象的,也就是相当于31个过滤器),
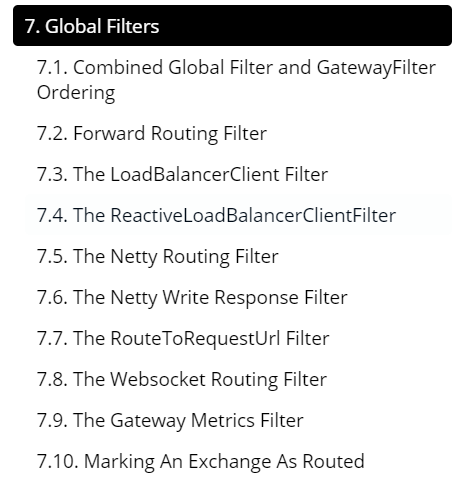
GlobalFilter官网给出了这么10个过滤器工厂(工厂就是产生对象的,也就是相当于31个过滤器):

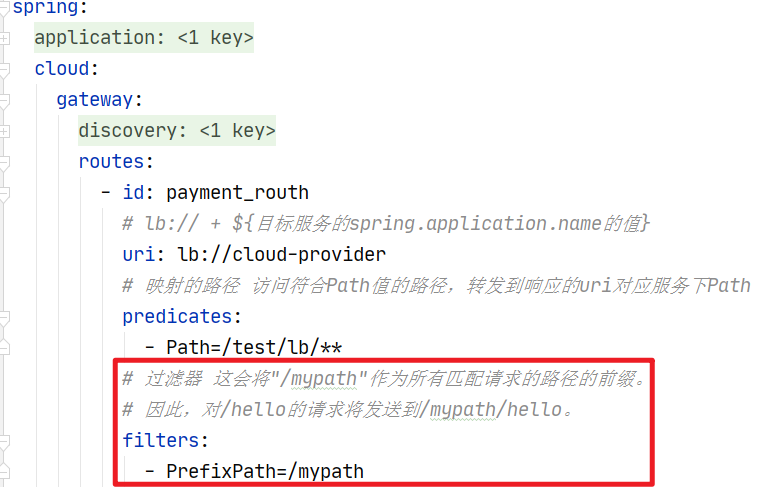
怎么用呢?
就像是断言(Predicate)一样,在spring.cloud.gateway.routes下面添加就好了,和id、uri同级。
例如:
自定义过滤器
我们自定义过滤器需要实现 GlobalFilter,Ordered 这两个接口。
implements GlobalFilter,Ordered
能干嘛?
- 全局日志记录
- 统一网关鉴权
- ……
我们的自定义过滤器代码
MyLogGatewayFilter.java org.example.springcloud.gateway.filter.MyLogGatewayFilter
package org.example.springcloud.gateway.filter;

import org.springframework.cloud.gateway.filter.GatewayFilterChain;
import org.springframework.cloud.gateway.filter.GlobalFilter;
import org.springframework.core.Ordered;
import org.springframework.http.server.reactive.ServerHttpRequest;
import org.springframework.http.server.reactive.ServerHttpResponse;
import org.springframework.stereotype.Component;
import org.springframework.web.server.ServerWebExchange;
import reactor.core.publisher.Mono;

@Component
public class MyLogGatewayFilter implements GlobalFilter, Ordered {
    @Override
    public Mono<Void> filter(ServerWebExchange exchange, GatewayFilterChain chain) {
        // 不用log.info了,为了省点事,别较真
        System.out.println("进入到了我们的自定义日志过滤器");
        // request、response啥的都能拿到,要干啥自己看着办吧,获取在下两行,
        // 你是要判断参数啊还是判断token啊还是咋地那你自己定义去吧。
        // ServerHttpRequest request = exchange.getRequest();
        // ServerHttpResponse response = exchange.getResponse();

        // 返回chain.filter(exchange); 表示此过滤器通过,将请求继续传递下去
        // 交由下面的过滤器继续处理
        // 如果是 return null; 则表示被过滤掉了,没通过。
        return chain.filter(exchange);
    }

    @Override
    public int getOrder() {
        // 加载过滤器的顺序,数值越小优先级越高。
        // Integer.MIN_VALUE 到 Integer.MAX_VALUE
        return 0;
    }
}
写好了自定义过滤器就ok了,不需要进行什么配置,直接@Component加入容器中就可以了。
比如我们在访问之前的 http://localhost:9002/test/lb ,控制台就会打印我们在过滤器中打印的内容,说明进入到了过滤器中。
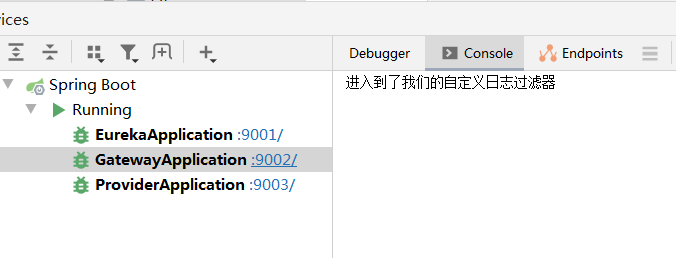
过滤器很强大,怎么用看个人、看需求,根据自己要实现的内容去定制化实现吧。
对应代码文件
http://xiazai.jb51.net/202104/yuanma/springcloudgateway_jb51.rar
到此这篇关于SpringCloud Gateway 2020.0.2最新版的文章就介绍到这了,更多相关SpringCloud Gateway内容请搜索猪先飞以前的文章或继续浏览下面的相关文章希望大家以后多多支持猪先飞!
相关文章
基于springcloud异步线程池、高并发请求feign的解决方案
这篇文章主要介绍了基于springcloud异步线程池、高并发请求feign的解决方案,具有很好的参考价值,希望对大家有所帮助。一起跟随小编过来看看吧...2021-02-25完美解决SpringCloud-OpenFeign使用okhttp替换不生效问题
这篇文章主要介绍了完美解决SpringCloud-OpenFeign使用okhttp替换不生效问题,具有很好的参考价值,希望对大家有所帮助。一起跟随小编过来看看吧...2021-02-25- 这篇文章主要介绍了详解SpringCloudGateway内存泄漏问题,文中通过示例代码介绍的非常详细,对大家的学习或者工作具有一定的参考学习价值,需要的朋友们下面随着小编来一起学习学习吧...2020-07-16
如何解决springcloud feign 首次调用100%失败的问题
这篇文章主要介绍了如何解决springcloud feign 首次调用100%失败的问题,具有很好的参考价值,希望对大家有所帮助。如有错误或未考虑完全的地方,望不吝赐教...2021-06-23解决php导致nginx报502 bad gateway错误问题
502 bad gateway这个问题很多朋友一看就以为是nginx或apache的问题,其实不然了,除了它们两会出现这个问题之外还有像php模块也会导致此问题的出现了,下面一起来看看吧....2016-11-25- 这篇文章主要介绍了spring cloud gateway中如何读取请求参数的操作,具有很好的参考价值,希望对大家有所帮助。如有错误或未考虑完全的地方,望不吝赐教...2021-07-15
- 502 bad gateway是php-fpm的问题对于这个问题就是配置参数的问题了,下面我们整理了一些关于php-fpm错误问题的解决办法,具体如下。 今天升级完PHP出现了502 Bad Gat...2016-11-25
解决SpringCloud Feign传对象参数调用失败的问题
这篇文章主要介绍了解决SpringCloud Feign传对象参数调用失败的问题,具有很好的参考价值,希望对大家有所帮助。如有错误或未考虑完全的地方,望不吝赐教...2021-06-24SpringCloud2020整合Nacos-Bootstrap配置不生效的解决
这篇文章主要介绍了SpringCloud2020整合Nacos-Bootstrap配置不生效的解决,文中通过示例代码介绍的非常详细,对大家的学习或者工作具有一定的参考学习价值,需要的朋友们下面随着小编来一起学习学习吧...2021-01-25- 这篇文章主要介绍了spring cloud gateway转发服务报错的解决,具有很好的参考价值,希望对大家有所帮助。如有错误或未考虑完全的地方,望不吝赐教...2021-09-02
- 这篇文章主要介绍了解决springcloud-gateway限流遇到的问题,具有很好的参考价值,希望对大家有所帮助。如有错误或未考虑完全的地方,望不吝赐教...2021-07-16
SpringCloud @FeignClient参数的用法解析
这篇文章主要介绍了SpringCloud @FeignClient参数的用法,具有很好的参考价值,希望对大家有所帮助。如有错误或未考虑完全的地方,望不吝赐教...2021-10-21- 这篇文章主要介绍了使用SpringCloudAlibaba整合Dubbo,具有很好的参考价值,希望对大家有所帮助。如有错误或未考虑完全的地方,望不吝赐教...2021-10-11
gateway与spring-boot-starter-web冲突问题的解决
这篇文章主要介绍了gateway与spring-boot-starter-web冲突问题的解决,具有很好的参考价值,希望对大家有所帮助。如有错误或未考虑完全的地方,望不吝赐教...2021-07-17SpringCloud之@FeignClient()注解的使用方式
这篇文章主要介绍了SpringCloud之@FeignClient()注解的使用方式,具有很好的参考价值,希望对大家有所帮助。如有错误或未考虑完全的地方,望不吝赐教...2021-09-25Spring Cloud中使用Feign,@RequestBody无法继承的解决方案
这篇文章主要介绍了Spring Cloud中使用Feign,@RequestBody无法继承的解决方案,具有很好的参考价值,希望对大家有所帮助。如有错误或未考虑完全的地方,望不吝赐教...2021-10-22Spring Cloud Gateway 内存溢出的解决方案
这篇文章主要介绍了Spring Cloud Gateway 内存溢出的解决方案,具有很好的参考价值,希望对大家有所帮助。如有错误或未考虑完全的地方,望不吝赐教...2021-07-16解决SpringCloud Config结合github无法读取配置的问题
这篇文章主要介绍了解决SpringCloud Config结合github无法读取配置的问题,具有很好的参考价值,希望对大家有所帮助。一起跟随小编过来看看吧...2021-02-25一篇文章教你如何在SpringCloud项目中使用OpenFeign
这篇文章主要介绍了SpringCloud 使用Open feign 优化详解,具有很好的参考价值,希望对大家有所帮助。一起跟随小编过来看看吧...2021-08-16- 这篇文章主要介绍了Springcloud实现服务多版本控制的示例代码,文中通过示例代码介绍的非常详细,对大家的学习或者工作具有一定的参考学习价值,需要的朋友们下面随着小编来一起学习学习吧...2020-05-15