Android极光推送的例子
一、集成SDK(这里推荐自动集成)
1.确认android studio的 Project 根目录的主 gradle 中配置了jcenter支持。(一般默认支持)
buildscript {
repositories {
jcenter()
}
...
}
allprojects {
repositories {
jcenter()
}
}
2.在 module 的 gradle 中添加依赖和AndroidManifest的替换变量
android {
...
defaultConfig {
applicationId "xx.xxx.xxxx"<code>//JPush上注册的包名
...
ndk {
//选择要添加的对应cpu类型的.so库。
abiFilters 'armeabi', 'armeabi-v7a', 'armeabi-v8a','x86', 'x86_64', 'mips', 'mips64'
}
manifestPlaceholders = [
JPUSH_PKGNAME : applicationId,
JPUSH_APPKEY : "你的appkey", //JPush上注册的包名对应的appkey.
JPUSH_CHANNEL : "developer-default", //暂时填写默认值即可.
]
...
}
...
}
dependencies {
compile 'cn.jiguang:jpush:2.2.0'
...
}
二、在AndroidManifest中配置权限
<!-- Required 一些系统要求的权限,如访问网络等-->
<uses-permission android:name="您应用的包名.permission.JPUSH_MESSAGE" />
<uses-permission android:name="android.permission.RECEIVE_USER_PRESENT" />
<uses-permission android:name="android.permission.INTERNET" />
<uses-permission android:name="android.permission.WAKE_LOCK" />
<uses-permission android:name="android.permission.READ_PHONE_STATE" />
<uses-permission android:name="android.permission.WRITE_EXTERNAL_STORAGE" />
<uses-permission android:name="android.permission.READ_EXTERNAL_STORAGE" />
<uses-permission android:name="android.permission.WRITE_SETTINGS" />
<uses-permission android:name="android.permission.VIBRATE" />
<uses-permission android:name="android.permission.MOUNT_UNMOUNT_FILESYSTEMS" />
<uses-permission android:name="android.permission.ACCESS_NETWORK_STATE" />
三、代码
新建一个Application,并添加一下代码
@Override
public void onCreate() {
super.onCreate();
JPushInterface.setDebugMode(true); // 设置开启日志,发布时请关闭日志
JPushInterface.init(this); // 初始化 JPush
}
说明:
1.init 只需要在应用程序启动时调用一次该 API 即可
2.以上 Application 类。需要在 AndoridManifest.xml 里配置
到此,极光推送的基本功能已经完成,推送通知后应用程序会接收到通知,通知默认图标为应用程序图标,点击通知会打开程序首页。
但是,当你的应用程序是打开状态时,点击通知后会重新运行一次程序并打开首页,显然这不是我们想要的,我们还需要配置接受到通知之后的响应动作。
四、自定义一个接收器
/**
* 自定义接收器
*
* 如果不定义这个 Receiver,则:
* 1) 默认用户会打开主界面
* 2) 接收不到自定义消息
*/
public class MyReceiver extends BroadcastReceiver {
private static final String TAG = "JPush";
@Override
public void onReceive(Context context, Intent intent) {
Bundle bundle = intent.getExtras();//接收到的消息
if (JPushInterface.ACTION_REGISTRATION_ID.equals(intent.getAction())) {
String regId = bundle.getString(JPushInterface.EXTRA_REGISTRATION_ID);
Log.d(TAG, "[MyReceiver] 接收Registration Id : " + regId);
//send the Registration Id to your server...
} else if (JPushInterface.ACTION_MESSAGE_RECEIVED.equals(intent.getAction())) {
Log.d(TAG, "[MyReceiver] 接收到推送下来的自定义消息: " + bundle.getString(JPushInterface.EXTRA_MESSAGE));
} else if (JPushInterface.ACTION_NOTIFICATION_RECEIVED.equals(intent.getAction())) {
Log.d(TAG, "[MyReceiver] 接收到推送下来的通知");
int notifactionId = bundle.getInt(JPushInterface.EXTRA_NOTIFICATION_ID);
Log.d(TAG, "[MyReceiver] 接收到推送下来的通知的ID: " + notifactionId);
} else if (JPushInterface.ACTION_NOTIFICATION_OPENED.equals(intent.getAction())) {
Log.d(TAG, "[MyReceiver] 用户点击打开了通知");
//打开自定义的Activity
Intent i = new Intent(context, TestActivity.class);
i.putExtras(bundle);
//i.setFlags(Intent.FLAG_ACTIVITY_NEW_TASK);
i.setFlags(Intent.FLAG_ACTIVITY_NEW_TASK | Intent.FLAG_ACTIVITY_CLEAR_TOP );
context.startActivity(i);
} else if (JPushInterface.ACTION_RICHPUSH_CALLBACK.equals(intent.getAction())) {
Log.d(TAG, "[MyReceiver] 用户收到到RICH PUSH CALLBACK: " + bundle.getString(JPushInterface.EXTRA_EXTRA));
//在这里根据 JPushInterface.EXTRA_EXTRA 的内容处理代码,比如打开新的Activity, 打开一个网页等..
} else if(JPushInterface.ACTION_CONNECTION_CHANGE.equals(intent.getAction())) {
boolean connected = intent.getBooleanExtra(JPushInterface.EXTRA_CONNECTION_CHANGE, false);
Log.w(TAG, "[MyReceiver]" + intent.getAction() +" connected state change to "+connected);
} else {
Log.d(TAG, "[MyReceiver] Unhandled intent - " + intent.getAction());
}
}
}
并在 AndoridManifest.xml 中配置
</pre>
<pre><!-- Required SDK核心功能-->
<receiver
android:name="cn.jpush.android.service.PushReceiver"
android:enabled="true"
android:exported="false">
<intent-filter android:priority="1000">
<action android:name="cn.jpush.android.intent.NOTIFICATION_RECEIVED_PROXY" /> <!--Required 显示通知栏 -->
<!--应用包名-->
<category android:name="xx.xxx.xxxx" />
</intent-filter>
<intent-filter>
<action android:name="android.intent.action.USER_PRESENT" />
<action android:name="android.net.conn.CONNECTIVITY_CHANGE" />
</intent-filter>
<!-- Optional -->
<intent-filter>
<action android:name="android.intent.action.PACKAGE_ADDED" />
<action android:name="android.intent.action.PACKAGE_REMOVED" />
<data android:scheme="package" />
</intent-filter>
</receiver>
<!-- Required SDK核心功能-->
<receiver android:name="cn.jpush.android.service.AlarmReceiver" android:exported="false"/>
<!-- User defined. For test only 用户自定义的广播接收器-->
<receiver
android:name=".MyReceiver"
android:enabled="true"
android:exported="true">
<intent-filter>
<action android:name="cn.jpush.android.intent.REGISTRATION" /> <!--Required 用户注册SDK的intent-->
<action android:name="cn.jpush.android.intent.MESSAGE_RECEIVED" /> <!--Required 用户接收SDK消息的intent-->
<action android:name="cn.jpush.android.intent.NOTIFICATION_RECEIVED" /> <!--Required 用户接收SDK通知栏信息的intent-->
<action android:name="cn.jpush.android.intent.NOTIFICATION_OPENED" /> <!--Required 用户打开自定义通知栏的intent-->
<action android:name="cn.jpush.android.intent.ACTION_RICHPUSH_CALLBACK" /> <!--Optional 用户接受Rich Push Javascript 回调函数的intent-->
<action android:name="cn.jpush.android.intent.CONNECTION" /><!-- 接收网络变化 连接/断开 since 1.6.3 -->
<category android:name="cn.zmit.yanmai" />
</intent-filter>
</receiver></pre>
<pre>
关于ListView移动到指定位置有两种方法
listview.setSelection(position);
listview.smoothScrollToPosition(position);
第一种方法没有滚动效果,直接跳到指定位置,第二种方法是有滚动效果的。
但是,在是用的时候,你会发现第二种方法没有效果,甚至都没有移动,其实这个问题很好解决,只要在新线程里是用就可以了
listview.post(new Runnable() {
@Override
public void run() {
listview.smoothScrollToPosition(position);
}
});
代码如下.
private void saveImage(ImageView imageView){
imageView.setDrawingCacheEnabled(true);//开启catch,开启之后才能获取ImageView中的bitmap
Bitmap bitmap = imageView.getDrawingCache();//获取imageview中的图像
MediaStore.Images.Media.insertImage(getContentResolver(), bitmap, "这是title", "这是description");
Toast.makeText(context, "保存成功", Toast.LENGTH_SHORT).show();
imageView.setDrawingCacheEnabled(false);//关闭catch
}
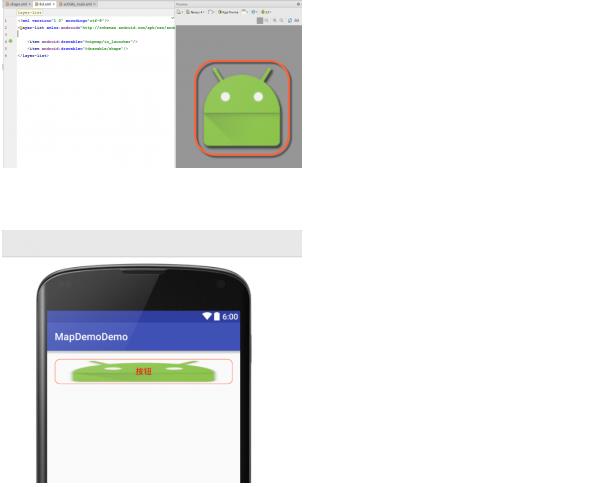
之前在做按钮的时候遇到在给按钮设置一张图片作为背景的同时还要自己定义圆角,最简单的做法就是直接切张圆角图作为按钮就可以了,但是如果不这样该怎么办呢,看代码:
先建一个圆角的shape文件:
<?xml version="1.0" encoding="utf-8"?>
<shape xmlns:android="http://schemas.android.com/apk/res/android">
<corners
android:radius="10dp"/>
<stroke
android:width="1dp"
android:color="#FF6238" />
</shape>
建立list文件:
<?xml version="1.0" encoding="utf-8"?>
<layer-list xmlns:android="http://schemas.android.com/apk/res/android">
<item android:drawable="@mipmap/ic_launcher"/>
<item android:drawable="@drawable/shape"/>
</layer-list>
直接引用:
<TextView
android:gravity="center"
android:background="@drawable/list"
android:layout_width="match_parent"
android:layout_height="50dp"
android:textSize="16sp"
android:textColor="#FF0000"
android:text="按钮" />
<?xml:namespace prefix="fck">


首先是MainActivity的代码:
package com.wyw.facedemo;
import android.content.Context;
import android.os.Bundle;
import android.support.v7.app.AppCompatActivity;
import android.util.Log;
import android.view.View;
import android.view.WindowManager;
import android.widget.Button;
import android.widget.RelativeLayout;
import org.opencv.android.CameraBridgeViewBase;
import org.opencv.android.JavaCameraView;
import org.opencv.android.OpenCVLoader;
import org.opencv.core.Core;
import org.opencv.core.CvType;
import org.opencv.core.Mat;
import org.opencv.core.MatOfRect;
import org.opencv.core.Rect;
import org.opencv.core.Scalar;
import org.opencv.core.Size;
import org.opencv.objdetect.CascadeClassifier;
import java.io.File;
import java.io.FileOutputStream;
import java.io.InputStream;
public class MainActivity extends AppCompatActivity
implements CameraBridgeViewBase.CvCameraViewListener {
private CameraBridgeViewBase openCvCameraView;
private CascadeClassifier cascadeClassifier;
//图像人脸小于高度的多少就不检测
private int absoluteFaceSize;
//临时图像对象
private Mat matLin;
//最终图像对象
private Mat mat;
//前置摄像头
public static int CAMERA_FRONT = 0;
//后置摄像头
public static int CAMERA_BACK = 1;
private int camera_scene = CAMERA_BACK;
private void initializeOpenCVDependencies() {
try {
// Copy the resource into a temp file so OpenCV can load it
InputStream is = getResources().openRawResource(R.raw.lbpcascade_frontalface);
File cascadeDir = getDir("cascade", Context.MODE_PRIVATE);
File mCascadeFile = new File(cascadeDir, "lbpcascade_frontalface.xml");
FileOutputStream os = new FileOutputStream(mCascadeFile);
byte[] buffer = new byte[4096];
int bytesRead;
while ((bytesRead = is.read(buffer)) != -1) {
os.write(buffer, 0, bytesRead);
}
is.close();
os.close();
// Load the cascade classifier
cascadeClassifier = new CascadeClassifier(mCascadeFile.getAbsolutePath());
} catch (Exception e) {
Log.e("OpenCVActivity", "Error loading cascade", e);
}
// And we are ready to go
openCvCameraView.enableView();
}
@Override
public void onCreate(Bundle savedInstanceState) {
super.onCreate(savedInstanceState);
getWindow().addFlags(WindowManager.LayoutParams.FLAG_KEEP_SCREEN_ON);
setContentView(R.layout.activity_main);
final RelativeLayout relativeLayout = (RelativeLayout) findViewById(R.id.relative);
openCvCameraView = new JavaCameraView(this, CameraBridgeViewBase.CAMERA_ID_FRONT);
openCvCameraView.setCvCameraViewListener(this);
final Button button = new Button(MainActivity.this);
button.setText("切换摄像头");
button.setOnClickListener(new View.OnClickListener() {
@Override
public void onClick(View v) {
if (camera_scene == CAMERA_FRONT) {//如果是前置摄像头就切换成后置
relativeLayout.removeAllViews();
openCvCameraView.disableView();
openCvCameraView = null;
cascadeClassifier = null;
openCvCameraView = new JavaCameraView(MainActivity.this, CameraBridgeViewBase.CAMERA_ID_BACK);
openCvCameraView.setCvCameraViewListener(MainActivity.this);
openCvCameraView.setCameraIndex(CameraBridgeViewBase.CAMERA_ID_BACK);//后置摄像头
camera_scene = CAMERA_BACK;
relativeLayout.addView(openCvCameraView);
relativeLayout.addView(button);
initializeOpenCVDependencies();
} else {
relativeLayout.removeAllViews();
openCvCameraView.disableView();
openCvCameraView = null;
cascadeClassifier = null;
openCvCameraView = new JavaCameraView(MainActivity.this, CameraBridgeViewBase.CAMERA_ID_FRONT);
openCvCameraView.setCvCameraViewListener(MainActivity.this);
openCvCameraView.setCameraIndex(CameraBridgeViewBase.CAMERA_ID_FRONT);//前置摄像头
camera_scene = CAMERA_FRONT;
relativeLayout.addView(openCvCameraView);
relativeLayout.addView(button);
initializeOpenCVDependencies();
}
}
});
relativeLayout.addView(openCvCameraView);
relativeLayout.addView(button);
if (camera_scene == CAMERA_FRONT) {
openCvCameraView.setCameraIndex(CameraBridgeViewBase.CAMERA_ID_FRONT);//前置摄像头
} else if (camera_scene == CAMERA_BACK) {
openCvCameraView.setCameraIndex(CameraBridgeViewBase.CAMERA_ID_BACK);//后置摄像头
}
}
@Override
public void onCameraViewStarted(int width, int height) {
matLin = new Mat(height, width, CvType.CV_8UC4);//临时图像
// 人脸小于高度的百分之30就不检测
absoluteFaceSize = (int) (height * 0.3);
}
@Override
public void onCameraViewStopped() {
}
@Override
public Mat onCameraFrame(Mat aInputFrame) {
//转置函数,将图像翻转(顺时针90度)
Core.transpose(aInputFrame, matLin);
if (camera_scene == CAMERA_FRONT) {//前置摄像头
//转置函数,将图像翻转(对换)
Core.flip(matLin, aInputFrame, 1);
//转置函数,将图像顺时针顺转(对换)
Core.flip(aInputFrame, matLin, 0);
mat = matLin;
} else if (camera_scene == CAMERA_BACK) {//后置摄像头
//转置函数,将图像翻转(对换)
Core.flip(matLin, aInputFrame, 1);
mat = aInputFrame;
}
MatOfRect faces = new MatOfRect();
Log.i("123456", "absoluteFaceSize = " + absoluteFaceSize);
// Use the classifier to detect faces
if (cascadeClassifier != null) {
cascadeClassifier.detectMultiScale(mat, faces, 1.1, 1, 1,
new Size(absoluteFaceSize, absoluteFaceSize), new Size());
}
// 检测出多少个
Rect[] facesArray = faces.toArray();
for (int i = 0; i < facesArray.length; i++) {
Log.i("123456", "facesArray[i].tl()坐上坐标 == " + facesArray[i].tl() + " facesArray[i].br() == 右下坐标" + facesArray[i].br());
Core.rectangle(mat, facesArray[i].tl(), facesArray[i].br(), new Scalar(0, 255, 0, 255), 3);
}
return mat;
}
@Override
public void onResume() {
super.onResume();
if (!OpenCVLoader.initDebug()) {
Log.e("log_wons", "OpenCV init error");
// Handle initialization error
}
initializeOpenCVDependencies();
//OpenCVLoader.initAsync(OpenCVLoader.OPENCV_VERSION_2_4_6, this, mLoaderCallback);
}
}
然后是layout的xml代码:
<?xml version="1.0" encoding="utf-8">
< RelativeLayout
xmlns:android="http://schemas.android.com/apk/res/android"
android:id="@+id/relative"
android:layout_width="match_parent"
android:layout_height="match_parent">
现在是raw文件夹里面的xml(这个xml是图片解析出来进行对比校验人脸的模型库)由于这个文件有一千多行就不贴了,如有需要请去下载本demo查看!当然也可以去你下载的openCV的sdk里面拿,目录是\samples\face-detection\res\raw。请看图:
这里写图片描述
最后就是AndroidManifest文件了:
<?xml version="1.0" encoding="utf-8">
< manifest package="com.wyw.facedemo"
xmlns:android="http://schemas.android.com/apk/res/android">
<application
android:allowBackup="true"
android:icon="@mipmap/ic_launcher"
android:label="@string/app_name"
android:supportsRtl="true"
android:theme="@style/AppTheme">
相关文章
- 下面我们来看一篇关于Android子控件超出父控件的范围显示出来方法,希望这篇文章能够帮助到各位朋友,有碰到此问题的朋友可以进来看看哦。 <RelativeLayout xmlns:an...2016-10-02
- 安装curl扩展支持https是非常的重要现在许多的网站都使用了https了,下面我们来看一篇关于PHP安装curl扩展支持https例子吧。 问题: 线上运行的lamp服务器,默认yu...2016-11-25
解决idea2020.1 用gitee push推送被拒绝的原因(亲测有效)
这篇文章主要介绍了解决idea2020.1 用gitee push推送被拒绝的原因(亲测有效),本文给大家分享解决方案,对大家的学习或工作具有一定的参考借鉴价值,需要的朋友可以参考下...2020-08-27Android开发中findViewById()函数用法与简化
findViewById方法在android开发中是获取页面控件的值了,有没有发现我们一个页面控件多了会反复研究写findViewById呢,下面我们一起来看它的简化方法。 Android中Fin...2016-09-20- 如果我们的项目需要做来电及短信的功能,那么我们就得在Android模拟器开发这些功能,本来就来告诉我们如何在Android模拟器上模拟来电及来短信的功能。 在Android模拟...2016-09-20
- 夜神android模拟器如何设置代理呢?对于这个问题其实操作起来是非常的简单,下面小编来为各位详细介绍夜神android模拟器设置代理的方法,希望例子能够帮助到各位。 app...2016-09-20
- 为了增强android应用的用户体验,我们可以在一些Button按钮上自定义动态的设置一些样式,比如交互时改变字体、颜色、背景图等。 今天来看一个通过重写Button来动态实...2016-09-20
- 如果我们要在Android应用APP中加载html5页面,我们可以使用WebView,本文我们分享两个WebView加载html5页面实例应用。 实例一:WebView加载html5实现炫酷引导页面大多...2016-09-20
- 深入理解Android中View和ViewGroup从组成架构上看,似乎ViewGroup在View之上,View需要继承ViewGroup,但实际上不是这样的。View是基类,ViewGroup是它的子类。本教程我们深...2016-09-20
- 下面我们来看一篇关于Android自定义WebView网络视频播放控件开发例子,这个文章写得非常的不错下面给各位共享一下吧。 因为业务需要,以下代码均以Youtube网站在线视...2016-10-02
- java开发的Android应用,性能一直是一个大问题,,或许是Java语言本身比较消耗内存。本文我们来谈谈Android 性能优化之MemoryFile文件读写。 Android匿名共享内存对外A...2016-09-20
- TextView默认是横着显示了,今天我们一起来看看Android设置TextView竖着显示如何来实现吧,今天我们就一起来看看操作细节,具体的如下所示。 在开发Android程序的时候,...2016-10-02
android.os.BinderProxy cannot be cast to com解决办法
本文章来给大家介绍关于android.os.BinderProxy cannot be cast to com解决办法,希望此文章对各位有帮助呀。 Android在绑定服务的时候出现java.lang.ClassCastExc...2016-09-20- 这篇文章主要介绍了Android 实现钉钉自动打卡功能的步骤,帮助大家更好的理解和学习使用Android,感兴趣的朋友可以了解下...2021-03-15
- 下面我们来看一篇关于Android 开发之布局细节对比:RTL模式 ,希望这篇文章对各位同学会带来帮助,具体的细节如下介绍。 前言 讲真,好久没写博客了,2016都过了一半了,赶紧...2016-10-02
- 首先如果要在程序中使用sdcard进行存储,我们必须要在AndroidManifset.xml文件进行下面的权限设置: 在AndroidManifest.xml中加入访问SDCard的权限如下: <!--...2016-09-20
- floor会产生小数了如果我们不希望有小数我们是可以去除小数点的了,下面一聚教程小编来为各位介绍php使用floor去掉小数点的例子,希望对各位有帮助。 float floor (...2016-11-25
- 下面来给各位简单的介绍一下关于Android开发之PhoneGap打包及错误解决办法,希望碰到此类问题的同学可进入参考一下哦。 在我安装、配置好PhoneGap项目的所有依赖...2016-09-20
用Intel HAXM给Android模拟器Emulator加速
Android 模拟器 Emulator 速度真心不给力,, 现在我们来介绍使用 Intel HAXM 技术为 Android 模拟器加速,使模拟器运行度与真机比肩。 周末试玩了一下在Eclipse中使...2016-09-20- 在安卓开发时我碰到一个问题就是需要实现全屏,但又需要我们来判断出用户是使用了全屏或非全屏了,下面我分别找了两段代码,大家可参考。 先来看一个android屏幕全屏实...2016-09-20