Android 利用Application对象存取公共数据
Android系统在运行每一个程序应用的时候,都会创建一个Application对象,用于存储与整个应用相关的公共变量。一个Android应用只会生成一个Application对象,在不用的Activity中获取的Application对象是一样的,所以Application对象是一个单例(SingleTon)。Application对象非常适合用于存储一些与整个应用相关数据,例如应用版本,应用登录账户,数据缓存等。
利用Application对象存储公共数据或数据传递
在android开发中,activity的切换是很频繁的,差不多可以和一个网站中不同网页之间的切换一样。那么不同的activity之间需要存储公共信息(如只有一个当前登录用户)以及数据传递等。下面就是一种利用Application对象存储登录用户信息的方法,可以发现这很方便不同的activity获取登录用户信息。
首先,新建一个java类继承Application类:MyApplication.java
| 代码如下 | 复制代码 |
|
package com.example.applicationtest; import android.app.Application; public class MyApplication extends Application { |
|
在AndroidManifest.xml中指定应用的application对象
| 代码如下 | 复制代码 |
|
<?xml version="1.0" encoding="utf-8"?> <uses-sdk <application <category android:name="android.intent.category.LAUNCHER" /> </manifest> |
|
在activity中使用application对象, 使用Activity的getApplication()方法。
| 代码如下 | 复制代码 |
|
package com.example.applicationtest; import android.os.Bundle; public class MainActivity extends Activity { } |
|
可以发现通过Application对象,在不同的Activity之间可以方便地实现数据共享。这比在每次切换activity时通过Bundle传递数据方便多了。
传统的利用Bundle在activity之前传递数据的方式
假设我们有两个Activity: Activity1和Activity2,Activity1切换到Activity2并传递用户信息。
| 代码如下 | 复制代码 |
|
Activity1.java package com.example.applicationtest; import android.os.Bundle; public class Activity1 extends Activity { @Override } package com.example.applicationtest; import android.os.Bundle; public class Activity2 extends Activity { @Override } |
|
我们可以发现这种传递数据的方式比较繁琐,特别是当Activity众多,切换很频繁的时候。整个应用的的公共数据(如登录信息)在不同的activity之间都一样且都需要用到时,利用Application对象更加简洁和方便
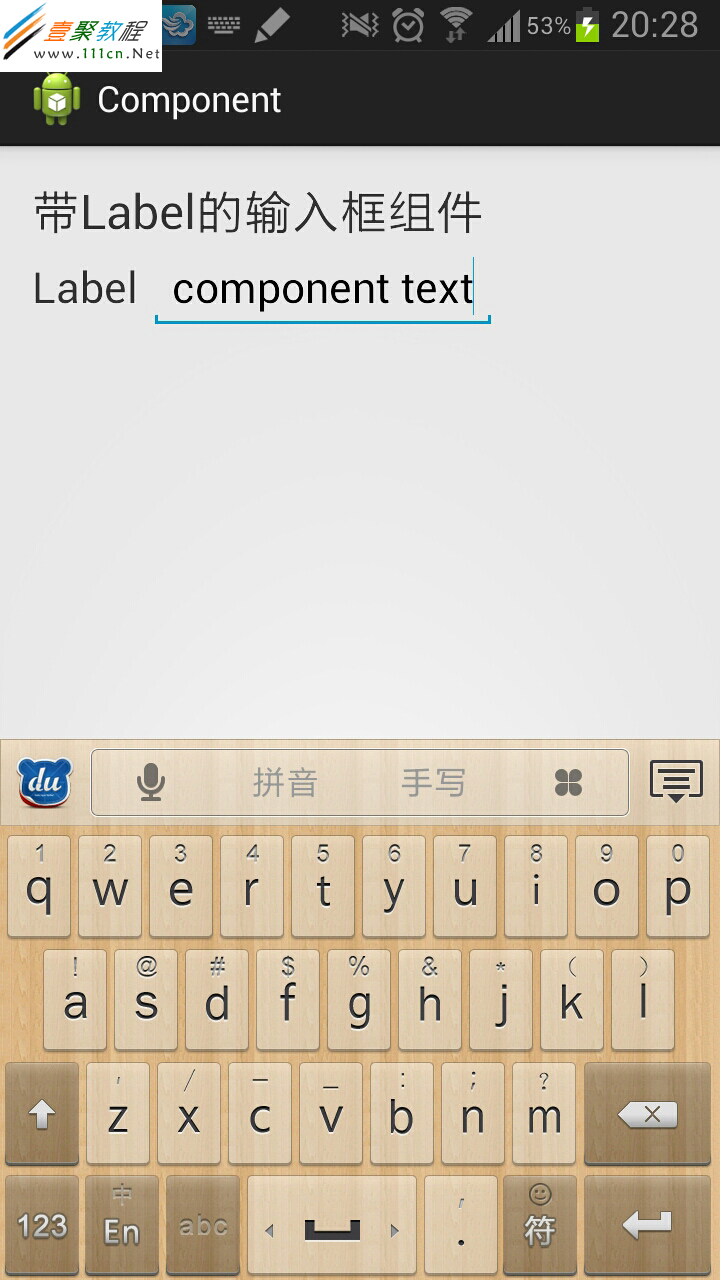
文章给大家介绍Android 组件开发之带label的文本输入框(EditText),有需要了解的朋友可参考,希望此教程对各位有所帮助。在Android开发中,我们的Activity都不免要用到很多的View部件,而对于每一个View我们都要findViewById,设置监听器,获取用户输入的结果等操作。如果我们细心想想,这些琐碎的操作是不是跟这个Activity的处理逻辑没有很大的关系呢?很多的Activity中都要用到一些常见的View组合,能不能把他们抽象出来形成一种可以复用的复合组件呢?
这篇文章就是基于这种想法,开发了一个简单的组件,对于Android新手来说,可以作为一种参考吧。
EditTextWithLabel组件类定义:(EditTextWithLabel.java)
| 代码如下 | 复制代码 |
|
package com.raysmond.component; import android.content.Context; public class EditTextWithLabel extends LinearLayout{ |
|
EditTextWithLabel组件的布局xml(edit_text_with_label.xml)
| 代码如下 | 复制代码 |
|
<?xml version="1.0" encoding="utf-8"?> <EditText |
|
使用EditTextWithLabel复合组件,主Activity的XML (activity_main.xml)
| 代码如下 | 复制代码 |
|
<RelativeLayout xmlns:android="http://schemas.android.com/apk/res/android" <TextView </RelativeLayout> |
|
使用EditTextWithLabel复合组件,主Activity类(MainActivity.java)
| 代码如下 | 复制代码 |
|
package com.raysmond.activity; import com.raysmond.component.EditTextWithLabel; import android.os.Bundle; public class MainActivity extends Activity { |
|
Demo:
方法一:快捷键截图
按动【Power】键+【Home】键,并快速松开,当你松手的瞬间会有“咔嚓”的拍照声出现,这时iphone屏幕上的画面就被捕捉下来,并保存到你的照片库中了。
方法二:Assistive Touch截图
“Assistive Touch”是ios系统自带的一个辅助功能,通过它可以降低对物理部件的损耗,尤其是“Home”键是较容易出现问题的。
开启Assistive Touch功能:
1.打开【设置】菜单,选择【通用】选项。2.继续点击“通用”里的【辅助功能】,将肢体活动版块中的【Assistive Touch】功能打开。
使用Assistive Touch截屏拍照:
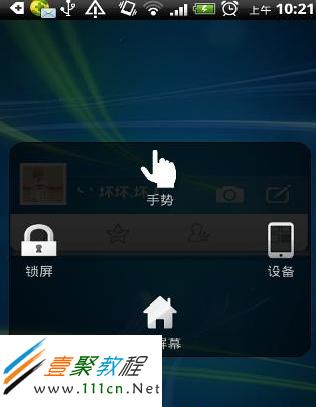
安装好Assistive Touch后,你会在手机的屏幕上看到一个点状的新图案出现。 截屏步骤:1.点击这个【小点】,选择【设备】菜单,然后是【更多】选项。 2.这时在新界面中会有一个【屏幕快照】图标,点击后就能实现屏幕截图的效果。3. Assistive Touch的操作界面和屏幕界面是同时存在的,但截图效果中不会出现截图程序本身的操作画面。
方法三:iTools工具截图
1.将iphone5连接电脑,开启iTools工具。
2.点击侧边栏中的【桌面管理】,在右侧显示区的顶部会有个【实时桌面】功能,点击它。
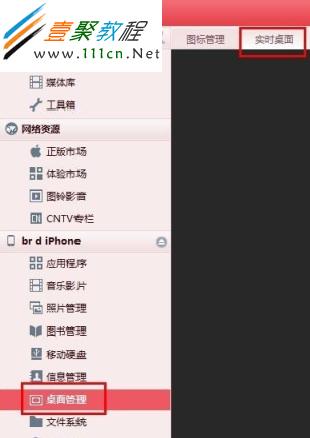
3. 这时显示区的右侧中间位置会有一个“照相机”的图标,点击后就会将手机屏幕上的画面保存下来。

<?xml version="1.0" encoding="utf-8" ?>
<LinearLayout xmlns:android="http://schemas.android.com/apk/res/android"
    android:orientation="vertical"
    android:layout_width="fill_parent"
    android:layout_height="fill_parent">
    <LinearLayout>   <!-- 上面部分 -->
    </LinearLayout>
    <LinearLayout>   <!-- 下面部分 -->
    </LinearLayout>
 </LinearLayout>
 <?xml version="1.0" encoding="utf-8"?>
 <LinearLayout xmlns:android="http://schemas.android.com/apk/res/android"
     android:orientation="vertical"
     android:layout_width="fill_parent"
     android:layout_height="fill_parent">
     <LinearLayout android:orientation="horizontal"
         android:layout_width="fill_parent"
         android:layout_height="fill_parent"
         android:layout_weight="1">
            <TextView
                 android:text="col1"
                 android:gravity="center_horizontal"
                 android:background="#999999"
                 android:layout_width="wrap_content"
                 android:layout_height="fill_parent"
                 android:layout_weight="1" />
            <TextView
                 android:text="col2"
                 android:gravity="center_horizontal"
                 android:background="#290fc0"
                 android:layout_width="wrap_content"
                 android:layout_height="fill_parent"
                 android:layout_weight="1" />
            <TextView
                 android:text="col3"
                 android:gravity="center_horizontal"
                 android:background="#999999"
                 android:layout_width="wrap_content"
                 android:layout_height="fill_parent"
                 android:layout_weight="1" />
            <TextView
                 android:text="col4"
                 android:gravity="center_horizontal"
                 android:background="#290fc0"
                 android:layout_width="wrap_content"
                 android:layout_height="fill_parent"
                 android:layout_weight="1" />
     </LinearLayout>
     <LinearLayout
         android:orientation="vertical"
         android:layout_width="fill_parent"
         android:layout_height="fill_parent"
         android:layout_weight="1">
         <TextView
              android:text="row_one"
              android:textSize="15sp"
              android:background="#290fc0"
              android:layout_width="fill_parent"
              android:layout_height="wrap_content"
              android:layout_weight="1" />
         <TextView
              android:text="row_two"
              android:textSize="15sp"
              android:background="#999999"
              android:layout_width="fill_parent"
              android:layout_height="wrap_content"
              android:layout_weight="1" />
         <TextView
              android:text="row_three"
              android:textSize="15sp"
              android:background="#290fc0"
              android:layout_width="fill_parent"
              android:layout_height="wrap_content"
              android:layout_weight="1" />
          <TextView
              android:text="row_four"
              android:textSize="15sp"
              android:background="#999999"
              android:layout_width="fill_parent"
              android:layout_height="wrap_content"
              android:layout_weight="1" />
     </LinearLayout>
</LinearLayout>

1、使用TelephonyManager提供的方法,核心代码:
| 代码如下 | 复制代码 |
| TelephonyManager tm = (TelephonyManager) this.getSystemService(TELEPHONY_SERVICE); String imei = tm.getDeviceId(); //取出IMEI Log.d(TAG, "IMEI:"+imei); String tel = tm.getLine1Number(); //取出MSISDN,很可能为空 Log.d(TAG, "MSISDN:"+tel); String iccid =tm.getSimSerialNumber(); //取出ICCID Log.d(TAG, "ICCID:"+iccid); String imsi =tm.getSubscriberId(); //取出IMSI Log.d(TAG, "IMSI:"+imsi); |
|
2、加入权限
在manifest.xml文件中要添加 <uses-permission android:name="android.permission.READ_PHONE_STATE" />
手机型号 Build.MODEL
| 代码如下 | 复制代码 |
|
String MODEL The end-user-visible name for the end product. |
|
sdk版本 Build.VERSION.SDK
| 代码如下 | 复制代码 |
|
String SDK This constant is deprecated. Use SDK_INT to easily get this as an integer. |
|
frimware版本号(系统版本号) Build.VERSION.RELEASE
| 代码如下 | 复制代码 |
|
String RELEASE The user-visible version string. |
|
获取手机的其他信息:
| 代码如下 | 复制代码 |
|
private void getPhoneStatus(){ TelephonyManager phoneMgr=(TelephonyManager)this.getSystemService(Context.TELEPHONY_SERVICE); |
|
Build中包括 硬件厂商,硬件编号,序列号等很多信息。调用方法也很简单,和上面类似的。
相关文章
- 这篇文章主要介绍了java8如何用Stream查List对象某属性是否有重复的操作,具有很好的参考价值,希望对大家有所帮助。如有错误或未考虑完全的地方,望不吝赐教...2021-09-11
- 下面我们来看一篇关于Android子控件超出父控件的范围显示出来方法,希望这篇文章能够帮助到各位朋友,有碰到此问题的朋友可以进来看看哦。 <RelativeLayout xmlns:an...2016-10-02
- 这篇文章主要介绍了R语言删除指定变量或对象的操作方法,具有很好的参考价值,希望对大家有所帮助。一起跟随小编过来看看吧...2021-05-06
- 这篇文章主要介绍了JavaScript预解析,对象的的相关资料,小编觉得这篇文章写的还不错,需要的朋友可以参考下,希望能够给你带来帮助...2021-11-10
Android开发中findViewById()函数用法与简化
findViewById方法在android开发中是获取页面控件的值了,有没有发现我们一个页面控件多了会反复研究写findViewById呢,下面我们一起来看它的简化方法。 Android中Fin...2016-09-20- 如果我们的项目需要做来电及短信的功能,那么我们就得在Android模拟器开发这些功能,本来就来告诉我们如何在Android模拟器上模拟来电及来短信的功能。 在Android模拟...2016-09-20
- 夜神android模拟器如何设置代理呢?对于这个问题其实操作起来是非常的简单,下面小编来为各位详细介绍夜神android模拟器设置代理的方法,希望例子能够帮助到各位。 app...2016-09-20
如何在Spring WebFlux的任何地方获取Request对象
这篇文章主要介绍了如何在Spring WebFlux的任何地方获取Request对象,帮助大家更好的理解和使用springboot框架,感兴趣的朋友可以了解下...2021-01-26- 为了增强android应用的用户体验,我们可以在一些Button按钮上自定义动态的设置一些样式,比如交互时改变字体、颜色、背景图等。 今天来看一个通过重写Button来动态实...2016-09-20
- 如果我们要在Android应用APP中加载html5页面,我们可以使用WebView,本文我们分享两个WebView加载html5页面实例应用。 实例一:WebView加载html5实现炫酷引导页面大多...2016-09-20
- 深入理解Android中View和ViewGroup从组成架构上看,似乎ViewGroup在View之上,View需要继承ViewGroup,但实际上不是这样的。View是基类,ViewGroup是它的子类。本教程我们深...2016-09-20
- 下面我们来看一篇关于Android自定义WebView网络视频播放控件开发例子,这个文章写得非常的不错下面给各位共享一下吧。 因为业务需要,以下代码均以Youtube网站在线视...2016-10-02
牛叉的Jquery――Jquery与DOM对象的互相转换及DOM的三种操作
只有jQuery对象才能调用jQuery类库的各种函数,同样有些dom对象的属性和方法在jQuery上也是无法调用的,不过基本上jQuery类库提供的函数包含了所有的dom操作。这就需要我们知道如何将jQuery对象和DOM的相互转换的方法。1...2015-10-30- java开发的Android应用,性能一直是一个大问题,,或许是Java语言本身比较消耗内存。本文我们来谈谈Android 性能优化之MemoryFile文件读写。 Android匿名共享内存对外A...2016-09-20
- TextView默认是横着显示了,今天我们一起来看看Android设置TextView竖着显示如何来实现吧,今天我们就一起来看看操作细节,具体的如下所示。 在开发Android程序的时候,...2016-10-02
android.os.BinderProxy cannot be cast to com解决办法
本文章来给大家介绍关于android.os.BinderProxy cannot be cast to com解决办法,希望此文章对各位有帮助呀。 Android在绑定服务的时候出现java.lang.ClassCastExc...2016-09-20- 这篇文章主要介绍了Android 实现钉钉自动打卡功能的步骤,帮助大家更好的理解和学习使用Android,感兴趣的朋友可以了解下...2021-03-15
- 下面我们来看一篇关于Android 开发之布局细节对比:RTL模式 ,希望这篇文章对各位同学会带来帮助,具体的细节如下介绍。 前言 讲真,好久没写博客了,2016都过了一半了,赶紧...2016-10-02
- js调试中经常会碰到输出的内容是对象而无法打印的时候,光靠alert只能打印出object标示,却不能打印出来里面的内容,甚是不方便,于是各方面整理总结了如下一个函数,能够将数组或者对象这类的结果一一打印出来,具体代码如下: fu...2015-10-21
- 这篇文章主要介绍了javascript self对象使用详解的相关资料,需要的朋友可以参考下...2016-10-20